Jira + Pachca integration
How to integrate Jira with Pachca

Webhook setup, payload format and integration examples
Here's how to build a chatbot that pushes Jira notifications to a chat using webhooks or the API. All of it right inside Pachca.
How the integration works
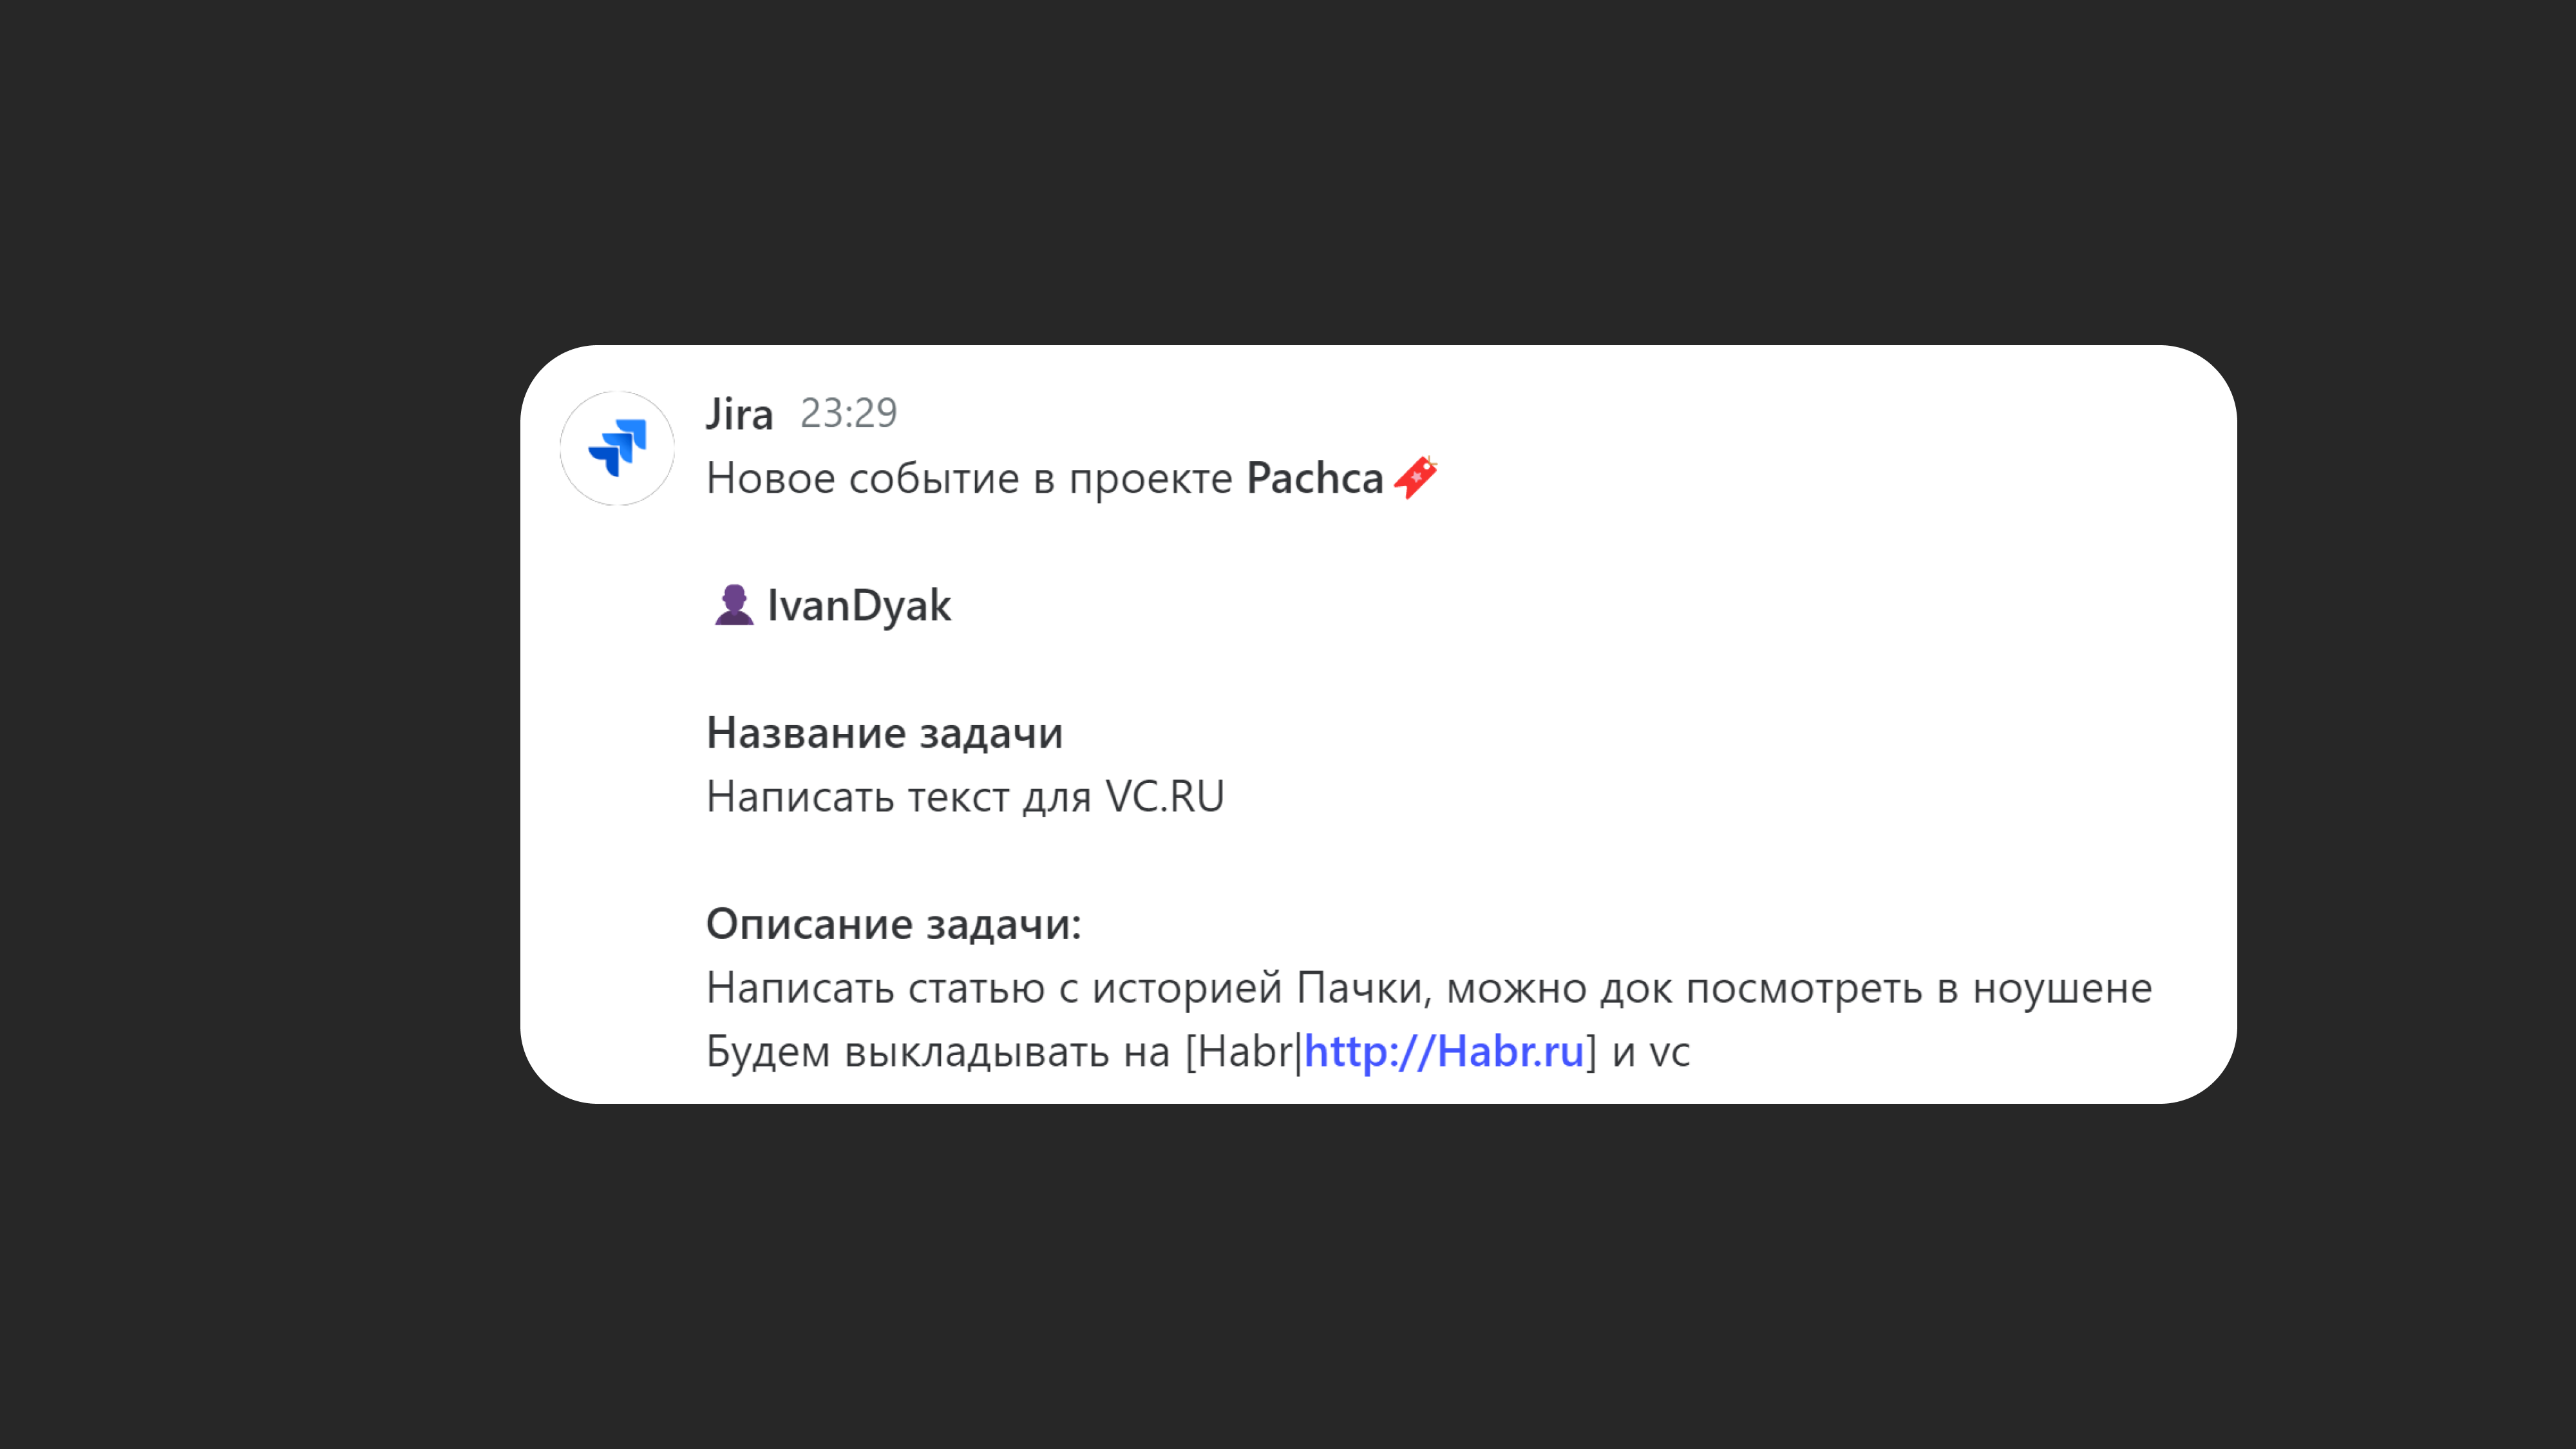
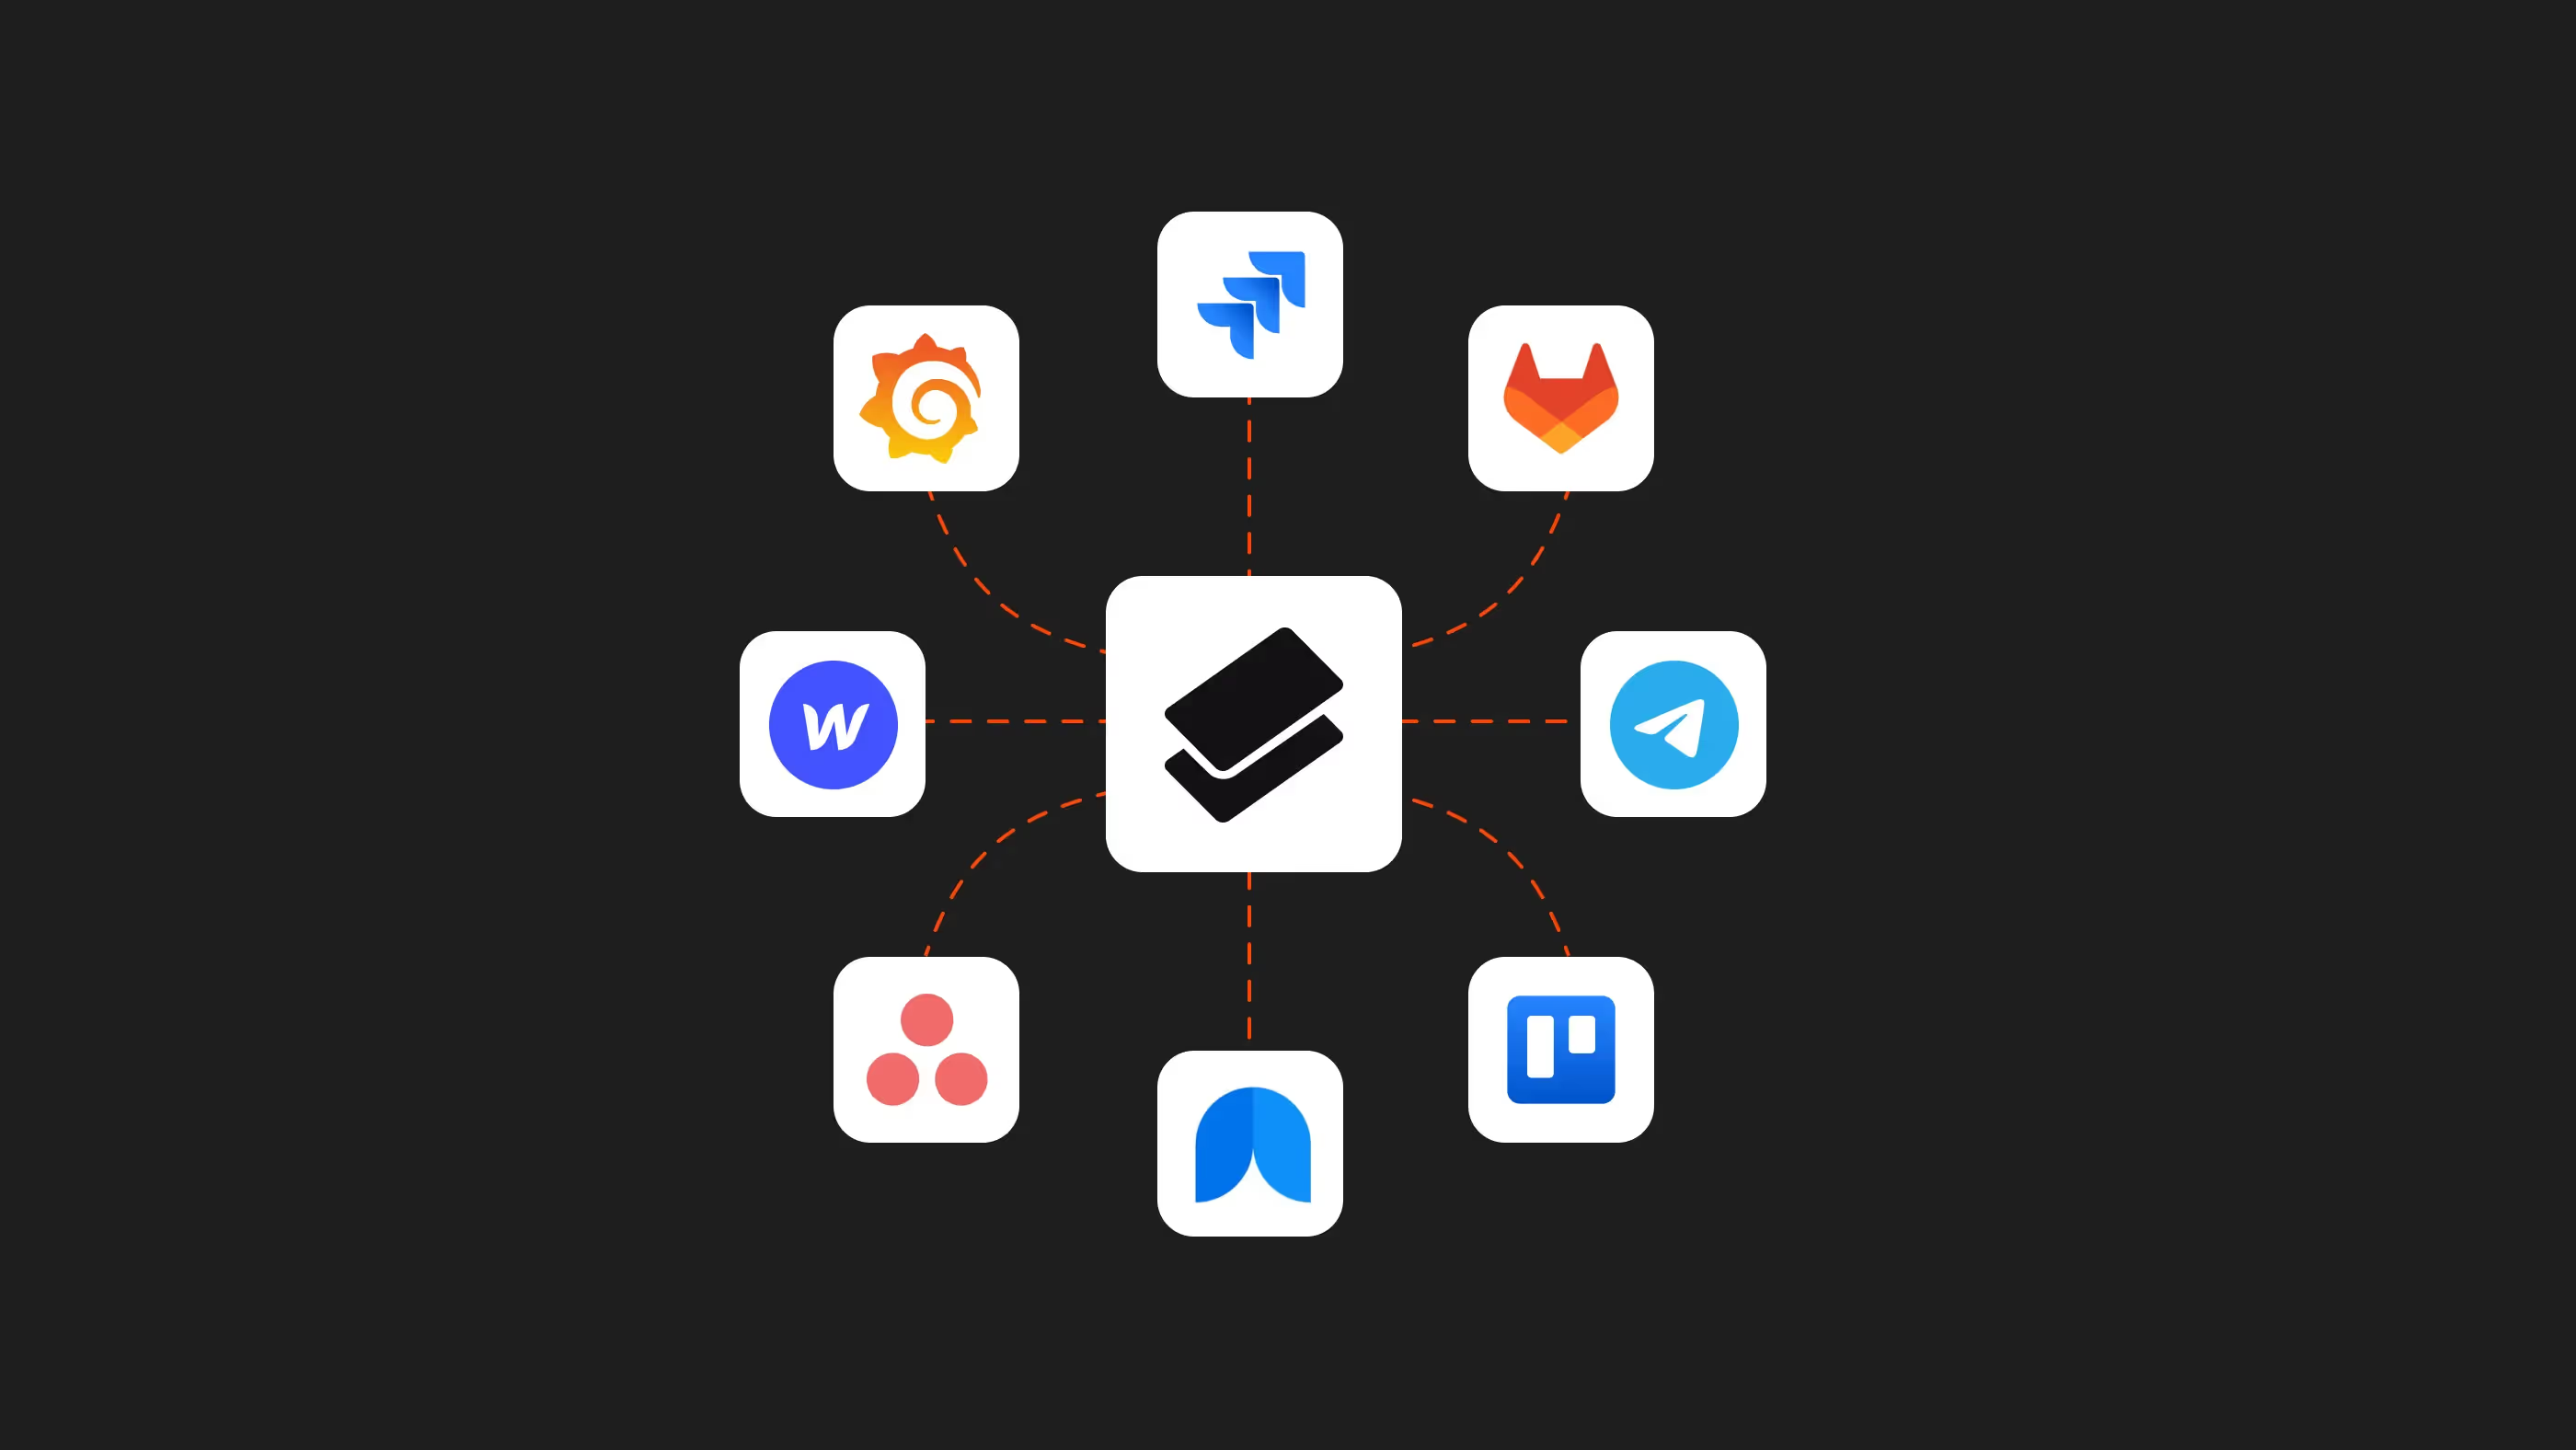
The Pachca×Jira integration brings events from your Jira straight into Pachca chats. Chat members can respond to project issues quickly, discuss them in threads and add reactions.
Here's how it works: you create a chatbot in Pachca that pulls information from the Jira account you choose. Then you add the bot to any chat, and it posts messages there about events in that project.
You can create as many bots as you like and add them to any number of chats.
Integration options
Webhook or API
Connecting Jira to Pachca with a webhook works well for simple use cases, like getting notified about new issues in a chat. It's easy to set up right from the interface, and any employee can do it.
Connecting Jira to Pachca through the API is the way to go for more complex integrations with custom use cases and bot interactions. For example, creating a new issue right from a chat through the bot, or pulling up all of today's issues. With this setup, you write the program the bot runs on yourself and connect it to Pachca and Jira using special tokens. If you'd rather not write code from scratch, you can build similar flows in a visual automation builder. We cover this in "What is n8n".
Connecting via webhook
Getting Jira notifications in Pachca
1. Create an integration in Pachca
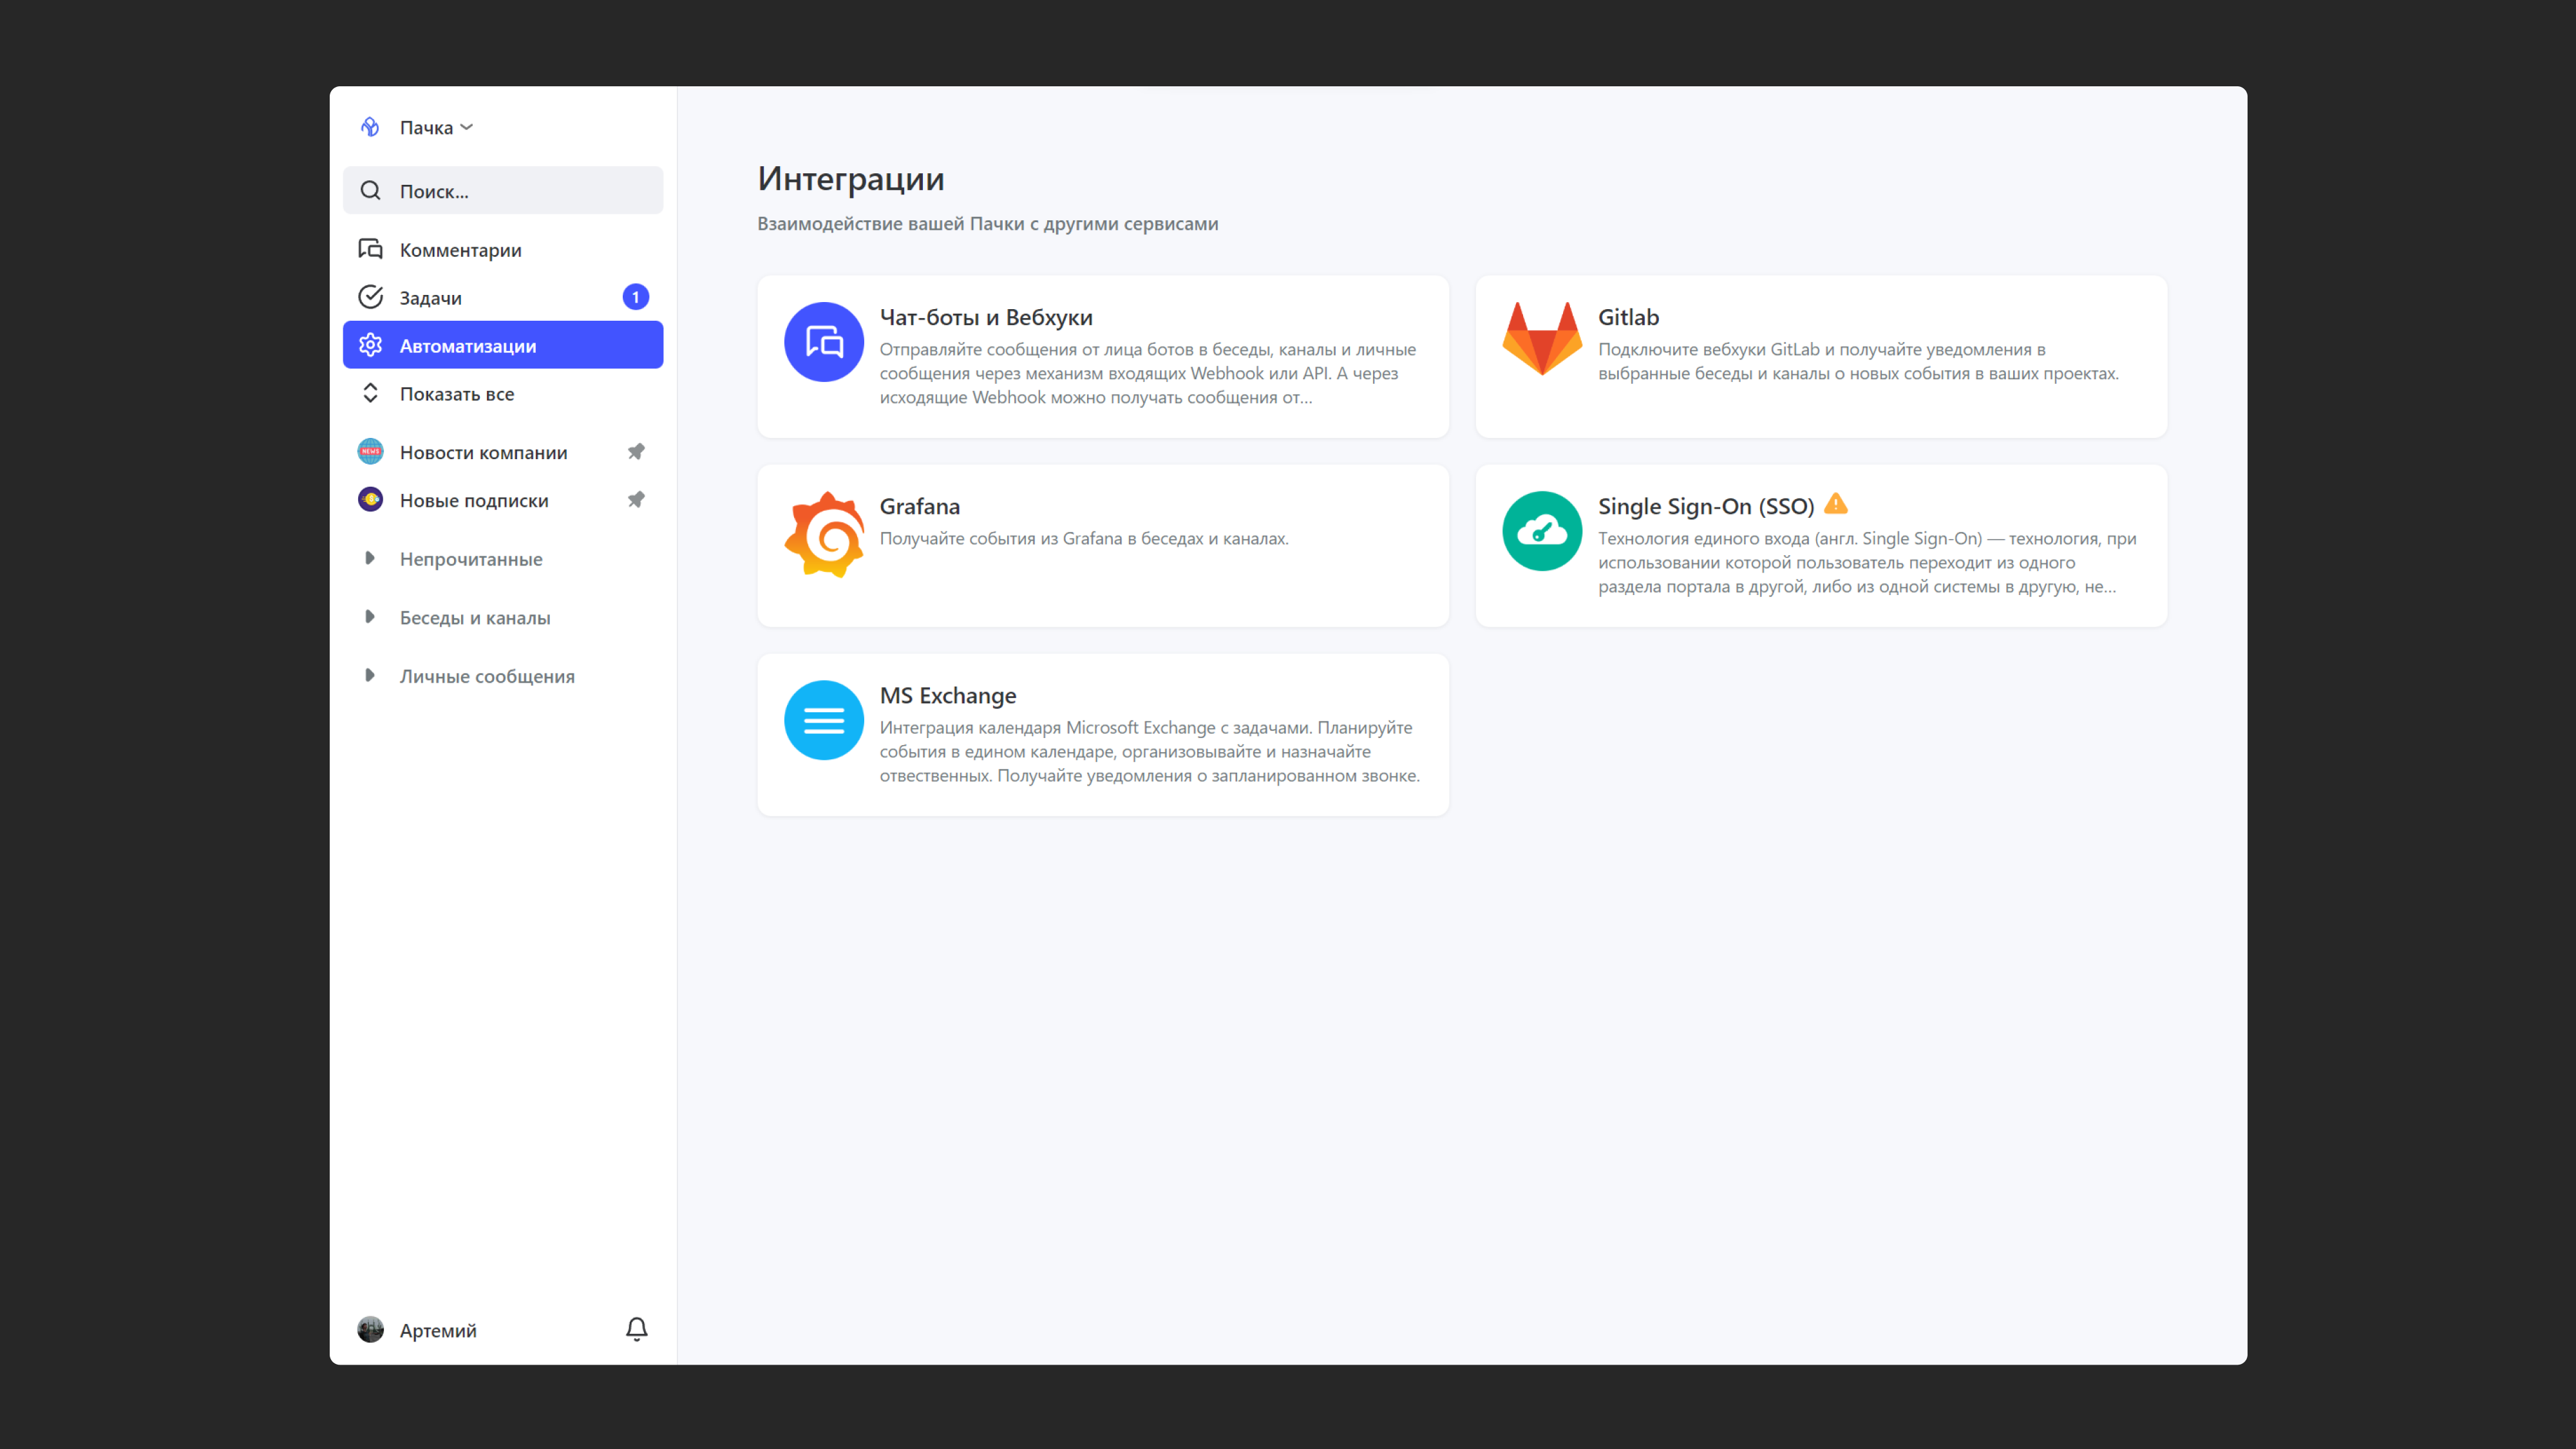
- Go to "Automations" → "Integrations"
- Select "Chatbots and webhooks"
- Click "+"
- Name your bot and add the logo of the service you're connecting.
- Choose who can configure the bot. They'll see it in their Integrations section and can change its settings.
- Choose who can add your bot to chats. These users can add the bot to chats and receive its messages
2. Create a webhook in Jira
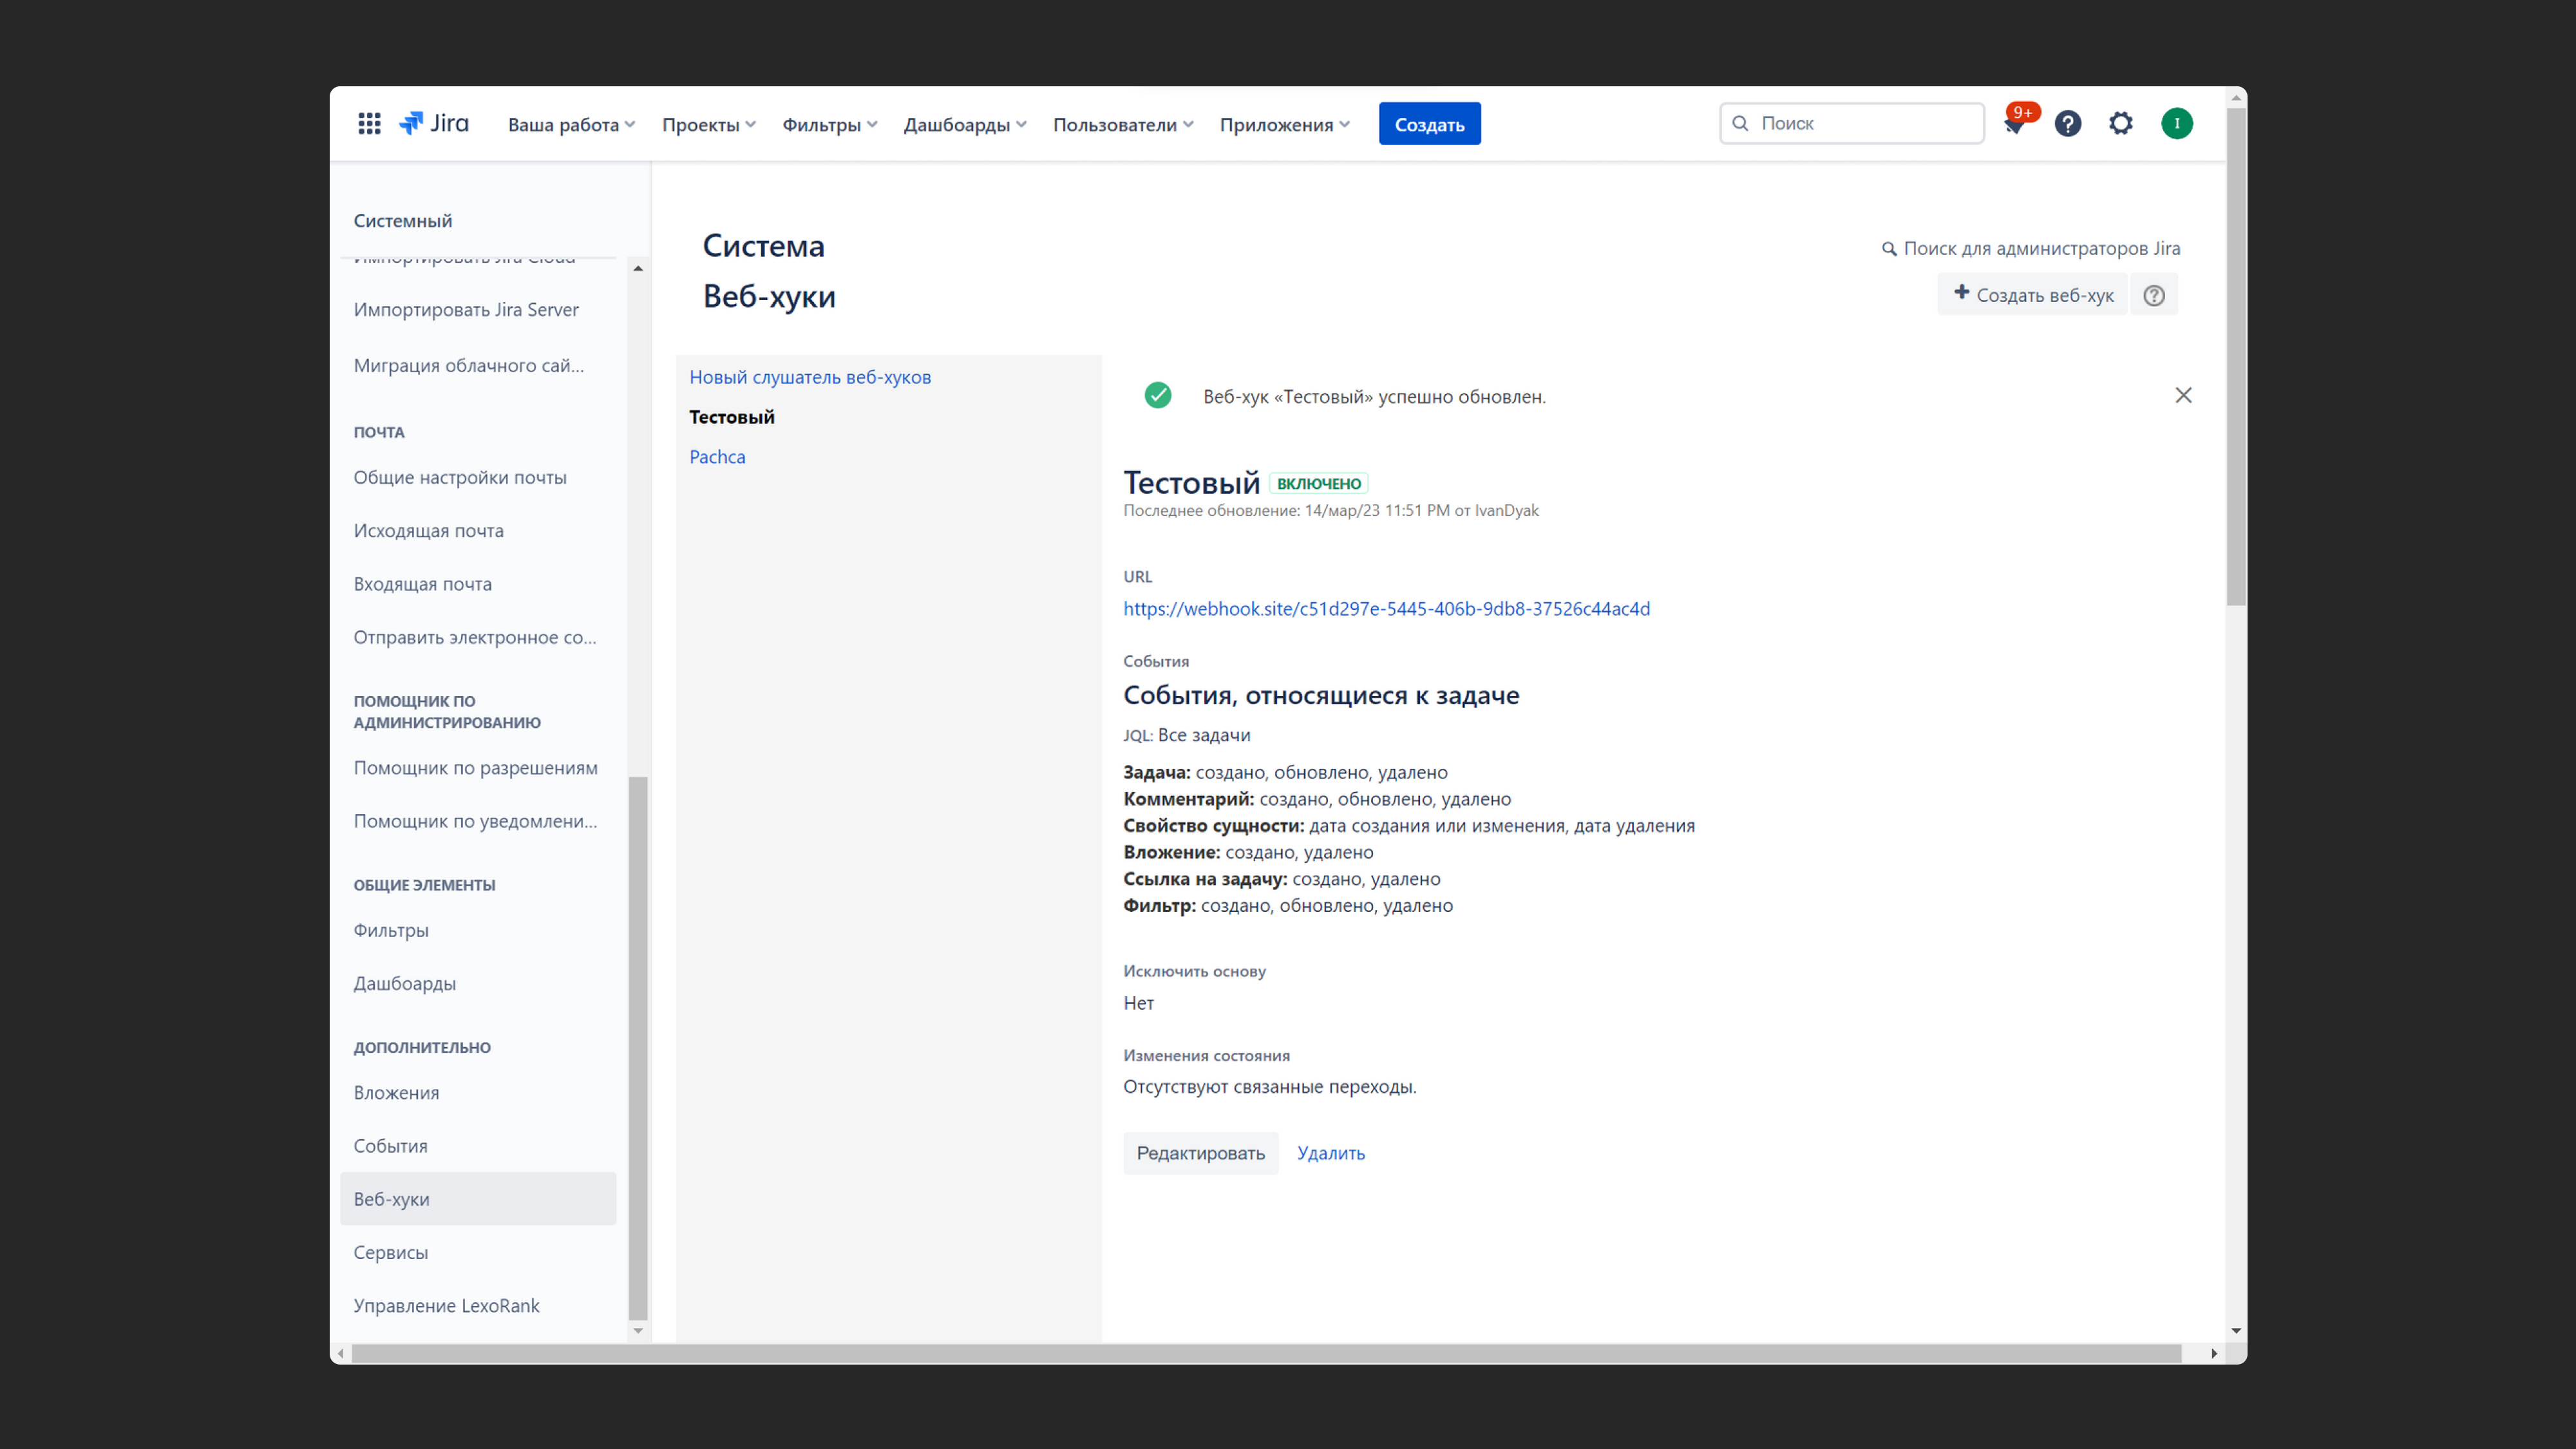
- Log in as a user with the "Administer Jira" global permission
- Click ⚙️ (top right) > System, then under Advanced select WebHooks
- Click "Create a WebHook"
3. Configure the webhook in Jira
- In the form that opens, enter a name and description for the webhook. These fields make it easy to find the integration in Jira later if you want to change it
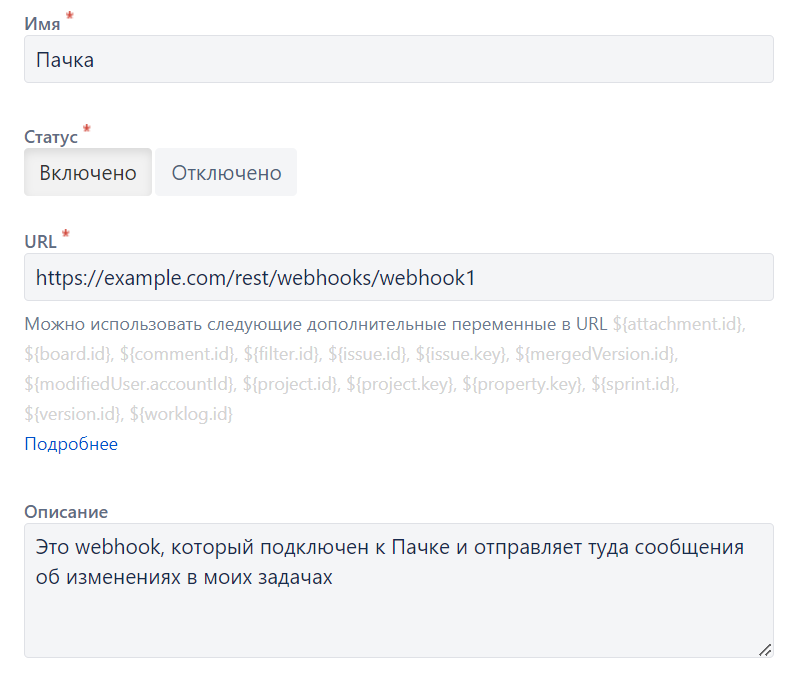
- In the URL field, paste the webhook URL you copied when you created the integration in Pachca (see step 1). This is the integration's address in Pachca, and Jira will send all the data there.
- Select the events that trigger the integration. For example, if you select "Issue" → "created", Jira will send a notification to Pachca every time a new issue is created. There are lots of events to choose from, and each one has its own checkbox
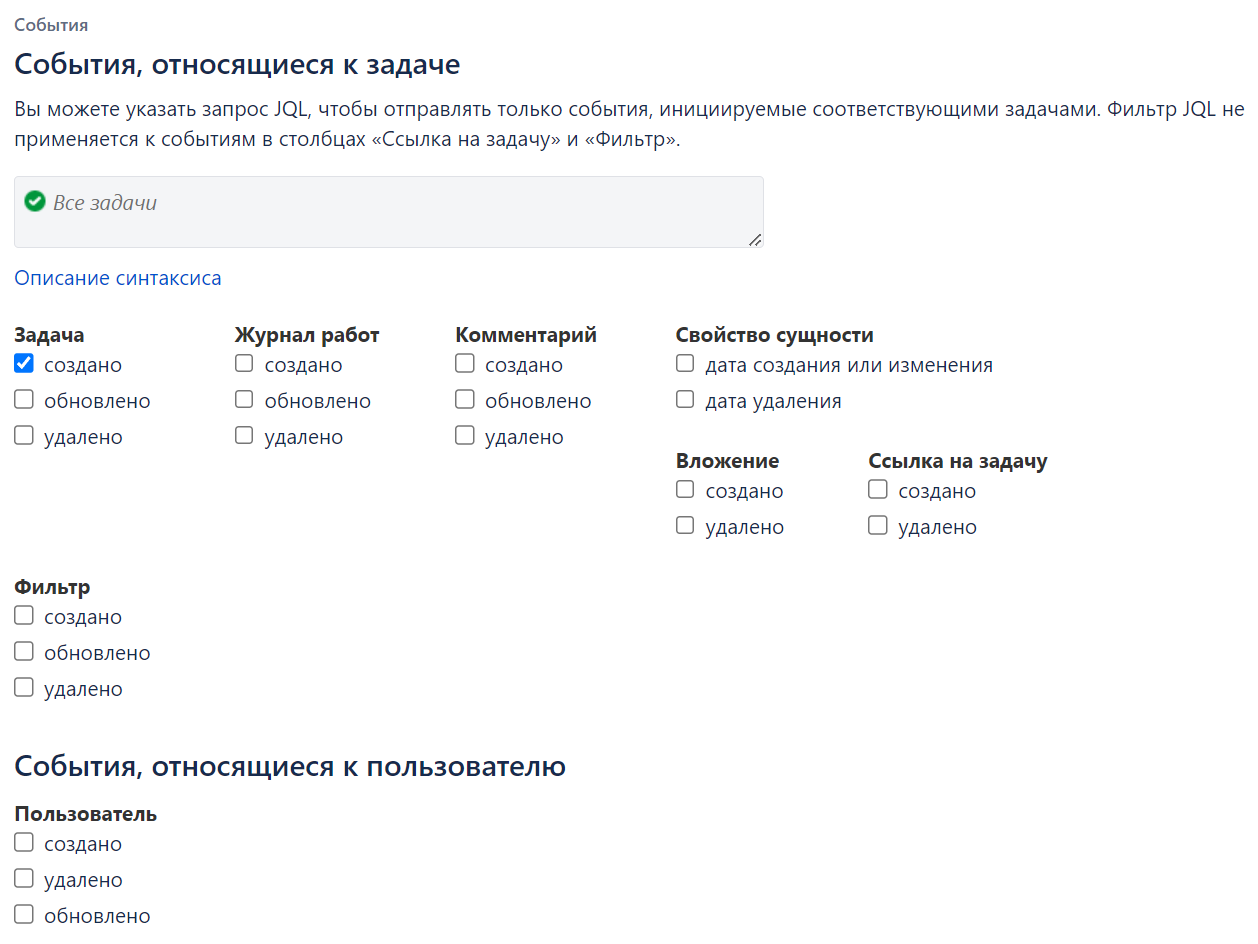
- Once you've selected all the events, make sure the "Exclude body" checkbox is cleared. If it's checked, Jira will send empty messages to Pachca

- Click "Create"
4. Configure the integration in Pachca
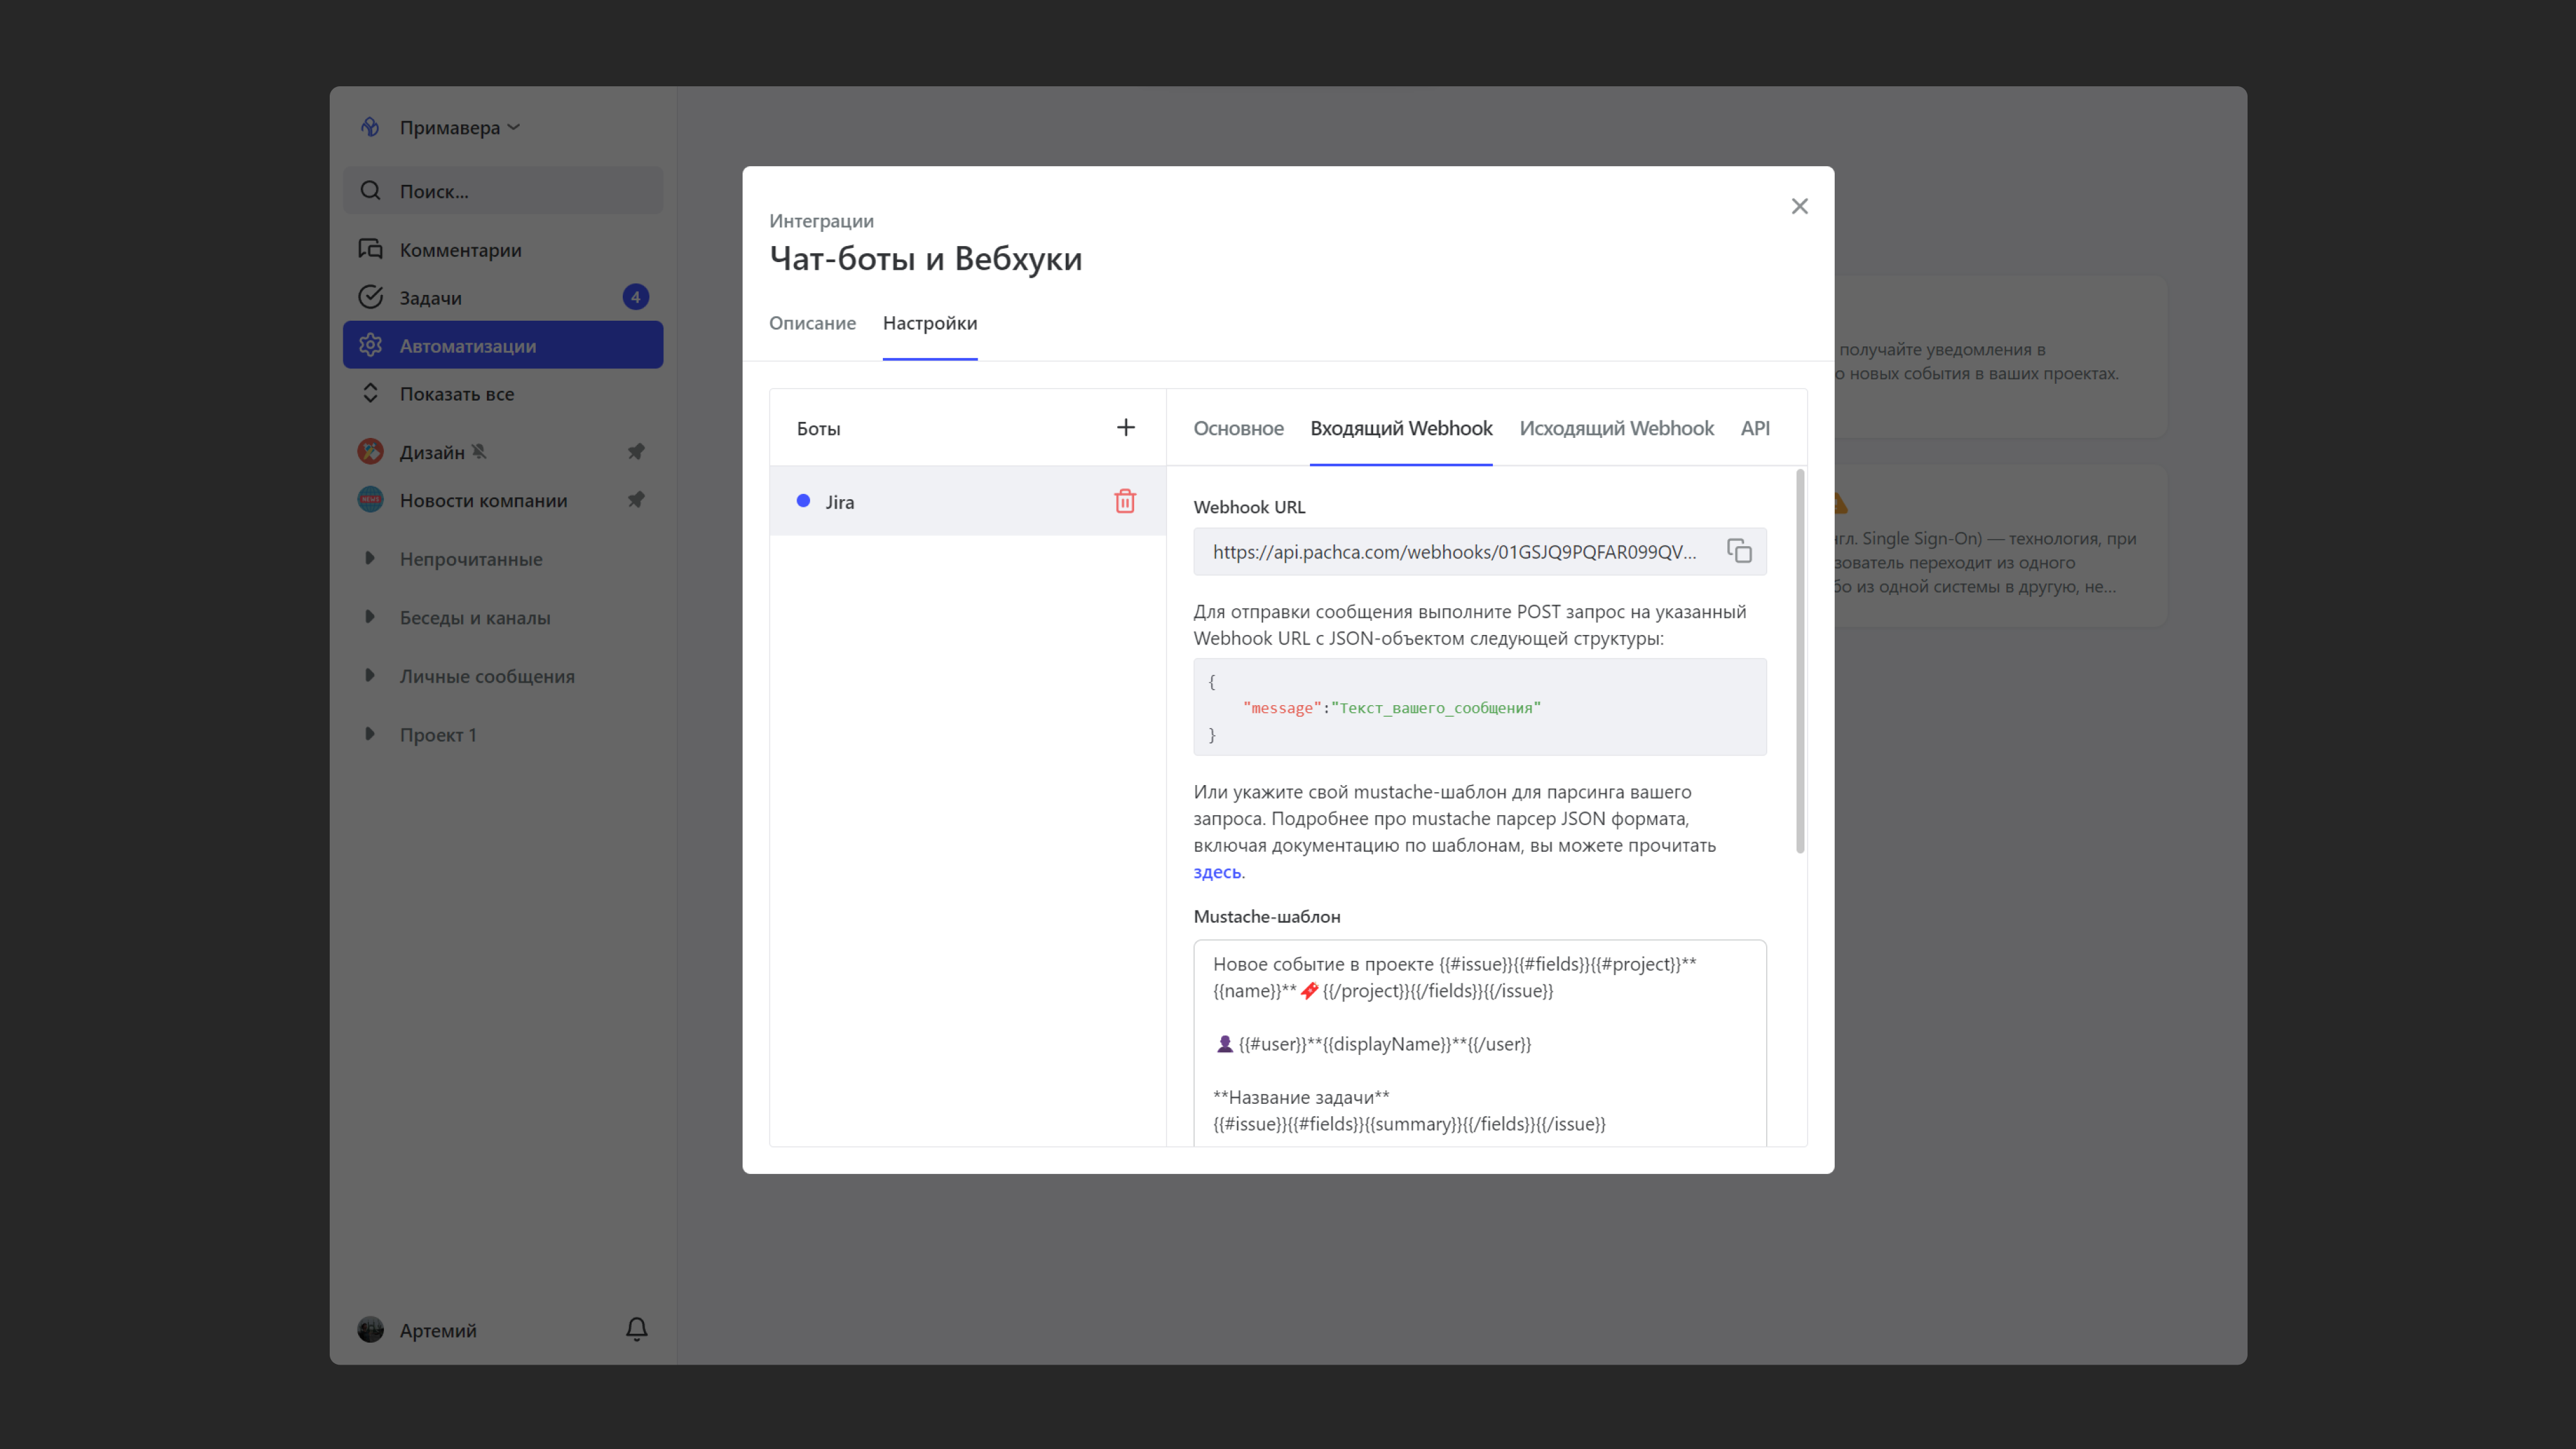
To get the right information into Pachca, you need to set up a template. In the chatbot settings, you specify which of the fields Jira sends should be posted to the chat. You do this by filling in the template. Pachca supports two template formats: Mustache and Liquid. To fill it in:
- Open the Pachca integration you created in step 1
- Go to the "Incoming webhook" section
- Find the "Template" section
You can add fixed text as well as the field values Jira sends. Here's what a filled-in template looks like, along with the bot message it produces.
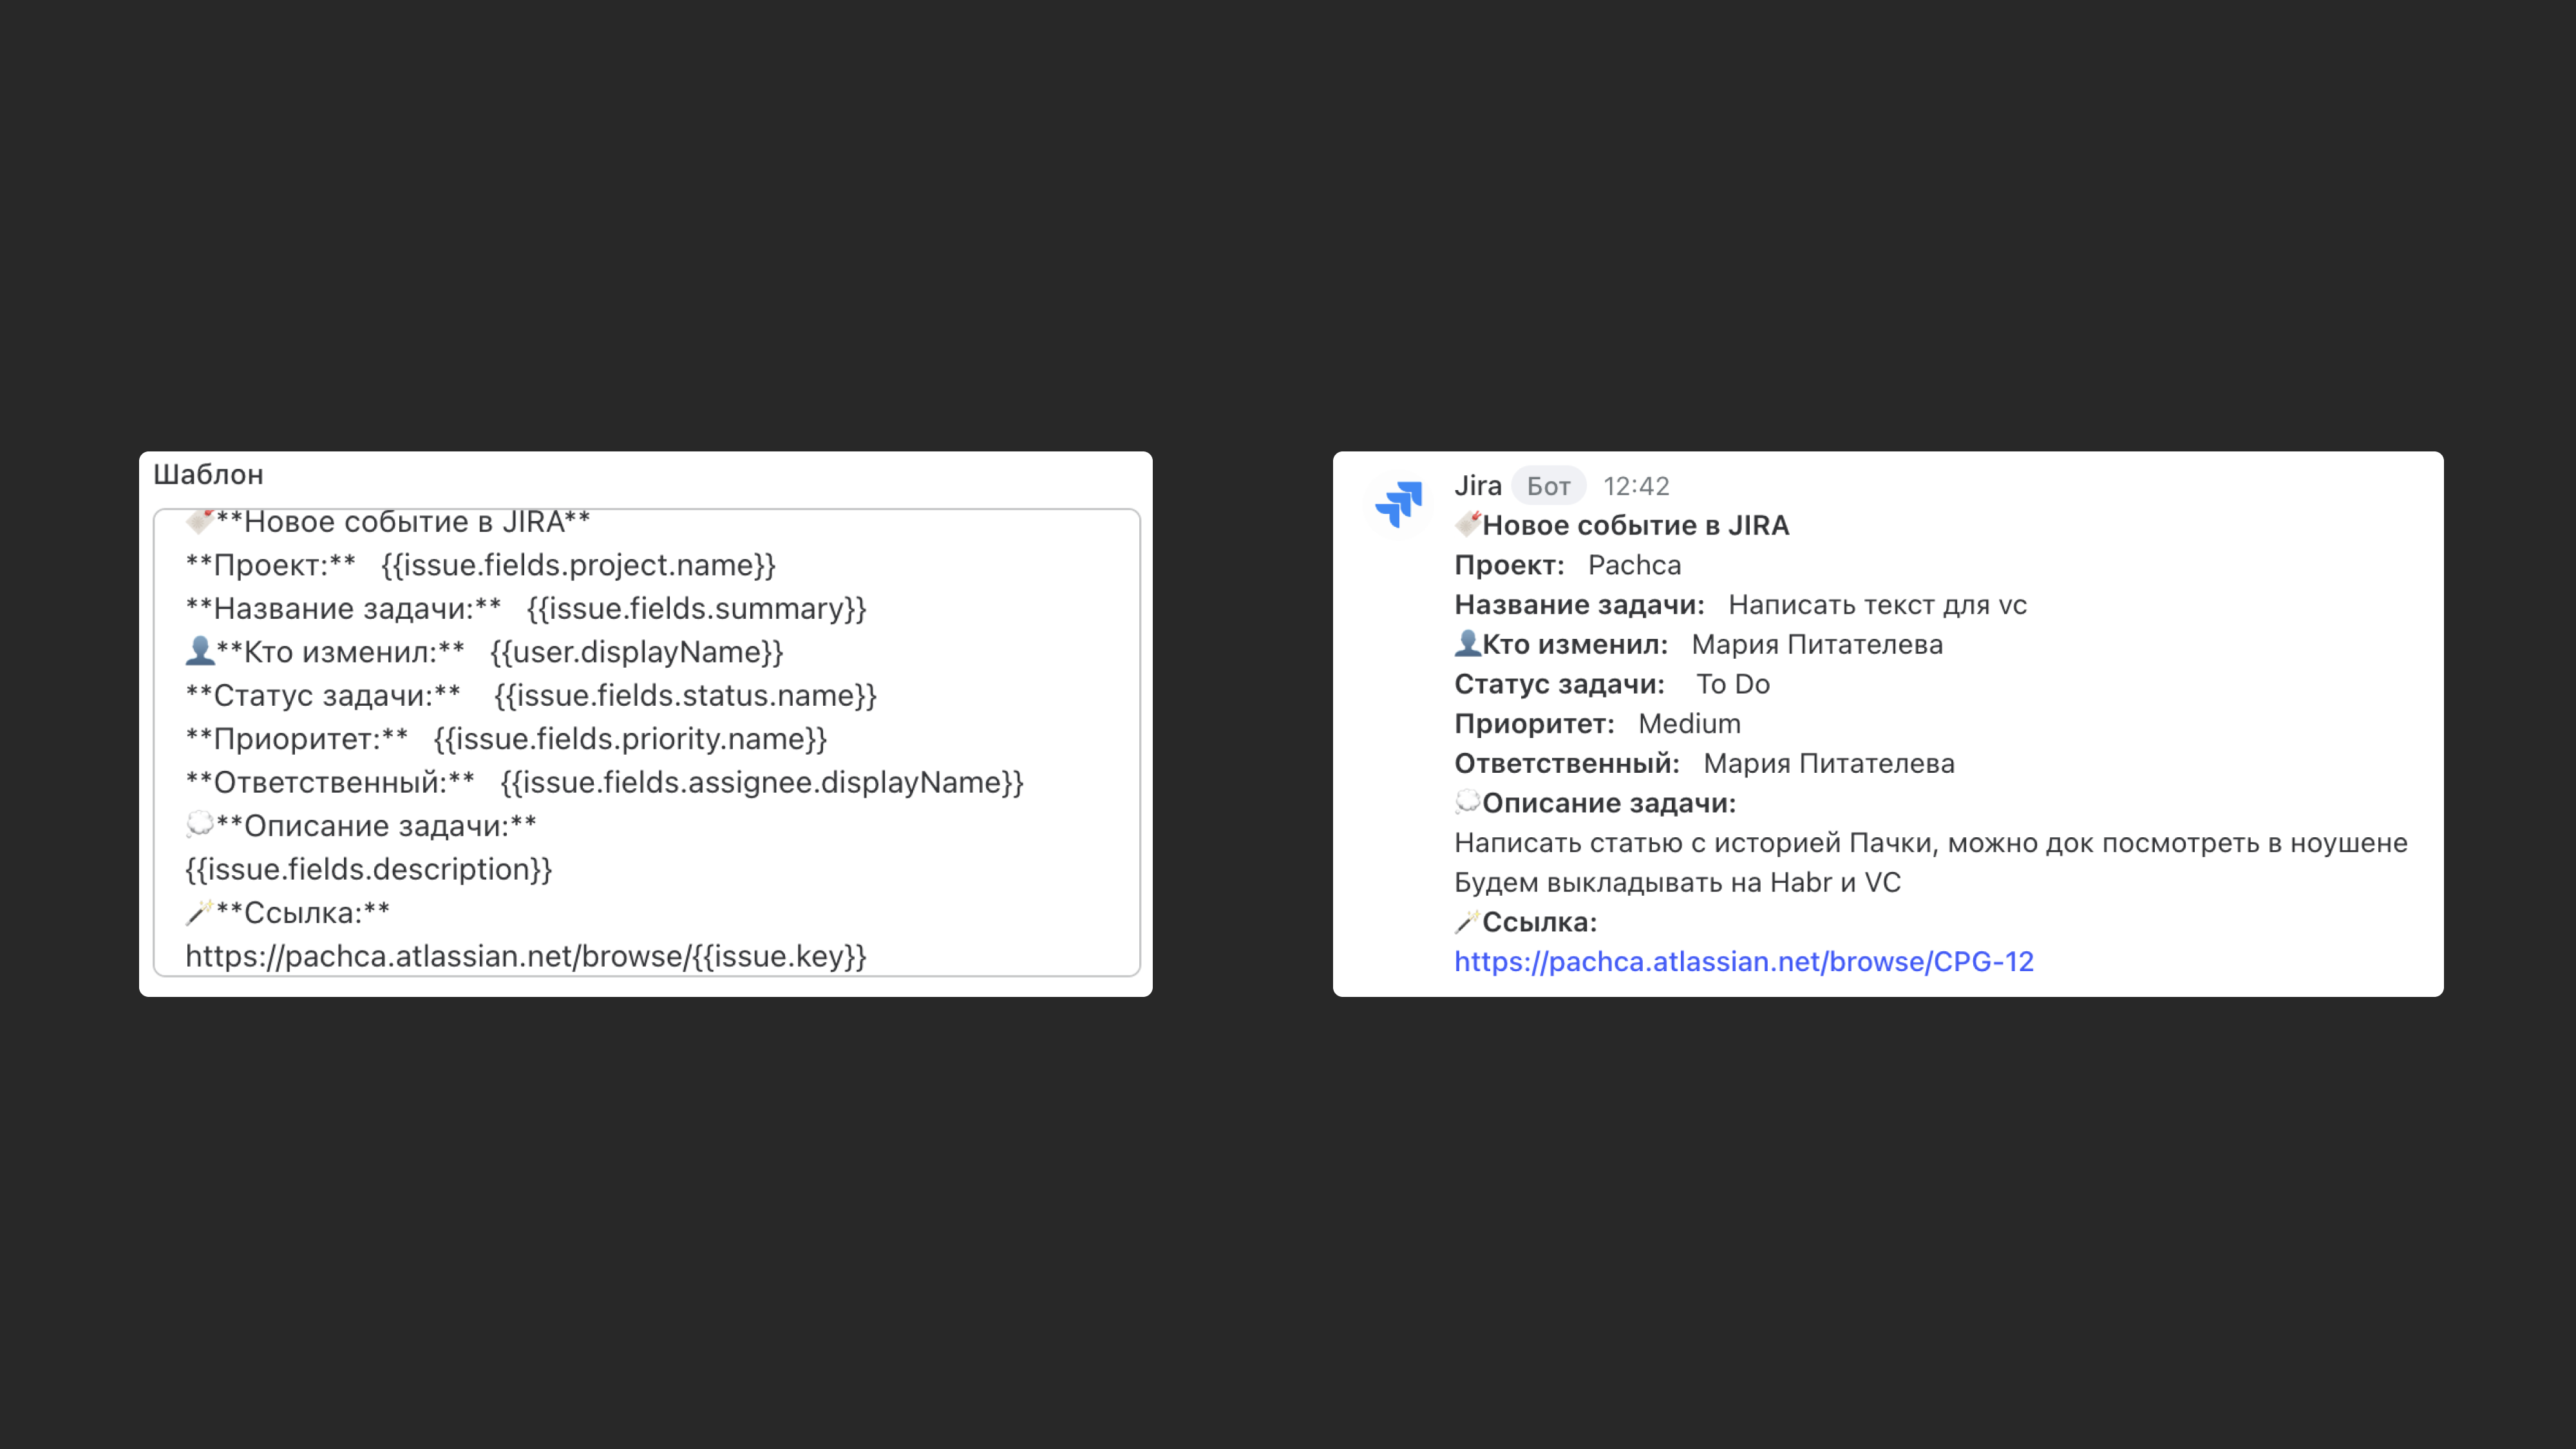
Below is Mustache code that pulls in the key details about issues. Just copy and paste it:
🔖**New event in JIRA**👇
**Project:**  `{{#issue}}{{#fields}}{{#project}}{{name}}{{/project}}{{/fields}}{{/issue}}`
**Issue title:**  `{{#issue}}{{#fields}}{{summary}}{{/fields}}{{/issue}}`
👤**Changed by:**  `{{#user}}{{displayName}}{{/user}}`
**Issue status:**  `{{#issue}}{{#fields}}{{#status}}{{name}}{{/status}}{{/fields}}{{/issue}}`
**Priority:**  `{{#issue}}{{#fields}}{{#priority}}{{name}}{{/priority}}{{/fields}}{{/issue}}`
**Assignee:** `{{#issue}}{{#fields}}{{#assignee}}{{displayName}}{{/assignee}}{{/fields}}{{/issue}}`
💭**Issue description:**  {{#issue}}{{#fields}}{{description}}{{/fields}}{{/issue}}
🪄**Link:**  {{#issue}}{{#fields}}[https://setters333.atlassian.net/browse/{{key}}{{/fields}}{{/issue}}
If you need an integration for a more specific use case, you can fill in the template yourself. To learn where to find field names and how to use them in a template, read our guide.
5. Add the integration to a chat
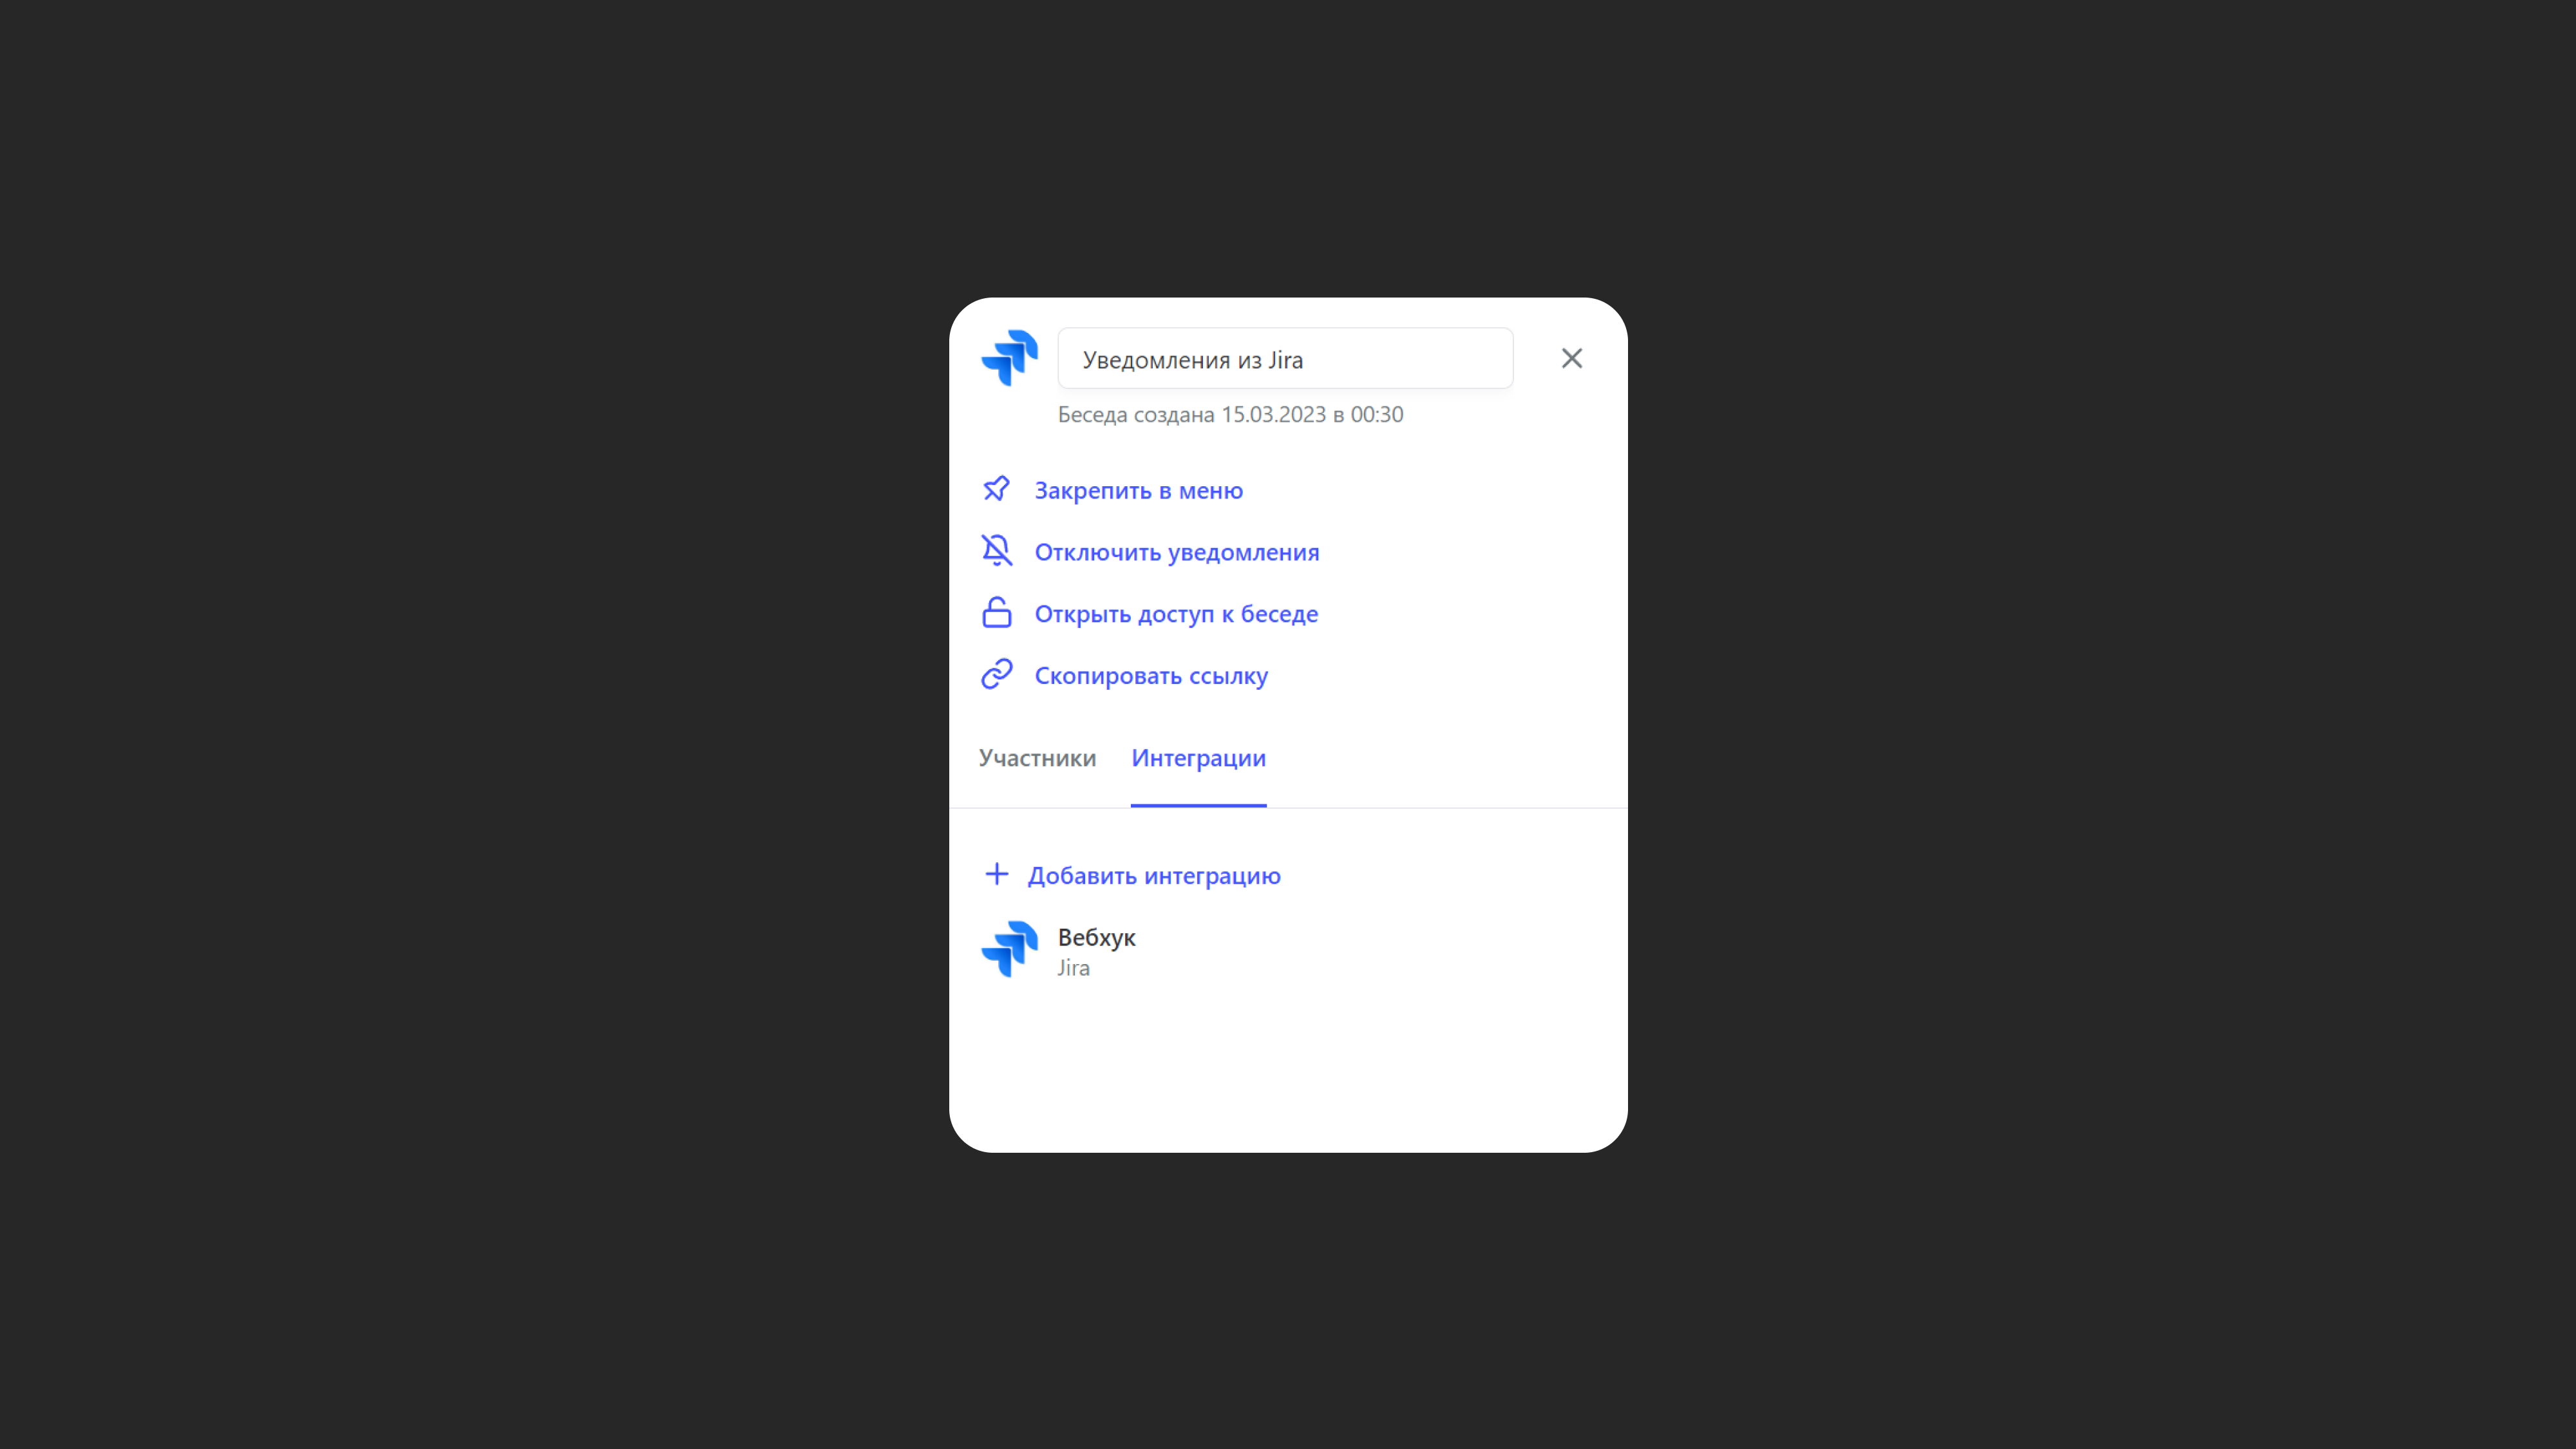
- Open the chat settings (the gray icon in the top right corner of the chat)
- Select "Integrations"
- Add the integration you created
Connecting via API
With an API connection, you write the code the bot runs on yourself and connect it to Pachca and Jira using access tokens.
1. Get the bot's access token in Pachca
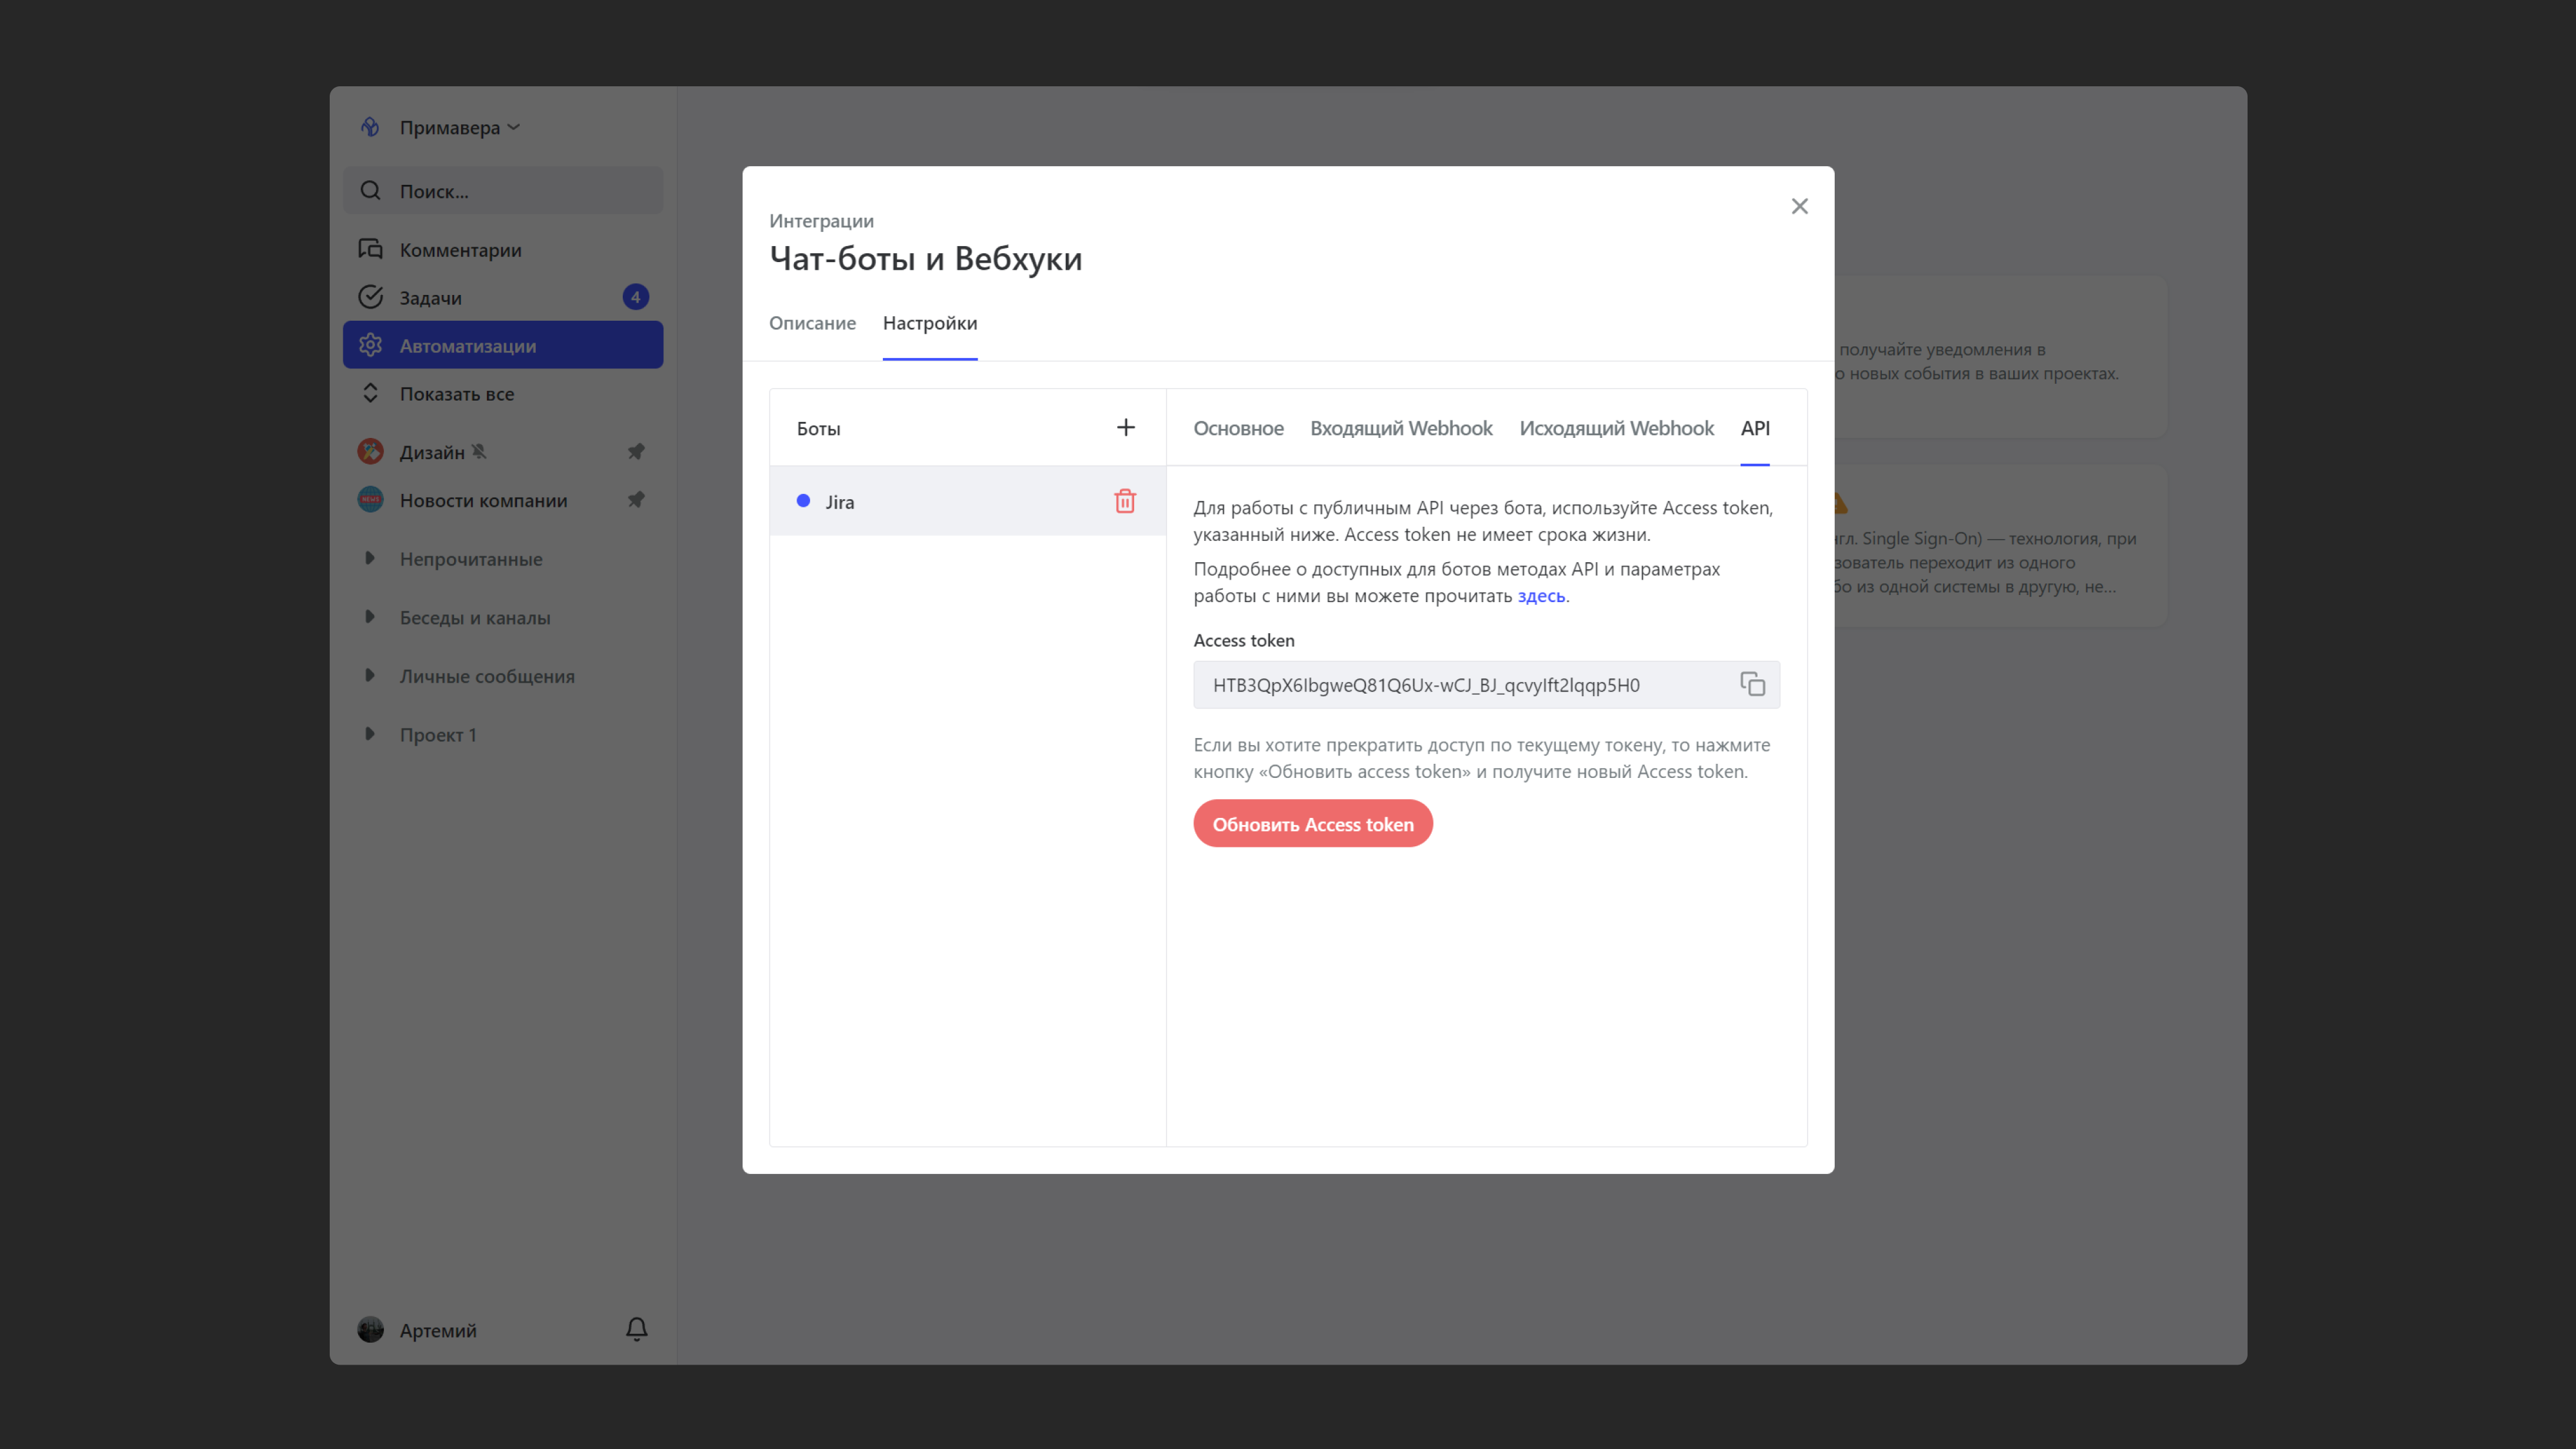
- Go to Automations → Integrations → Chatbots and webhooks
- Open a bot from the list, or create a new one by clicking +
- Fill in the "General" section. Give the bot a name and an avatar, and set up its privacy settings
- Go to the "API" section
- Copy the access token. You can use it to connect to Pachca and post messages as the bot
Now you can make API requests to Pachca
2. Get an API token in Jira
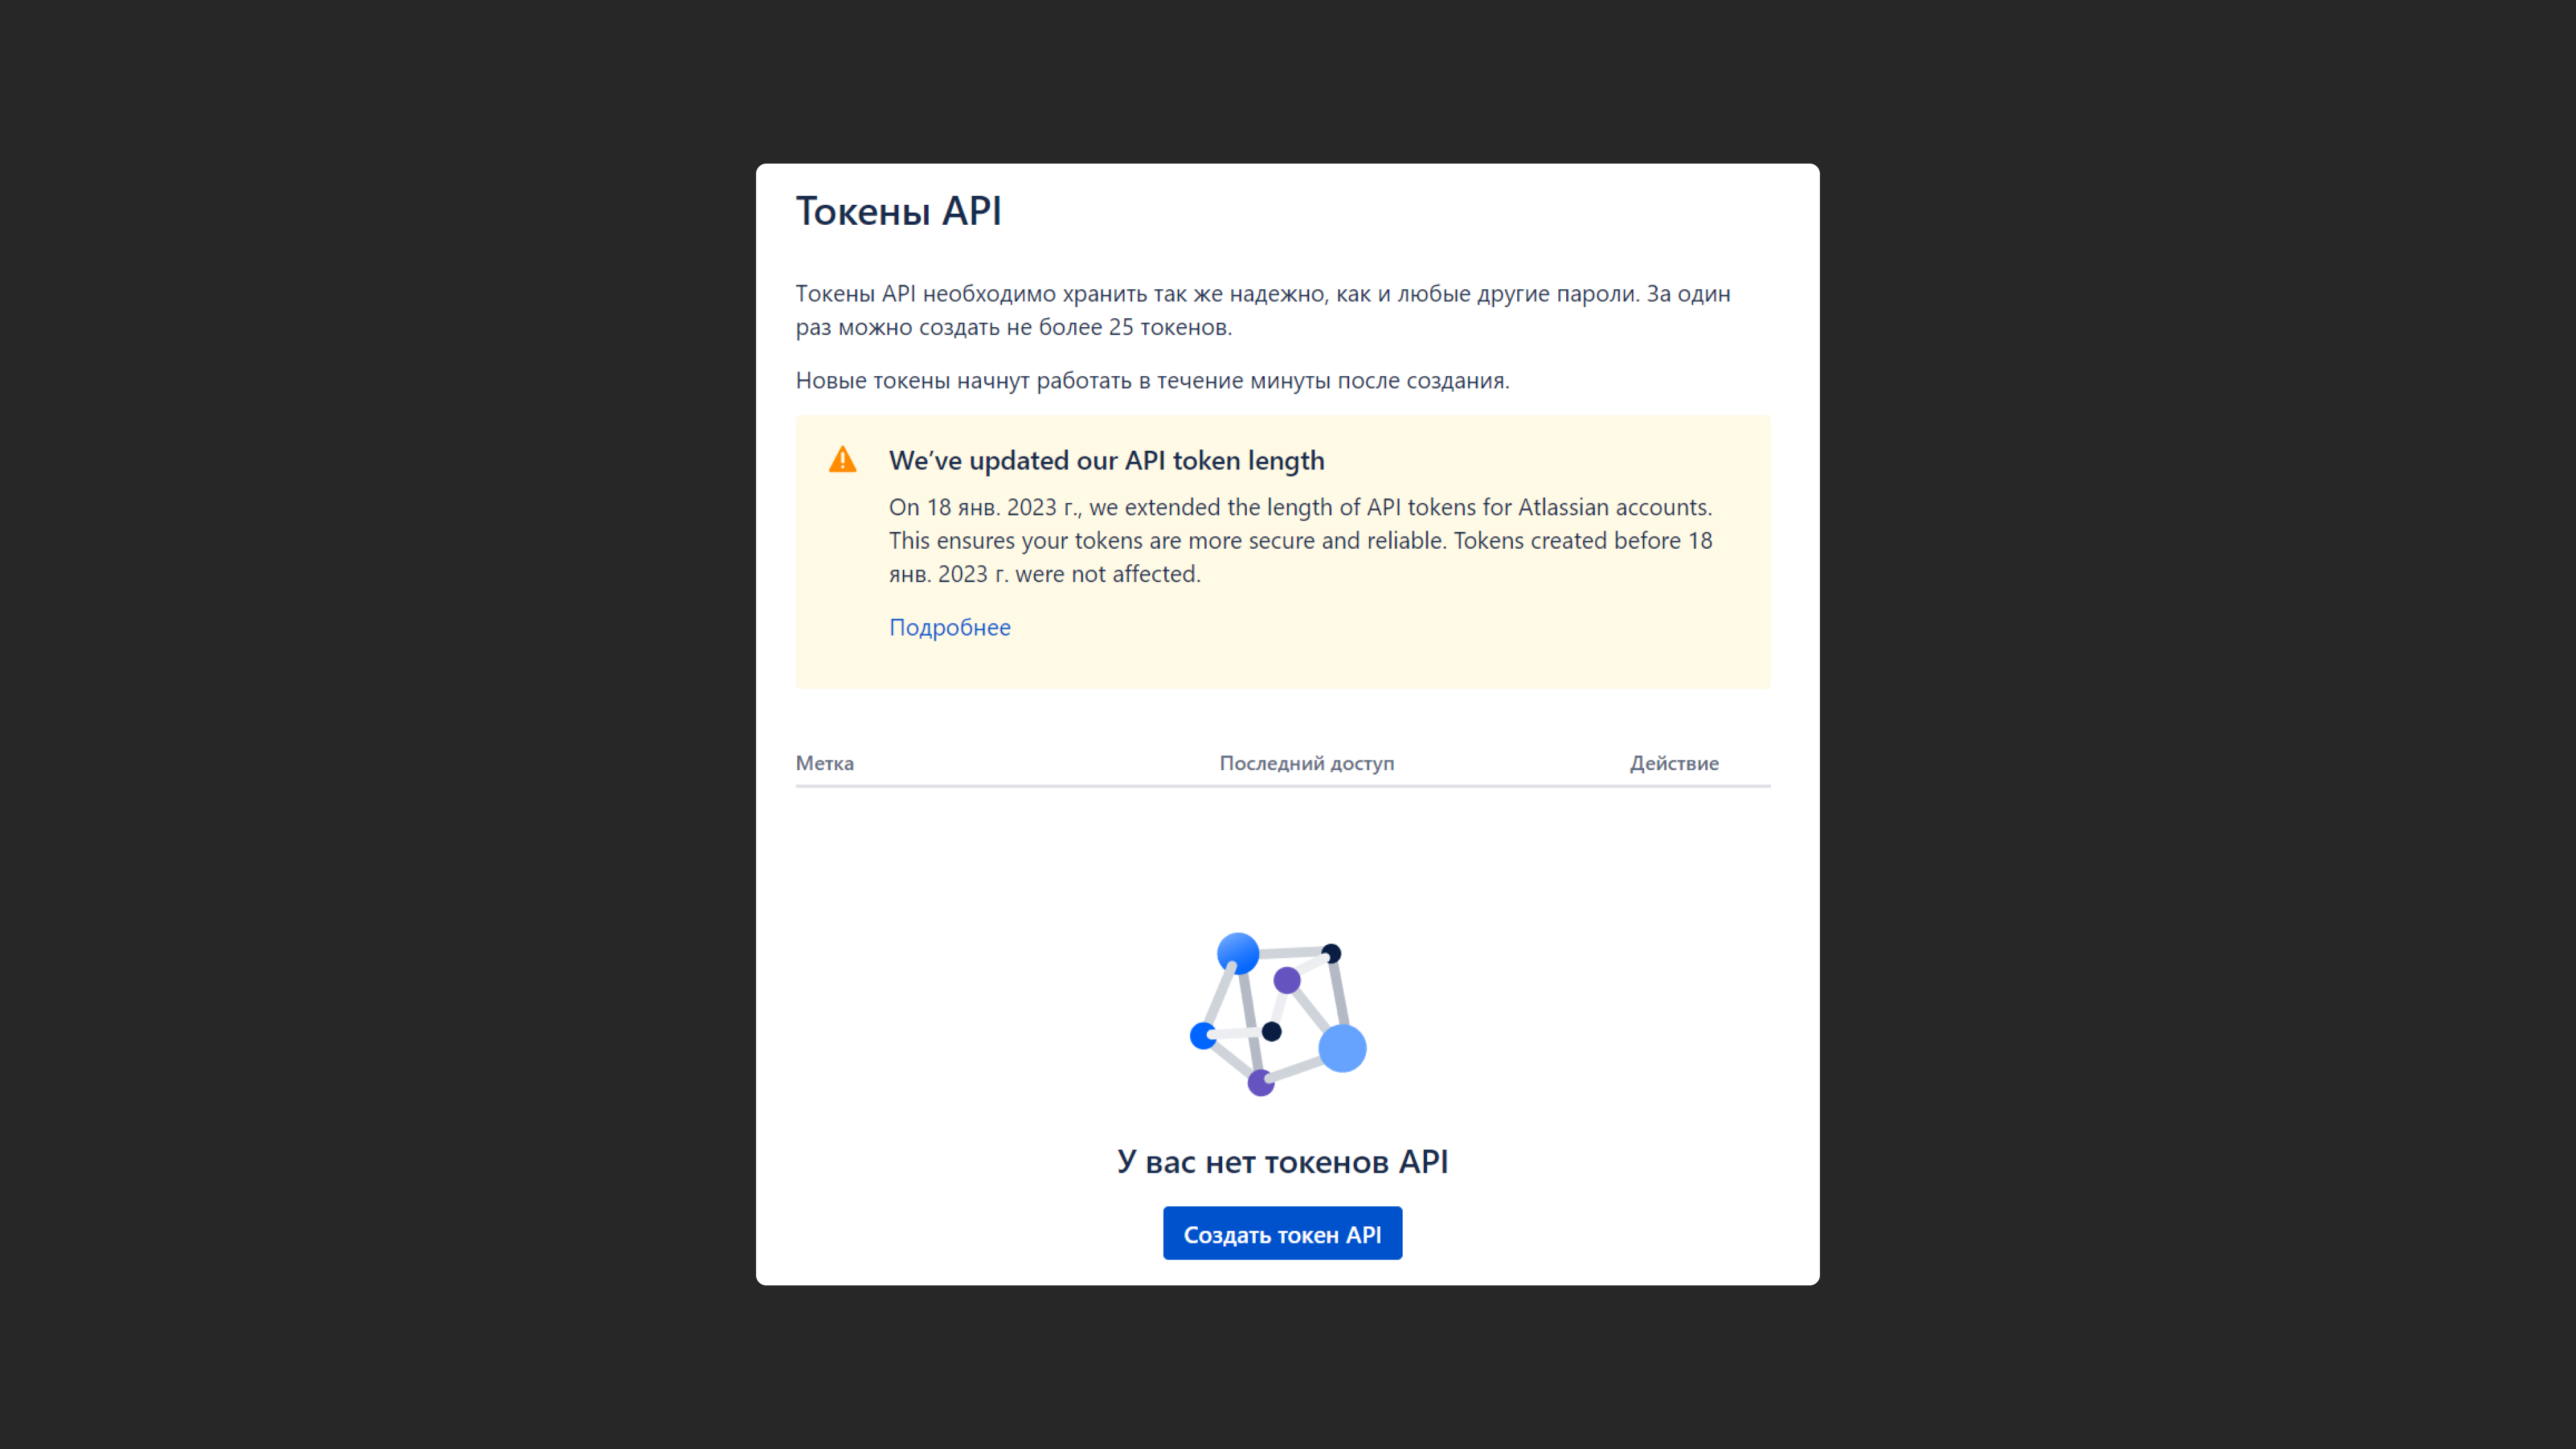
First, create an API token in JIRA to get access to the JIRA API.
- Go to https://id.atlassian.com/manage/api-tokens
- Click Create API token
- Enter a name for the token → click Create
- Save the token somewhere safe. Don't lose it
Now you can make API requests to JIRA. Every request includes a header with the email (of the user the token was created for) and the token itself. Jira Cloud uses basic auth: the email:token string is Base64-encoded.
3. Write a handler
The handler is a small app on your server that connects the Jira API and the Pachca API. It usually does three things:
- Receives events from Jira. Create a webhook in Jira as described in steps 2–3 of "Connecting via webhook," but enter your handler's address in the URL field instead of Pachca's. That way, your app decides what to send and to which chat.
- Receives commands from Pachca. In the bot settings, open the "Outgoing webhook" section, enter your handler's address and add commands like
/taskand/today. Pachca will send messages that start with these commands to that address. - Responds through the API. Use the Jira REST API to find and create issues:
GET /rest/api/3/search/jqlfor JQL search andPOST /rest/api/3/issueto create an issue. To post a message as the bot, sendPOST https://api.pachca.com/api/shared/v1/messageswith the bot token in theAuthorization: Bearer <token>header.
Here's a sample request body that posts today's tasks to a chat:
{
  "message": {
    "entity_type": "discussion",
    "entity_id": 123456,
    "content": "📋 Today's tasks:\n- PROJ-12 Update the landing page\n- PROJ-15 Check the payment flow"
  }
}
entity_id is the chat ID, which you can copy from the chat settings. All methods and parameters are covered in the Pachca API docs, and Jira methods are in the Jira Cloud REST API docs.
4. Add the bot to a chat and test it
- Add the bot to a chat, as in step 5 of "Connecting via webhook"
- Send one of your commands to the chat, like
/today - The bot replies with a list of tasks from Jira