Yandex Tracker + Pachca integration
Step-by-step guide to integrating Yandex Tracker with Pachca to get task notifications

Webhook setup, payload format and integration examples
The Pachca × Yandex Tracker integration sends notifications from your Tracker straight to a Pachca chat. You and your colleagues can respond to project tasks quickly, discuss them in threads and add reactions.
There are two ways to set up the integration:
- The simple option. Everyone gets the same notifications in one or more chats. This works if you're building a bot just for yourself or if it's enough for the bot to post all notifications to your team's chat.
- The advanced option. Each colleague gets notifications only about their own tasks, in direct messages.
In this article, we'll walk through the first, simpler example: how to set up the Yandex Tracker integration so the bot sends you a direct message whenever someone comments on your task
Here's how it works:
- You create a chatbot in Pachca that pulls the information you choose from a specific queue in Yandex Tracker.
- Then you can add the bot to any chat, where it will post messages about events in that queue, or set it up to send notifications to your direct messages.
Step 1. Create and set up the bot in Pachca
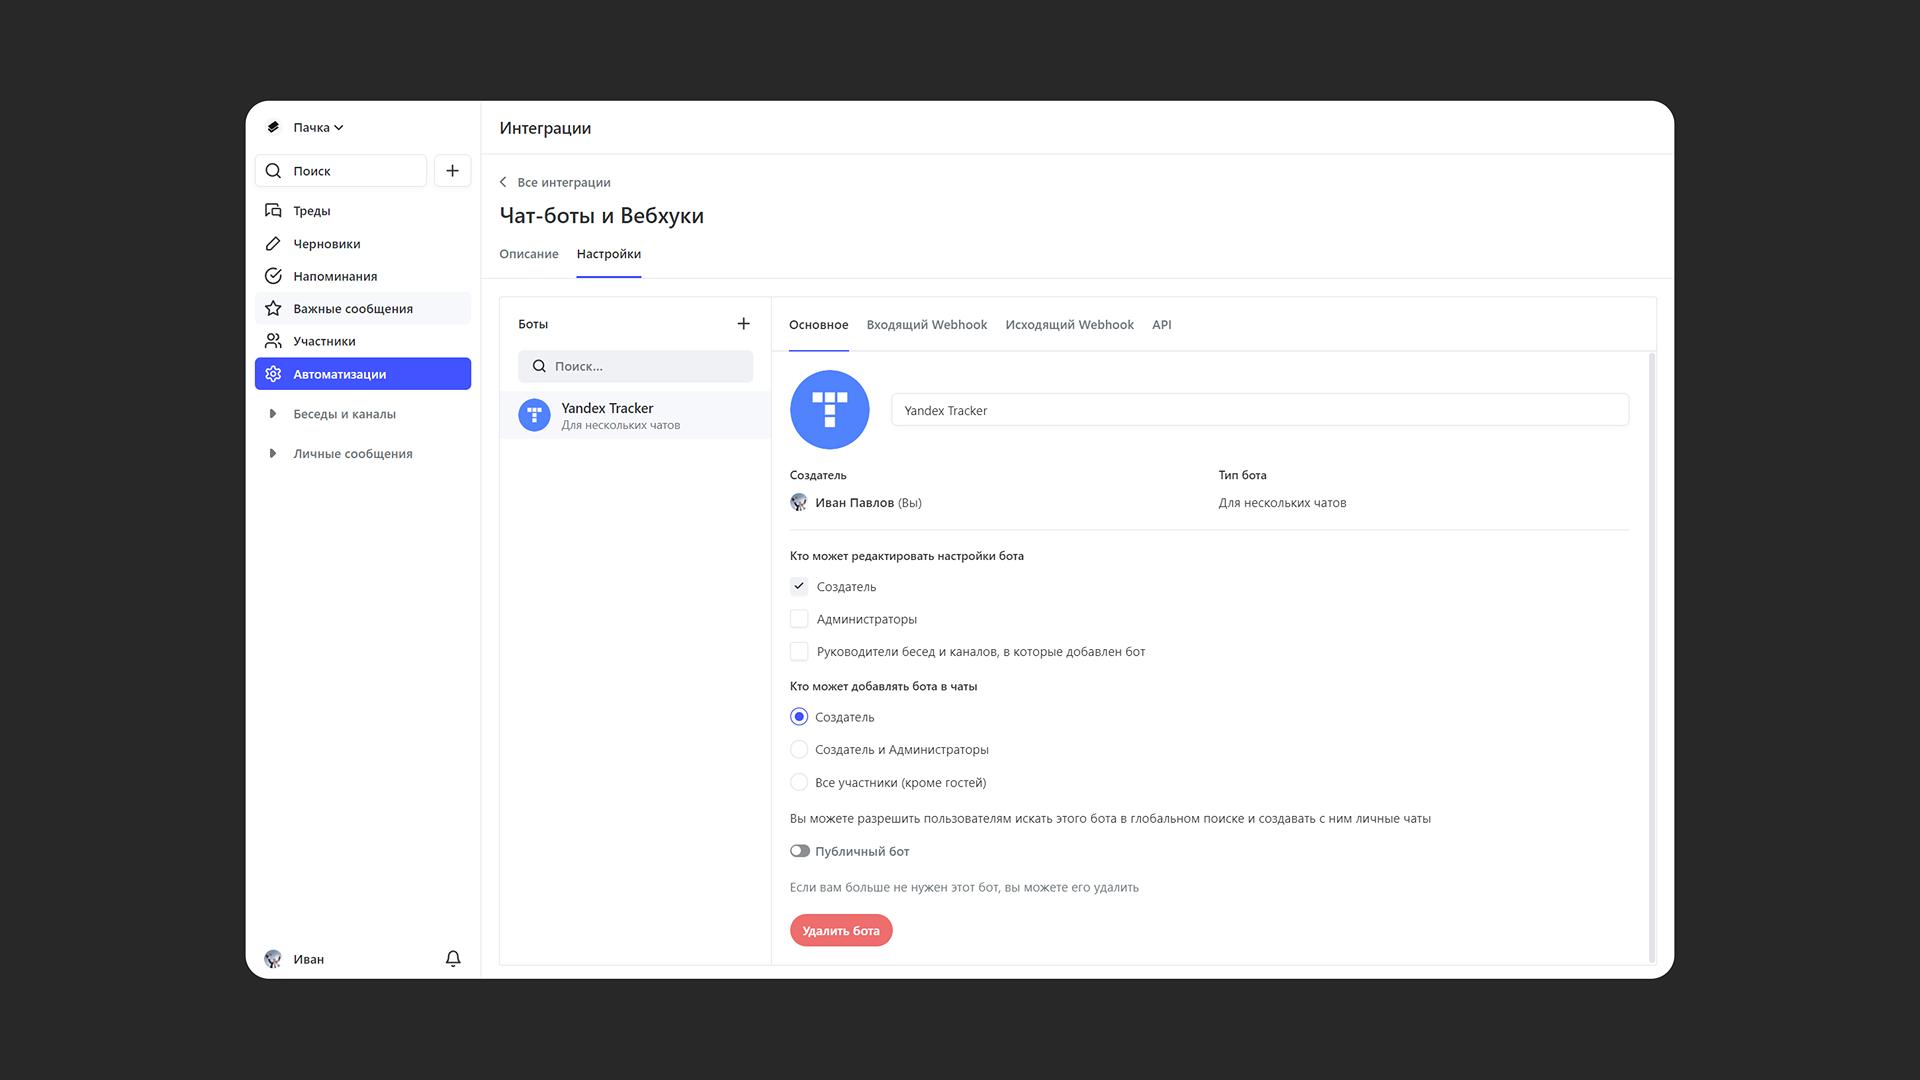
Create a new bot in Pachca:
- Go to "Automations" → "Integrations"
- Select "Chatbots and webhooks"
- Click "+"
- Name your bot and add the Yandex Tracker logo or any other avatar
- Choose who can configure the bot. They'll see it in their Integrations section and can change its settings.
- Choose who can add your bot to chats. These users can add the bot to chats and receive its messages
- Change any other settings if needed
Add the bot to a chat*
- Open the chat you need
- Go to "Chat settings" → "Add members" → "Integrations"
* If you're building the bot just for yourself and it will send notifications to your direct messages, skip this step.
Step 2. Set up Yandex Tracker
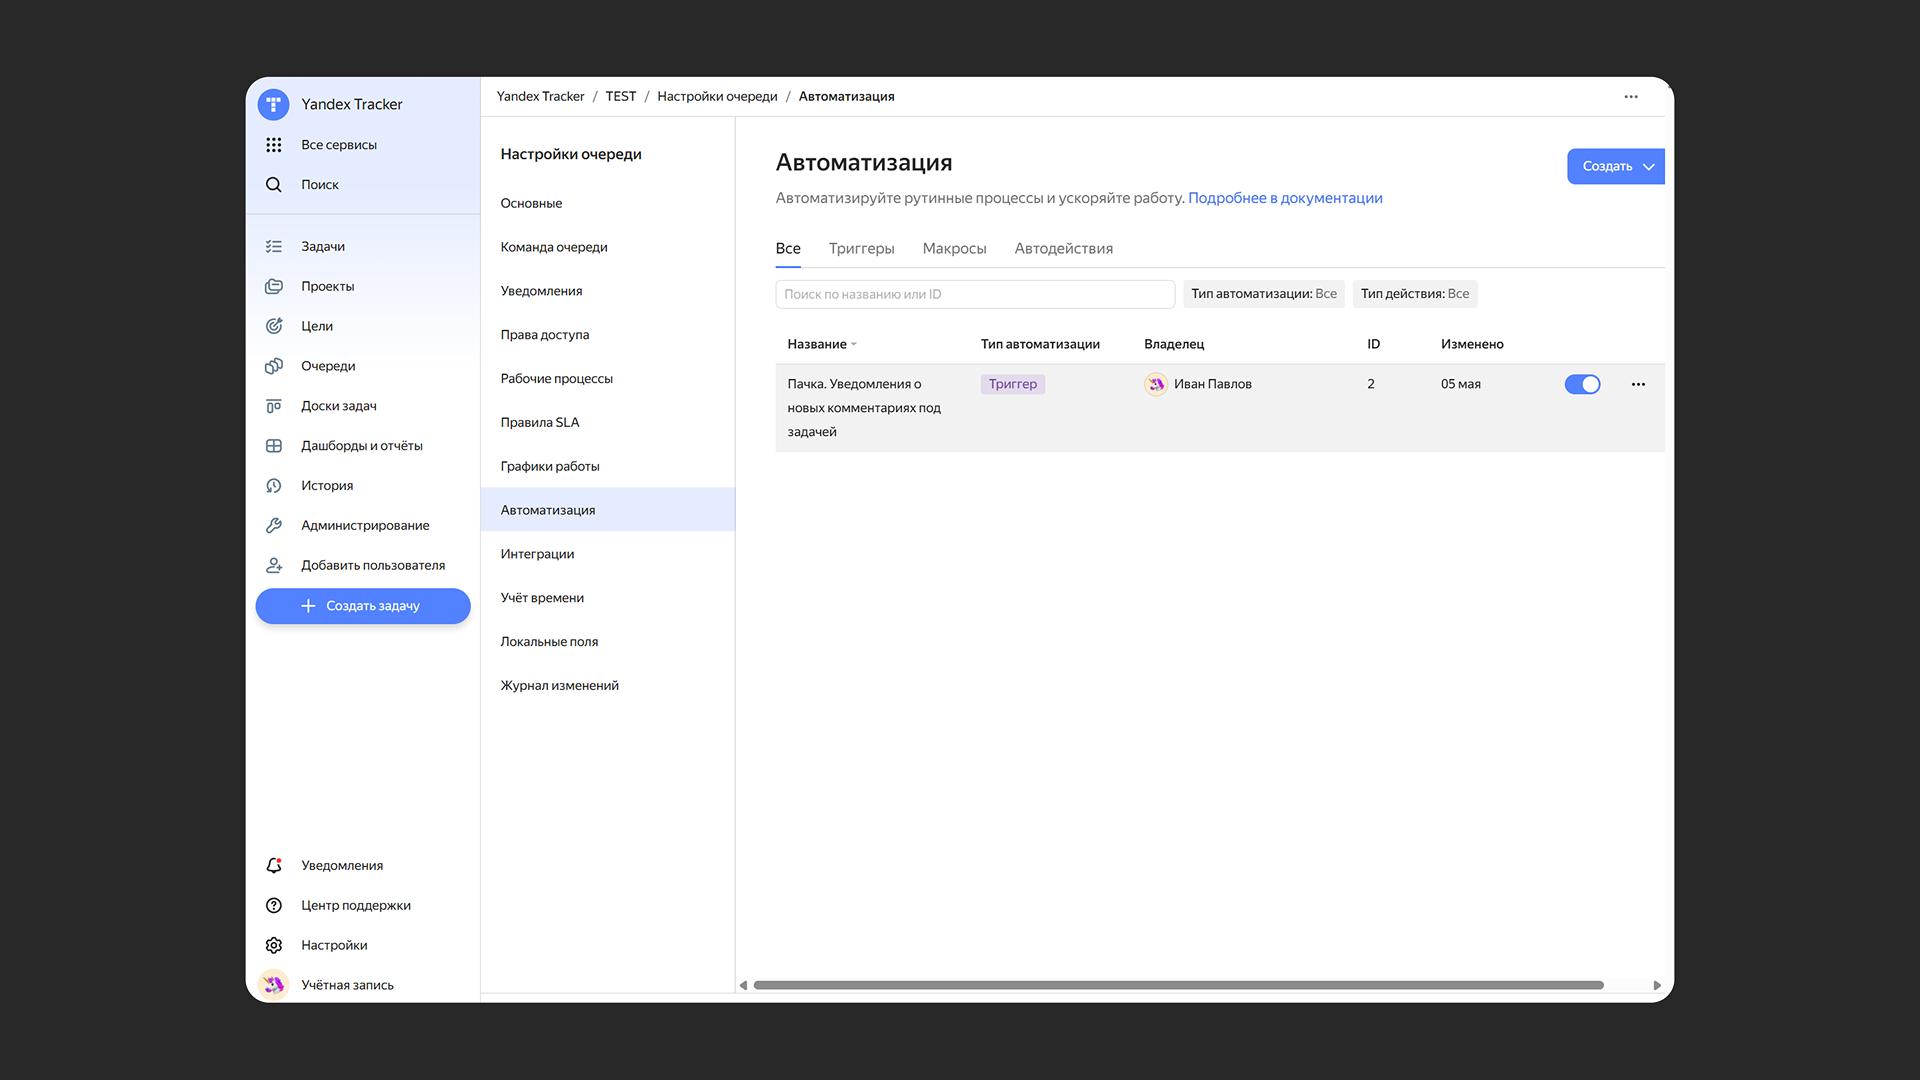
- Log in to Tracker. You need admin rights for the queue you're setting up the trigger for.
- In the left panel, click "Queues" and select a queue.
- On the queue page, click "Queue settings" in the top right corner.
- In the left panel, select "Automation".
- In the top right corner, click "Create" → "Trigger".
- Enter a name for the trigger, for example "New comment notifications to Pachca".
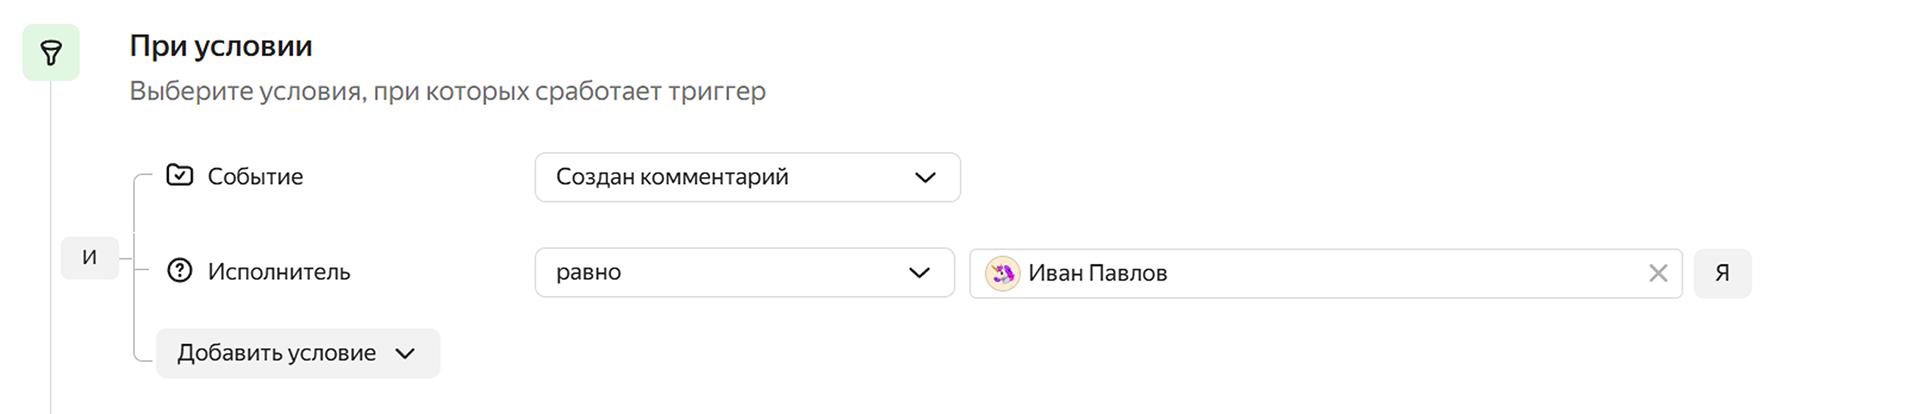
Set the conditions that trigger the notification. For example, to fire the trigger when you get a new comment on a task:
- Add the condition "Event" → "Comment created".
- Add the condition "Assignee" → "equals" → "Me".
- Make sure the logical operator to the left of the condition group is set to "AND" so the trigger fires only when all conditions are met. If you're setting up an integration with different logic, you can use "OR". To switch between "AND/OR", click the block with the operator on the left.
Set up the trigger actions and save it:
- Click Add action and select HTTP request. Configure the request:
- Method: "POST".
- Address:
https://api.pachca.com/api/shared/v1/messages - Authorization method: "OAuth 2.0"
- Token: open the bot you created in the "Integrations" section in Pachca and copy the Access Token from the "API" section. You'll find it in the bot's own settings.
- Token type: "Bearer"
- Content type: "application/json".
- Paste the code block below into the request body
- Replace the values in the code block with your own
⚠️ Pay attention to the comments in the code block highlighted in yellow on the right. They mark the places where you need to insert your own values or can change the format of the bot's message. You can also specify your own events
//Request body that makes the bot notify you about new comments on your tasks
{
  "message": {
    "entity_type": "user", //Set the type to "discussion" if you want the bot to post messages to a chat
    "entity_id": 515613, //Copy the link to your Pachca profile and use the digits at the end of the link. If you want the bot to post messages to a chat, paste the chat ID instead. You can copy it in the chat settings.
    "content": " [{{issue.key}} {{issue.summary}}](https://tracker.yandex.ru/{{issue.key}})
💬 {{issue.modifier}} left a new comment" //Text of the message the bot will send. Customize it and add more variables if you like. To do that, click the {} icon on the right in Yandex Tracker
  }
}
Note: If you want to use other methods and parameters in the HTTP request, you'll find the bot API reference in the API documentation. For example, you can set up Pachca to automatically create "Reminders" after a certain action in Yandex Tracker
Step 3. Test the integration
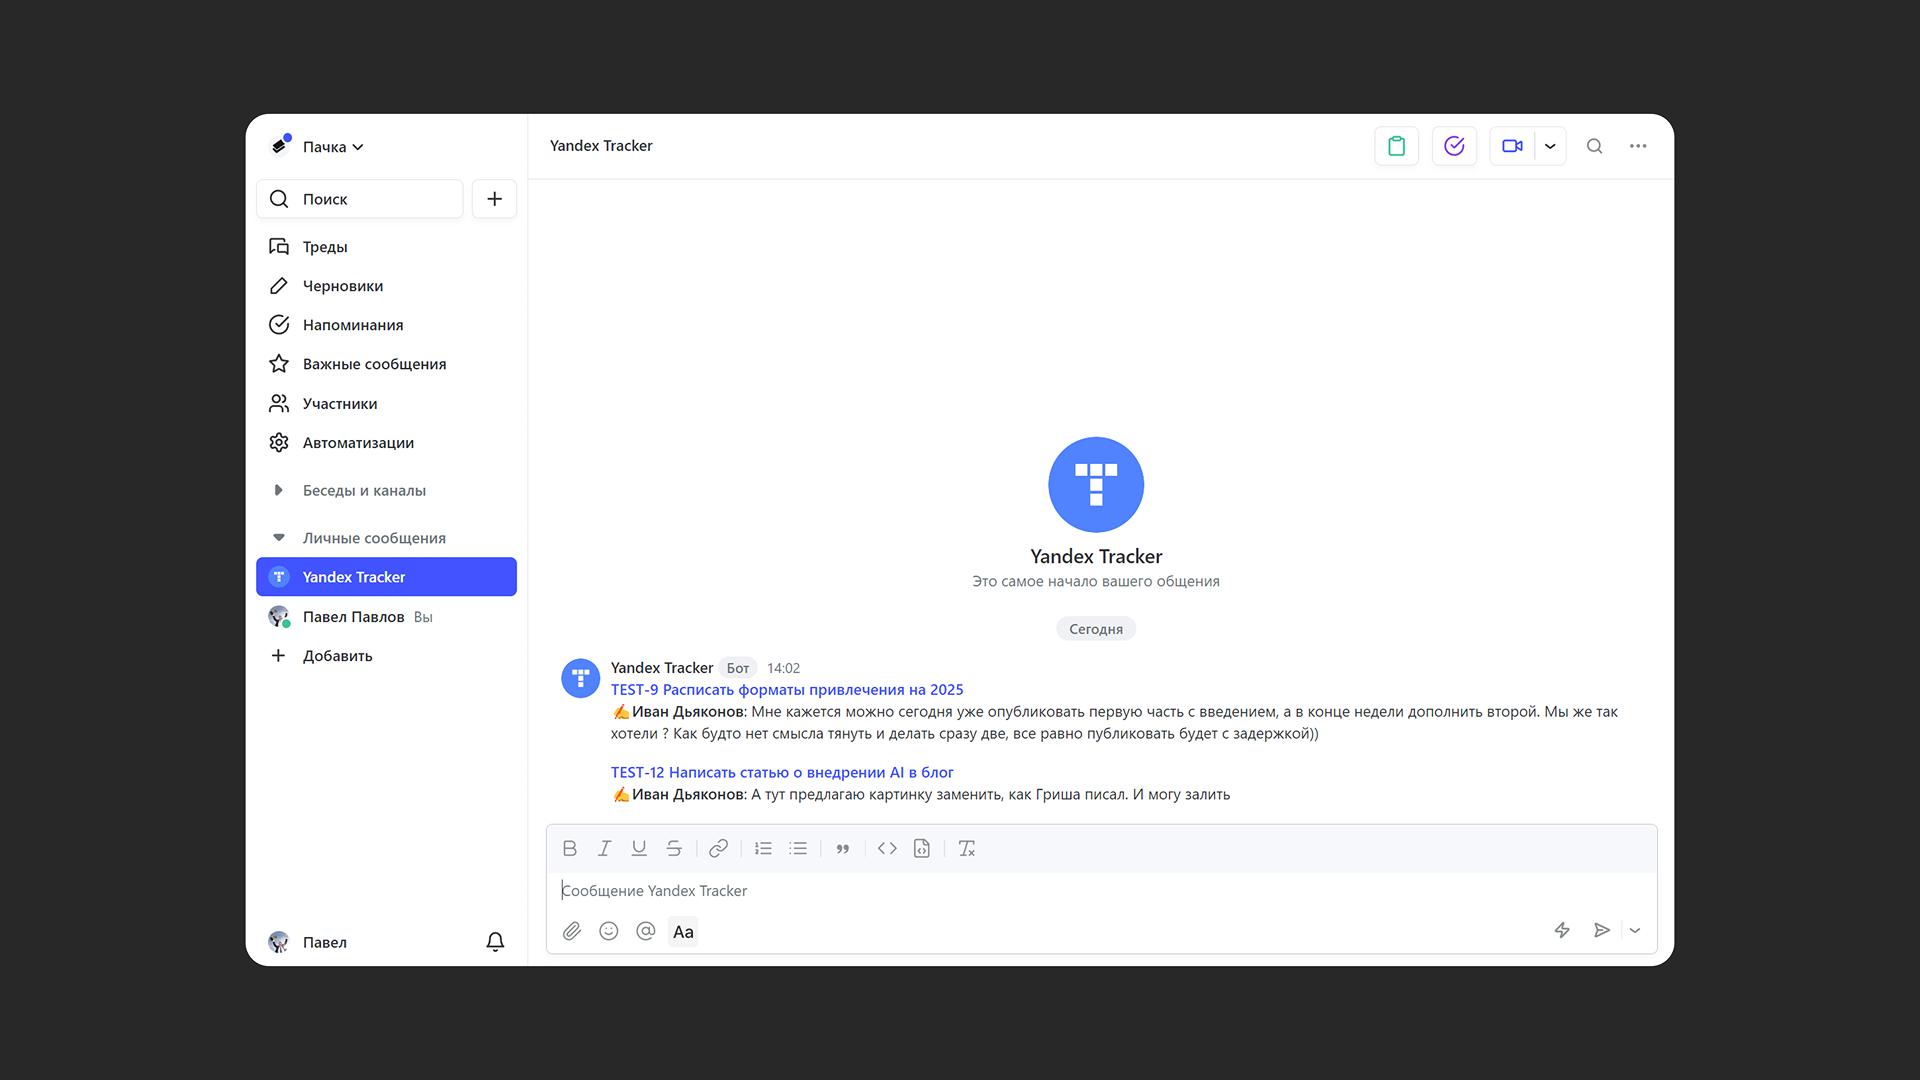
To check that the trigger works, leave a comment on any task where you're set as the "Assignee". Done! You can set up other triggers for your needs the same way.