IntegrationsUpdated:
Pachca + Personik integration
Connect a chatbot that automates HR tasks
ByAnastasia Volodina

Developer docs
Pachca API and guides for building your own integration
The Pachca × Personik integration lets you connect a chatbot that automates HR tasks. Employees can go through onboarding, get answers from the knowledge base, take part in surveys and training, and use HR self-service tools right inside Pachca.
Here's how it works:
- You create a bot in Pachca and connect it to your Personik account.
- You set up workflows and content for the bot in Personik.
- Once an employee is added to the Personik platform, a chat with the bot appears for them in Pachca.
Step 1. Create and set up a bot in Pachca
1. Create a new bot in Pachca:
- Log in to your Pachca workspace with Administrator rights.
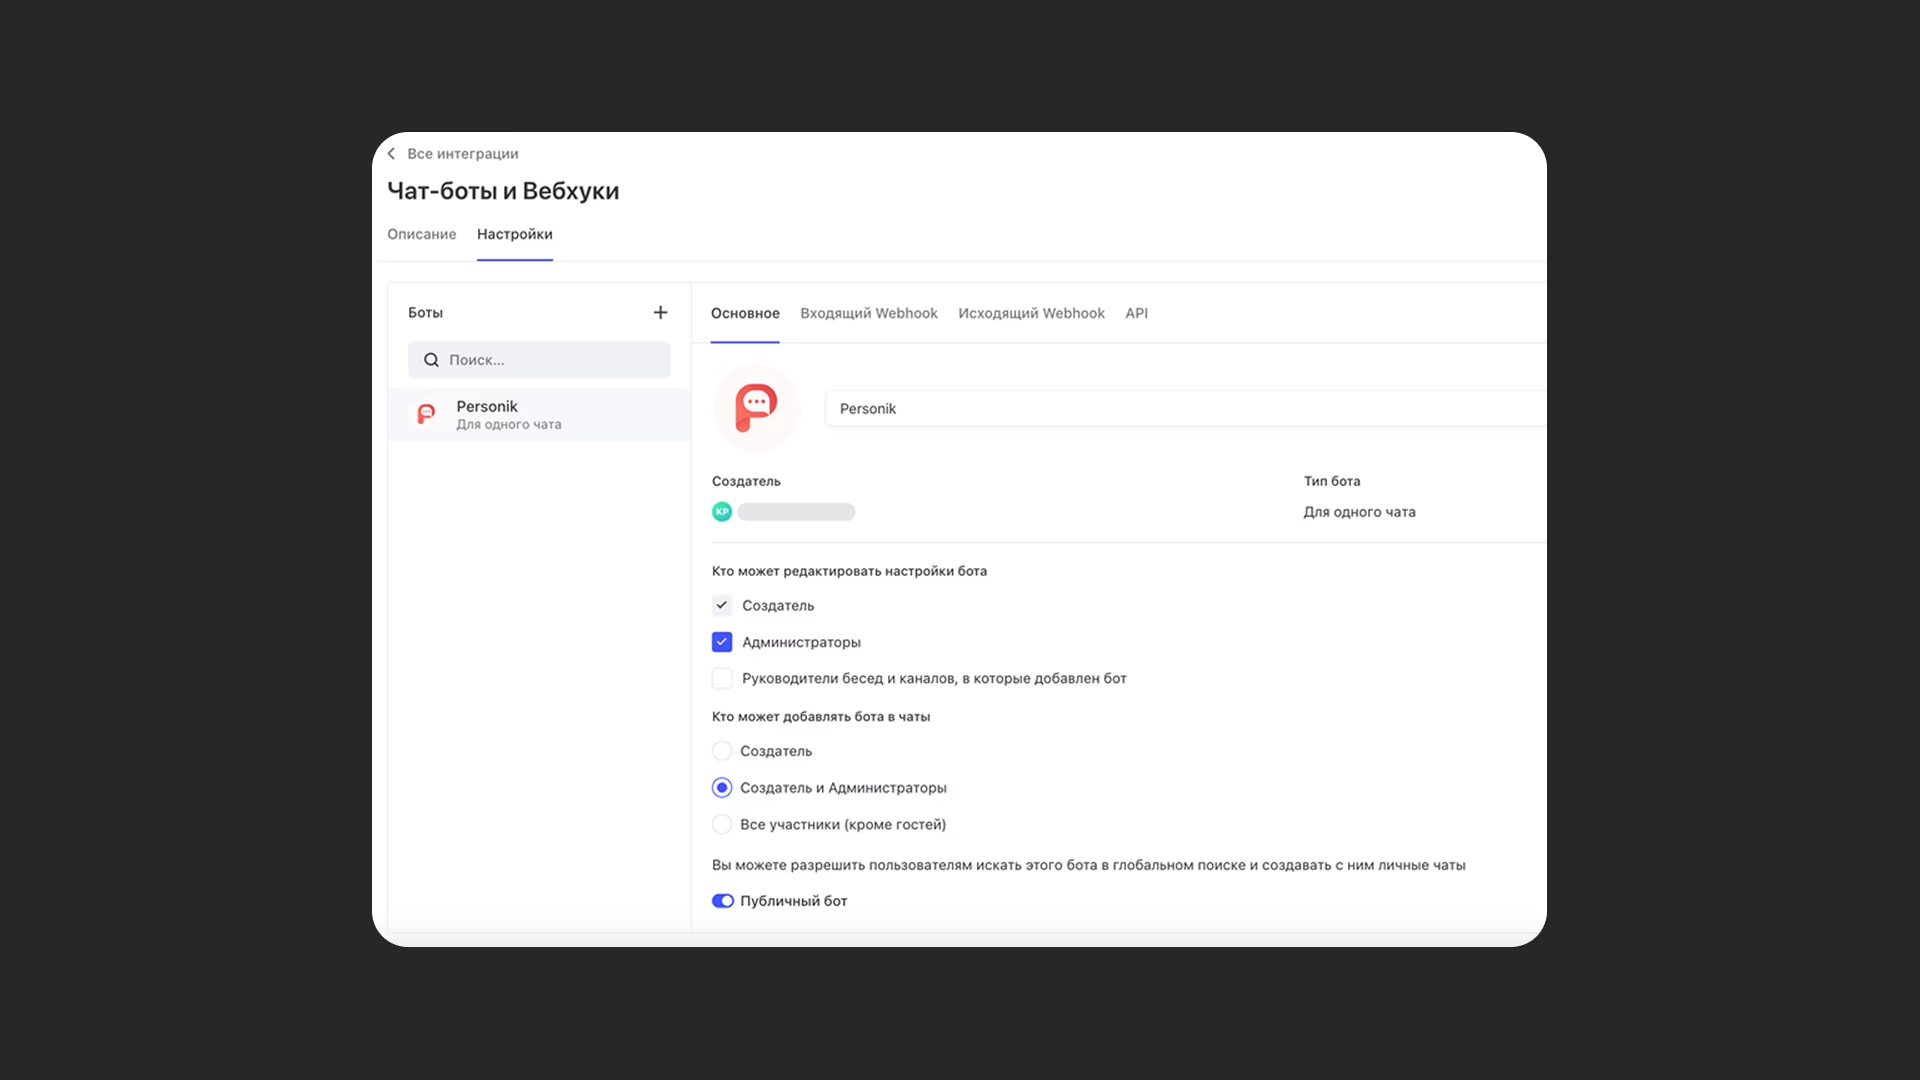
- Go to "Automations" → "Chatbots and webhooks".
- Click "+", name your bot and upload an avatar (the Personik logo, for example).
- In the "General" section, check "Administrators" and "Creator and administrators" in the settings for who can edit and add the bot.
- Make the bot public so employees can find it through search.
- Set up the outgoing webhook
- Go to the "Outgoing webhook" tab
- Enter the Personik server URL: https://app.personik.ai/webhooks/pachka/<your_account_name> (the account name is the ID you get when you sign up for Personik)
- Check "New messages", "Button clicks", "Workspace member changes" and "Any messages"
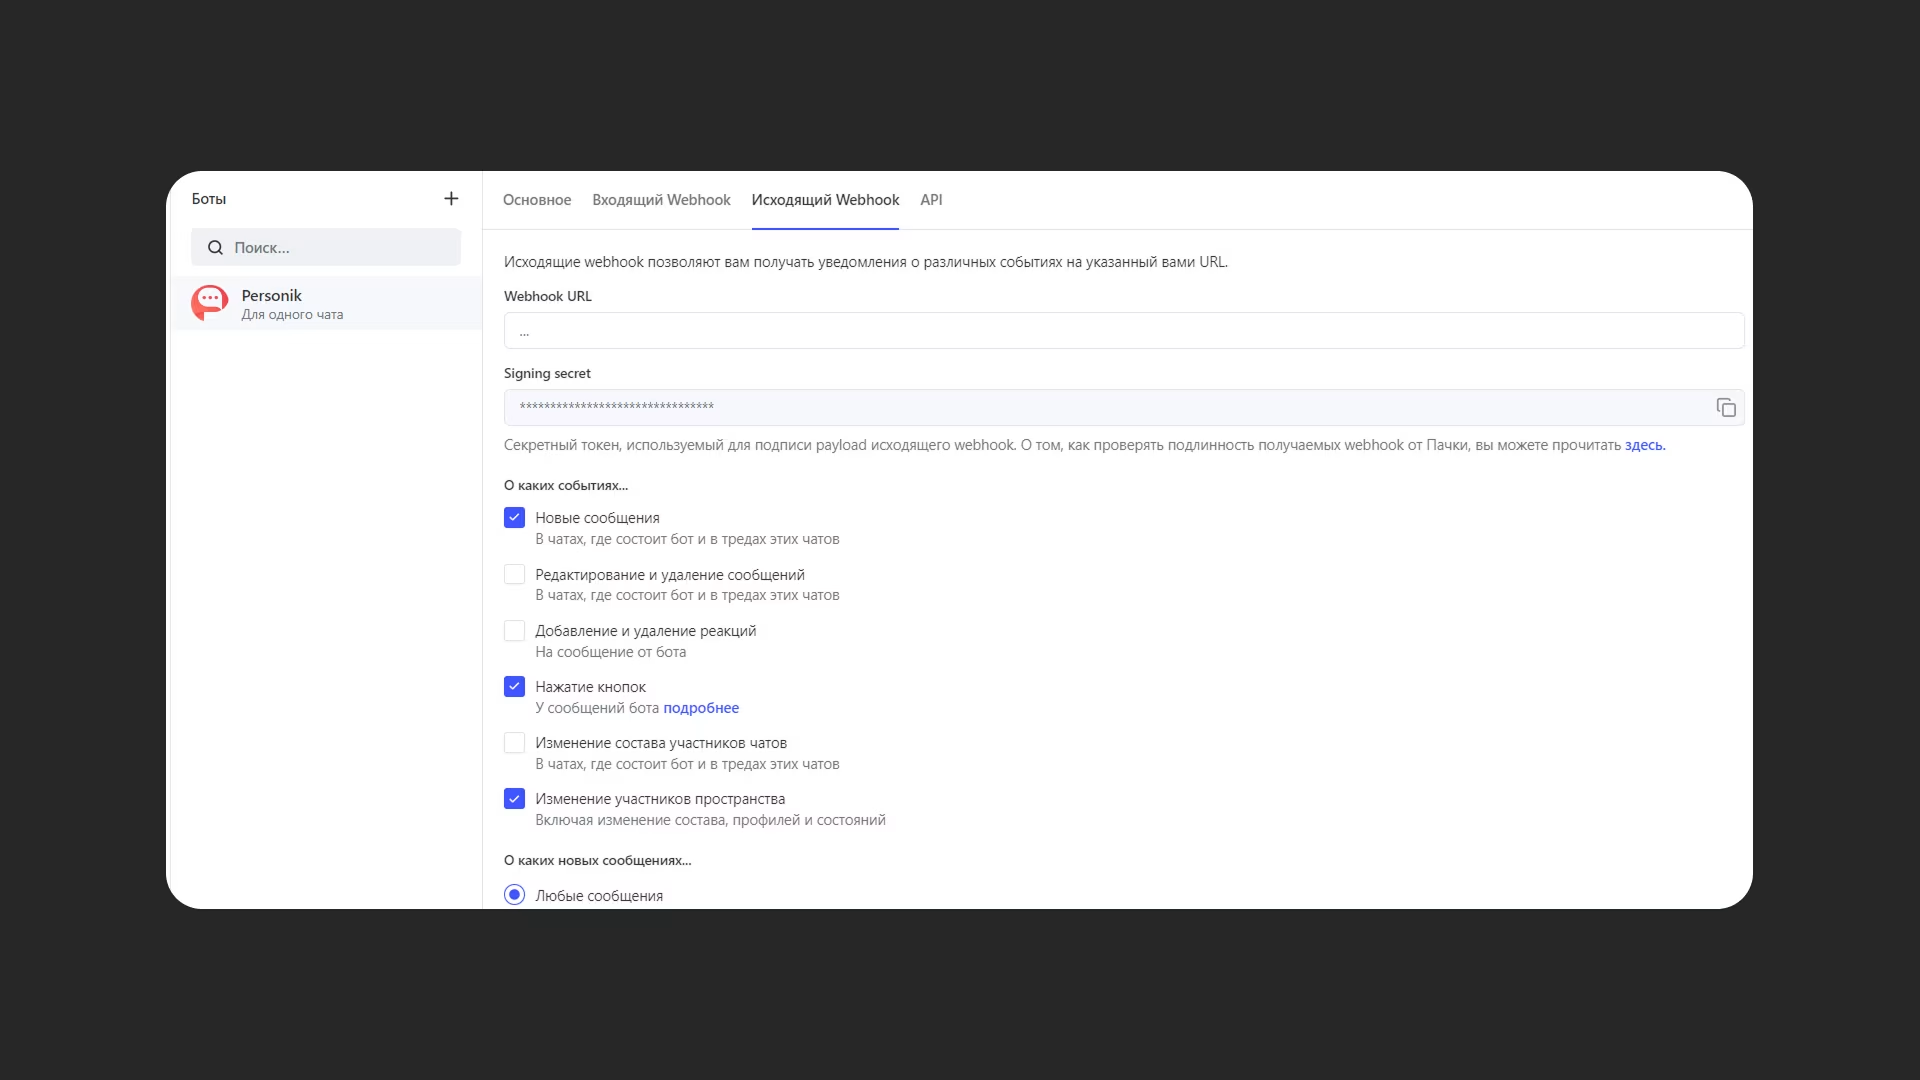
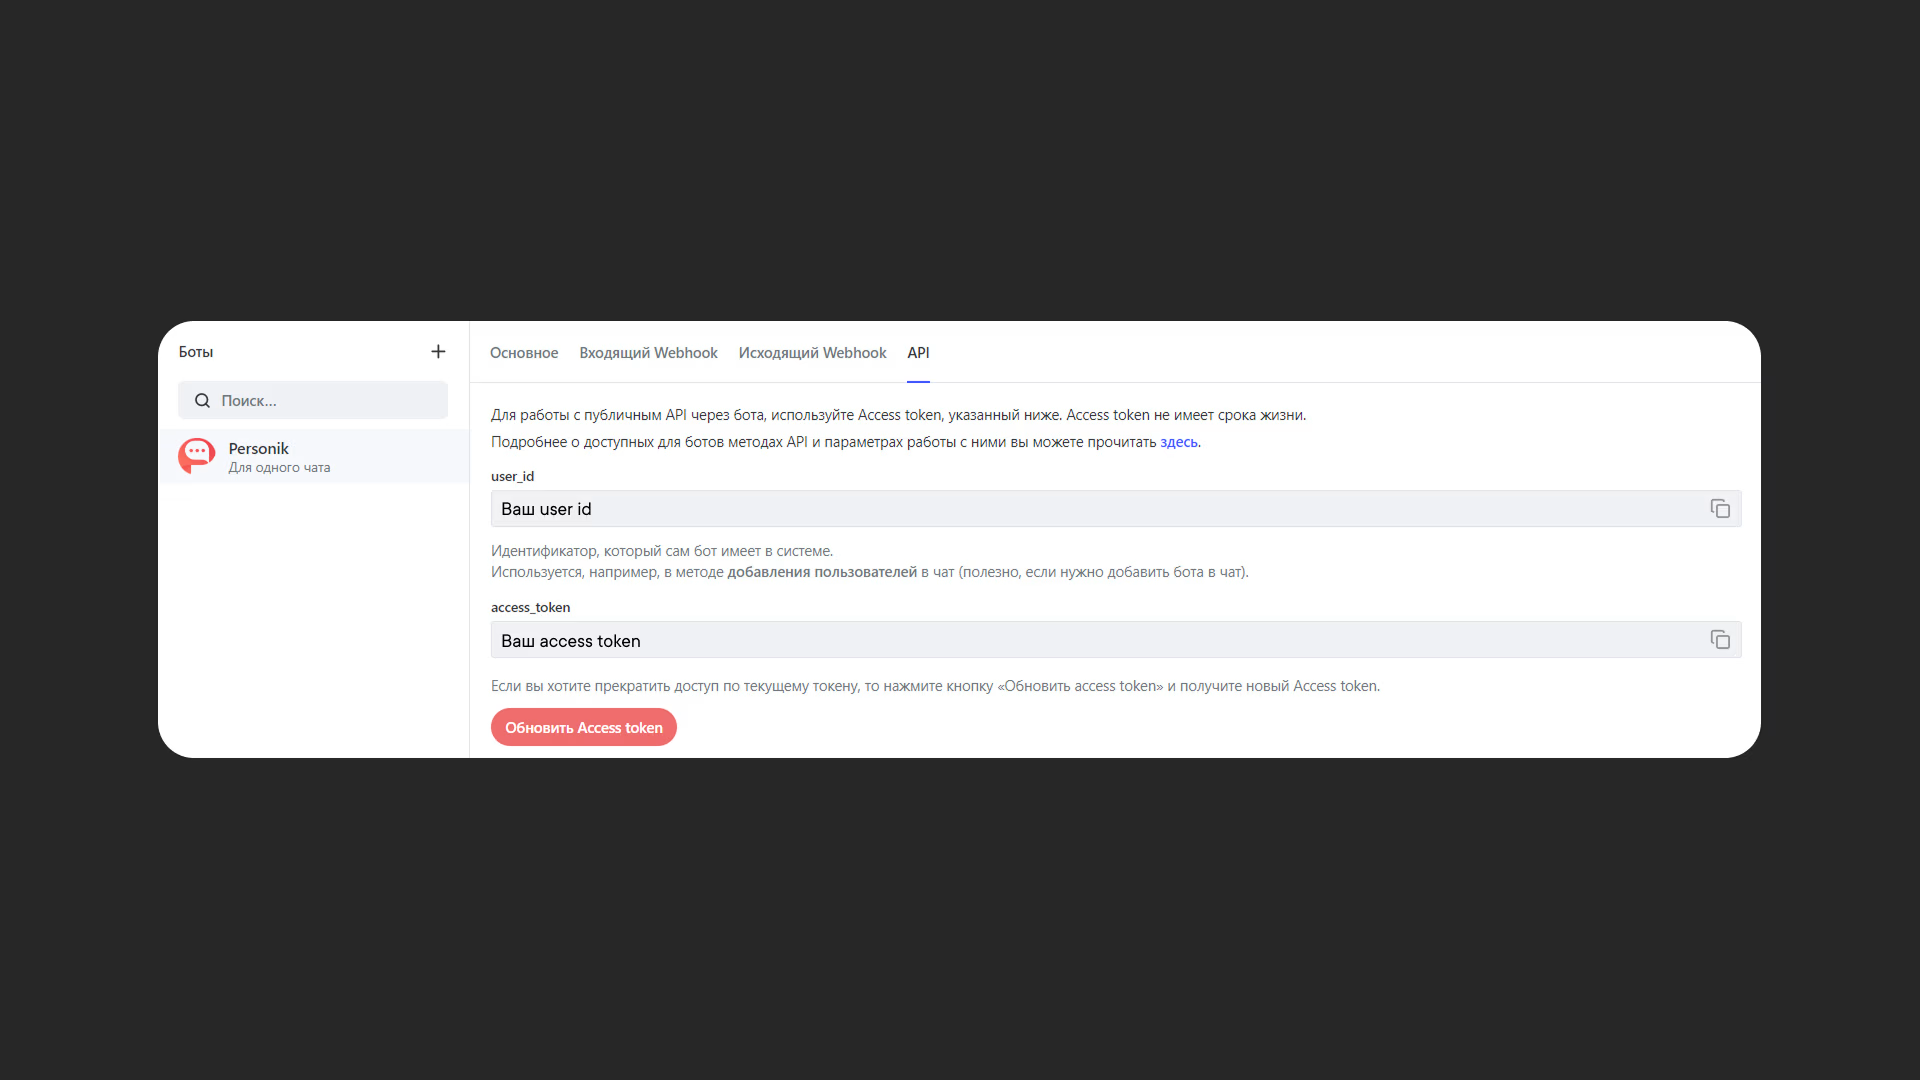
- Get your connection details
- Go to the "API" tab in the bot settings and keep it open.
Step 2. Set up the integration in Personik
- Turn on webhook notifications:
- Log in to your Personik account.
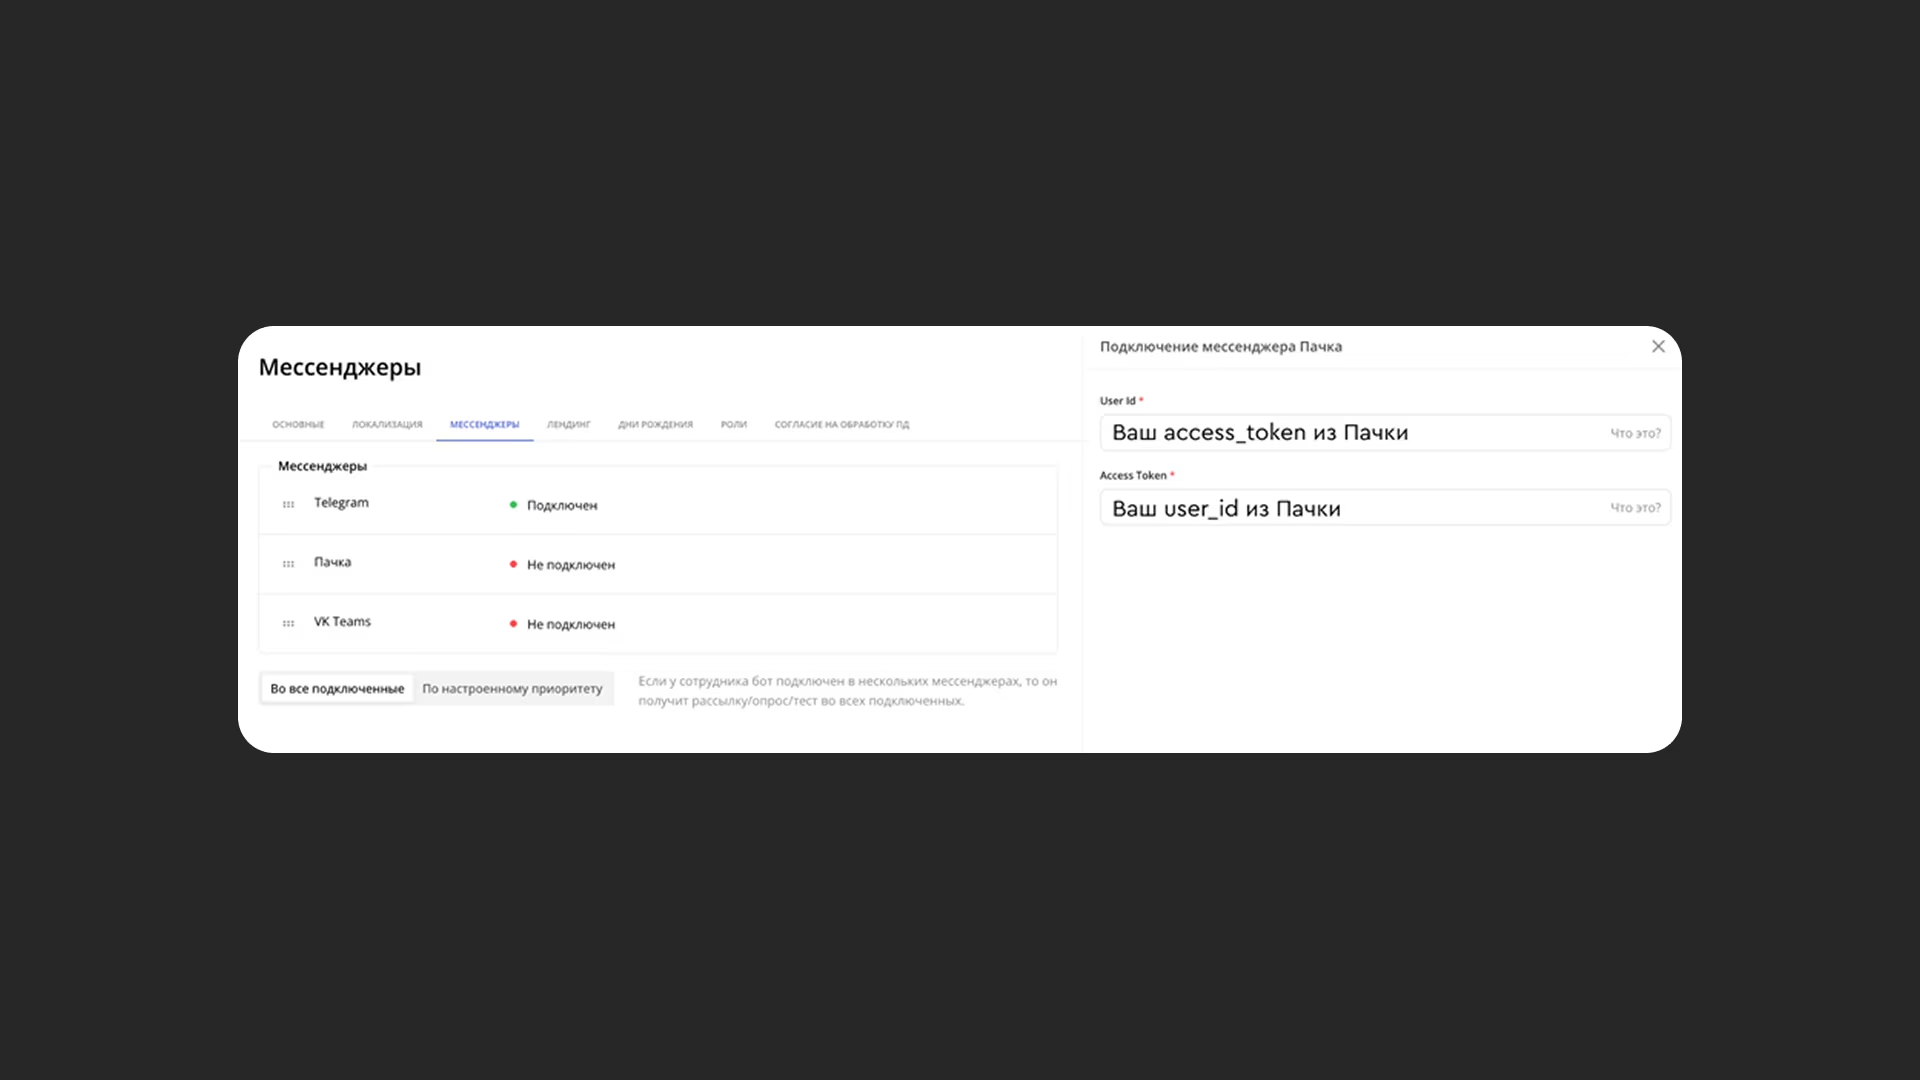
- Go to "Settings" → "Integrations" → "Pachca".
- Copy the user_id from the API tab in Pachca and paste it into the "User ID" field in Personik.
- Copy the access_token from the same tab and paste it into the "Access token" field in Personik.
- Click "Connect".
- You'll see the message "Messenger connected." Now you can start working with the bot.
- Set up interaction workflows:
- In the "Scenarios" section, create or edit dialogs (onboarding, surveys, knowledge base and so on).
- Choose which notifications and messages will be sent to Pachca.
- Invite an employee
- Make sure the employee's details have been added to the Personik platform.
- Send the employee a one-time code to register with the bot (by email or text message) from the Personik platform.
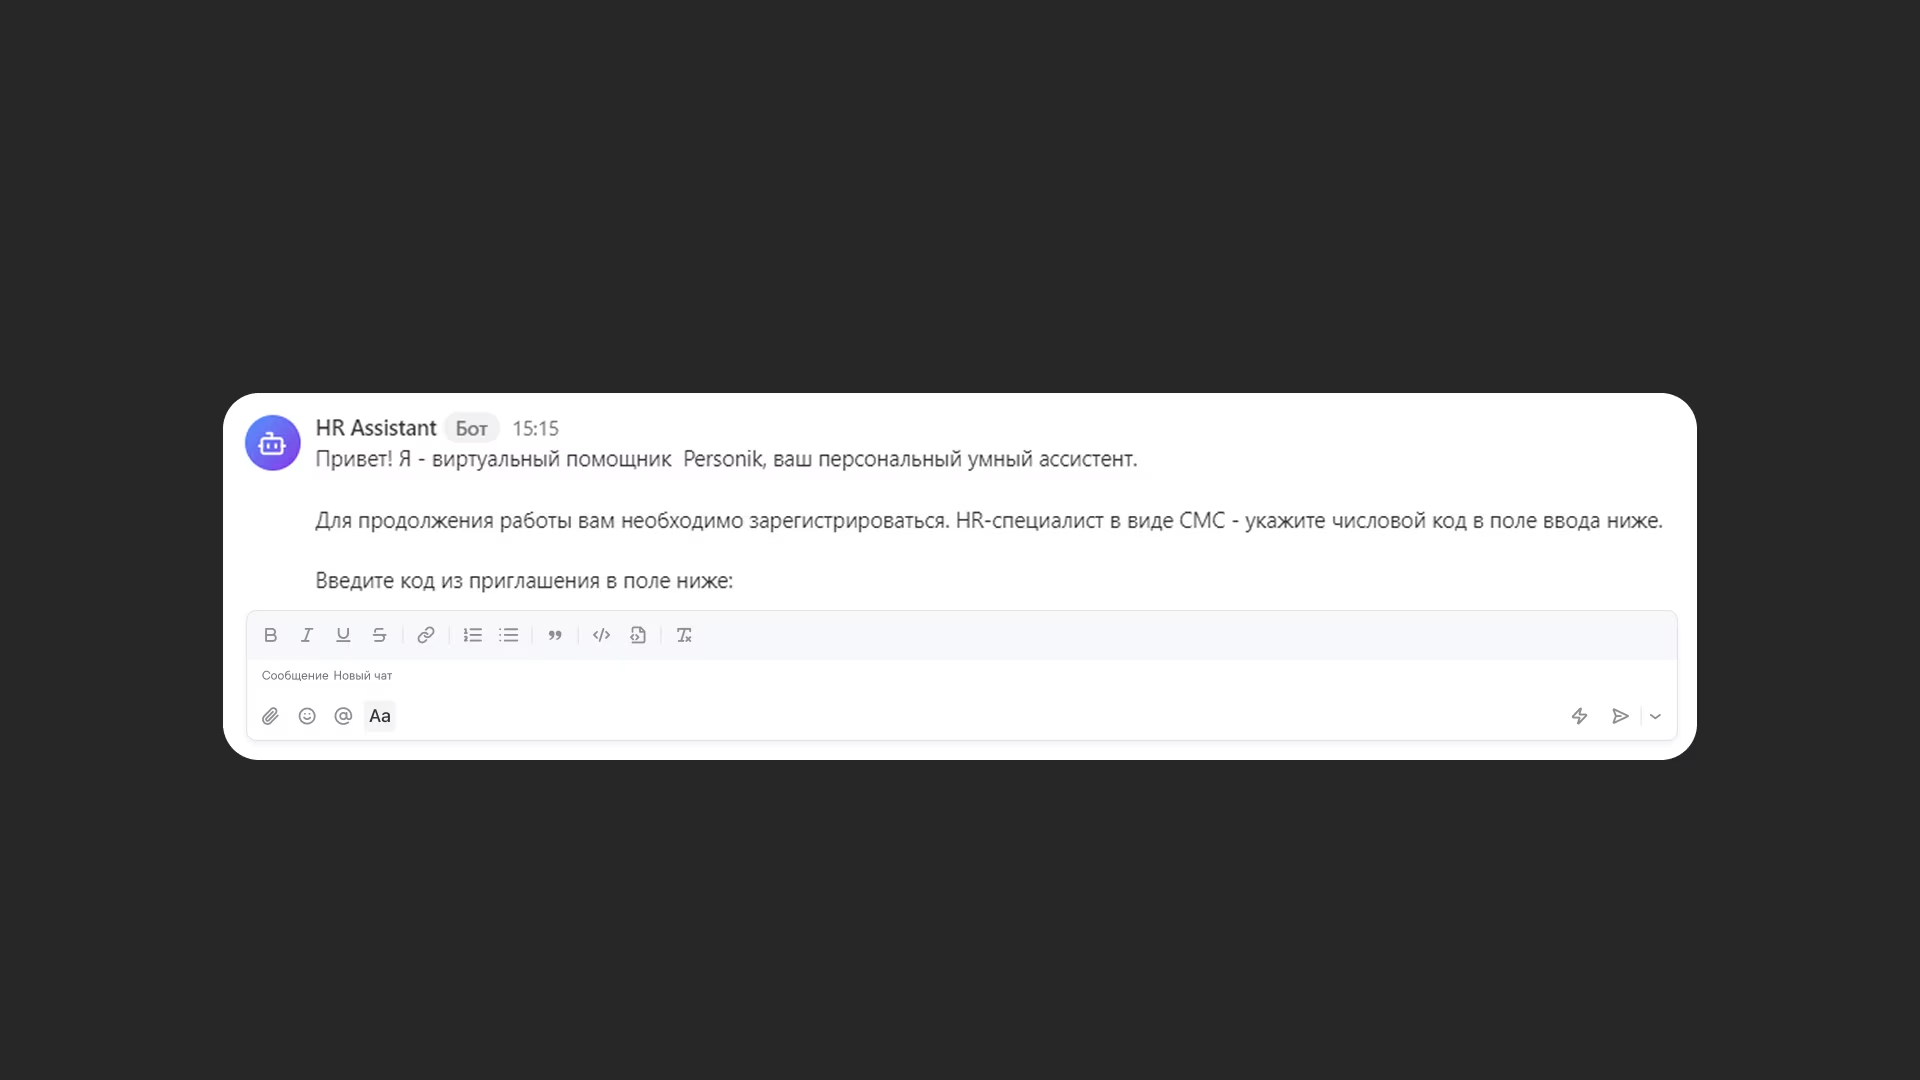
- If you're an existing employee, a chat with the bot will appear in your contacts. To start, send it "Hi." The bot will greet new employees automatically after they first log in to Pachca.
- At the start of the conversation, the bot will ask for the invite code. Once it's entered, you're good to go.
Step 3. Test the integration
1. Start a conversation with the bot:
- Open the chat with the bot in Pachca and send any message (for example, "Hi").
- If the integration works, the bot will reply according to the workflows you set up.
2. Run a test workflow:
- For example, send a broadcast: in your Personik account, go to "Broadcasts", open "Templates", click any of the broadcasts and click "Create broadcast" at the bottom. Choose the audience and date, and review the content.
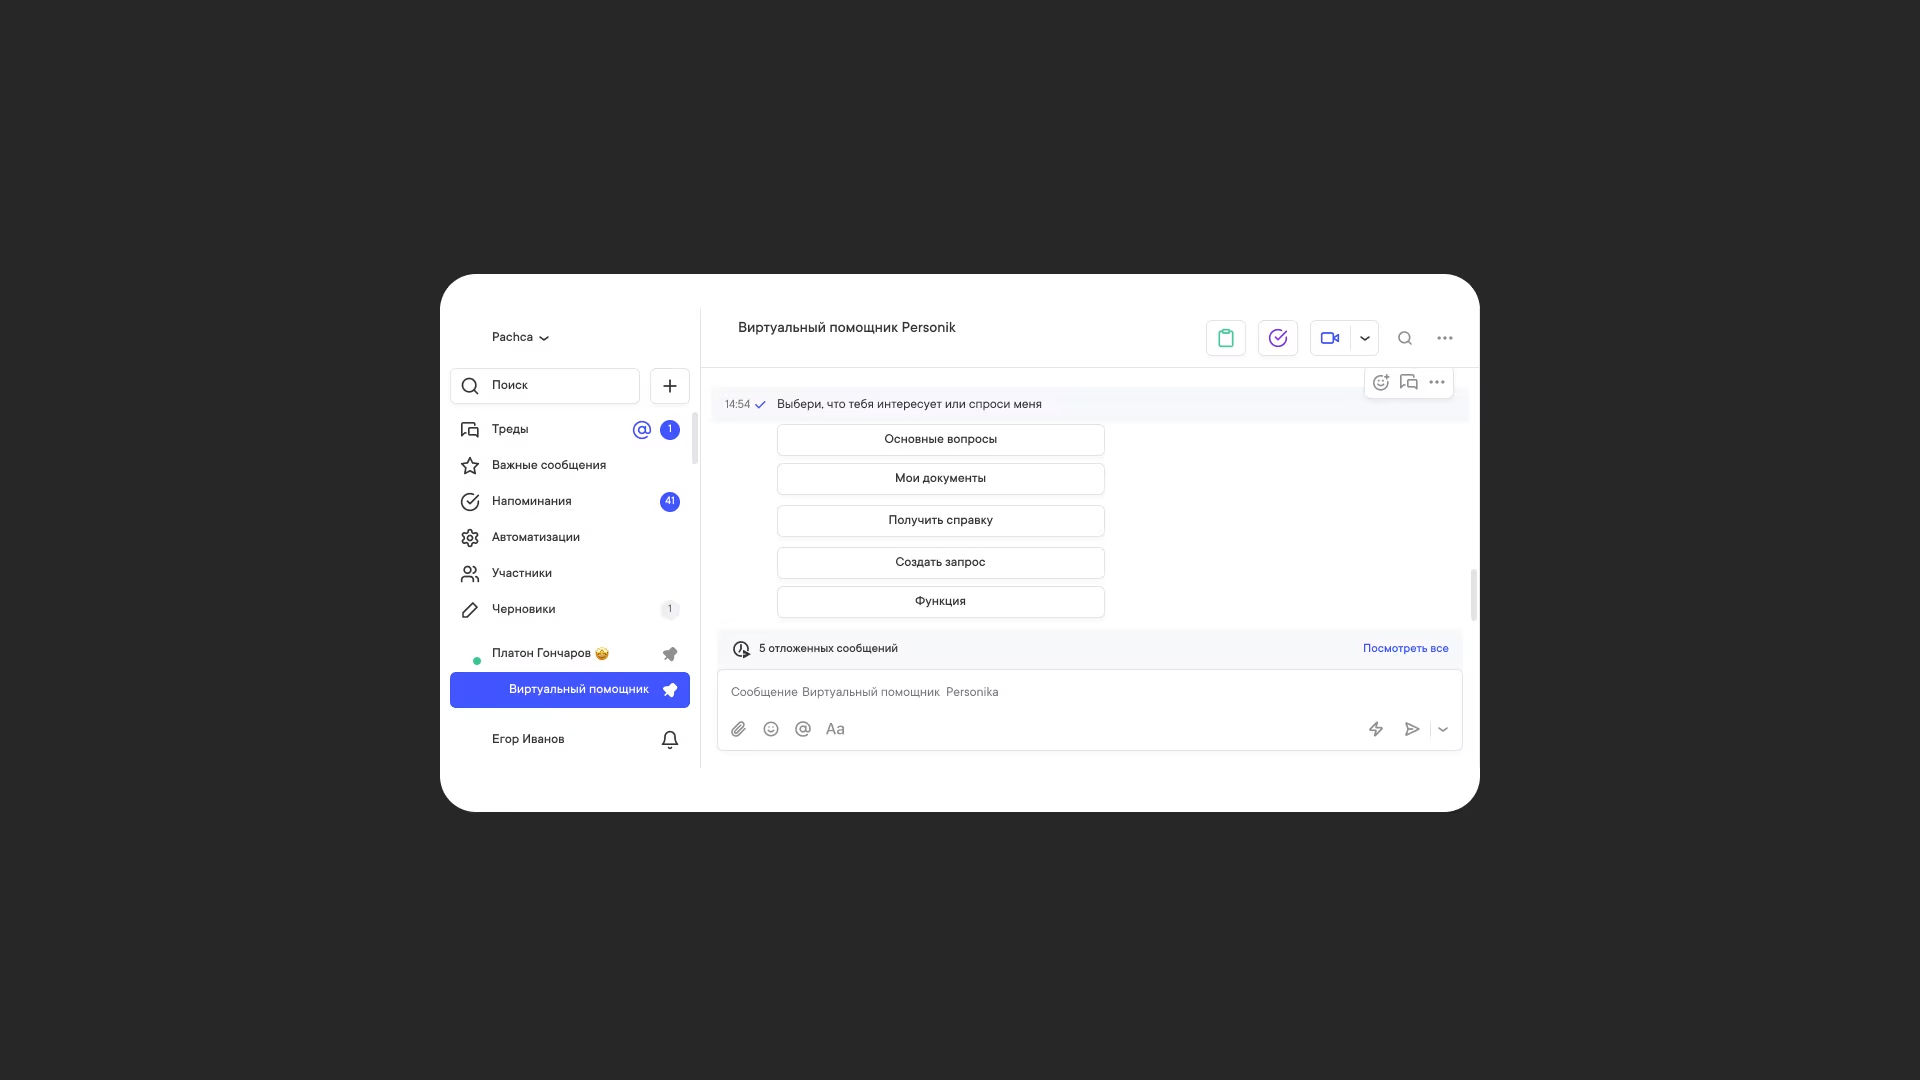
Done! Now employees can work with Personik right in Pachca. We've rounded up other ready-made connections with work tools in our integrations overview.