
Albato integration
Integrate Pachca with Albato: connect hundreds of services through a single no-code connector
Albato is a platform that helps you connect different apps to each other (CRMs, analytics tools, team chat apps and more). With Albato and Pachca, you can connect more than 250 services and get notifications right in your Pachca chats and channels.
Notifications arrive as messages from the person who set up the integration. There's no limit on the number of integrations per chat.
Note:
- For now, Pachca can only handle incoming events. This means you can't send information from Pachca to other services.
- Albato is a paid service. You can find its pricing on the Albato website. The first 14 days are free.
What services you can connect with Albato
With Albato, you can connect more than 250 services to Pachca.
For example, you can connect your CRM (Bitrix24, AmoCRM, SBIS CRM) to Pachca and get notifications about sales or subscriptions. Or set up notifications from your project management tool (Jira, Trello) to keep track of what's changing there.
Other services you can connect include MoySklad, CloudPayments, YClients and more. You'll see the full list when you create a workflow in your Albato account (more on this below).
What notifications you'll get in Pachca
With Albato, you can set up text notifications about different events. Which events are available depends on the service. For example, with the Bitrix24 integration, Pachca can notify you about deal updates, new invoices, new leads and more. With the Telegram integration, you can get notified about incoming messages or new group members.
You can also customize the text of the message sent to the chat. For example, when you get a message in Telegram, you can forward just its text to Pachca, or add a note (like "New message in Telegram") and include the sender's username.
Who can create integrations with Albato
Only administrators can create integrations with Albato.
How to set up an integration with Albato
1. Sign up for Albato
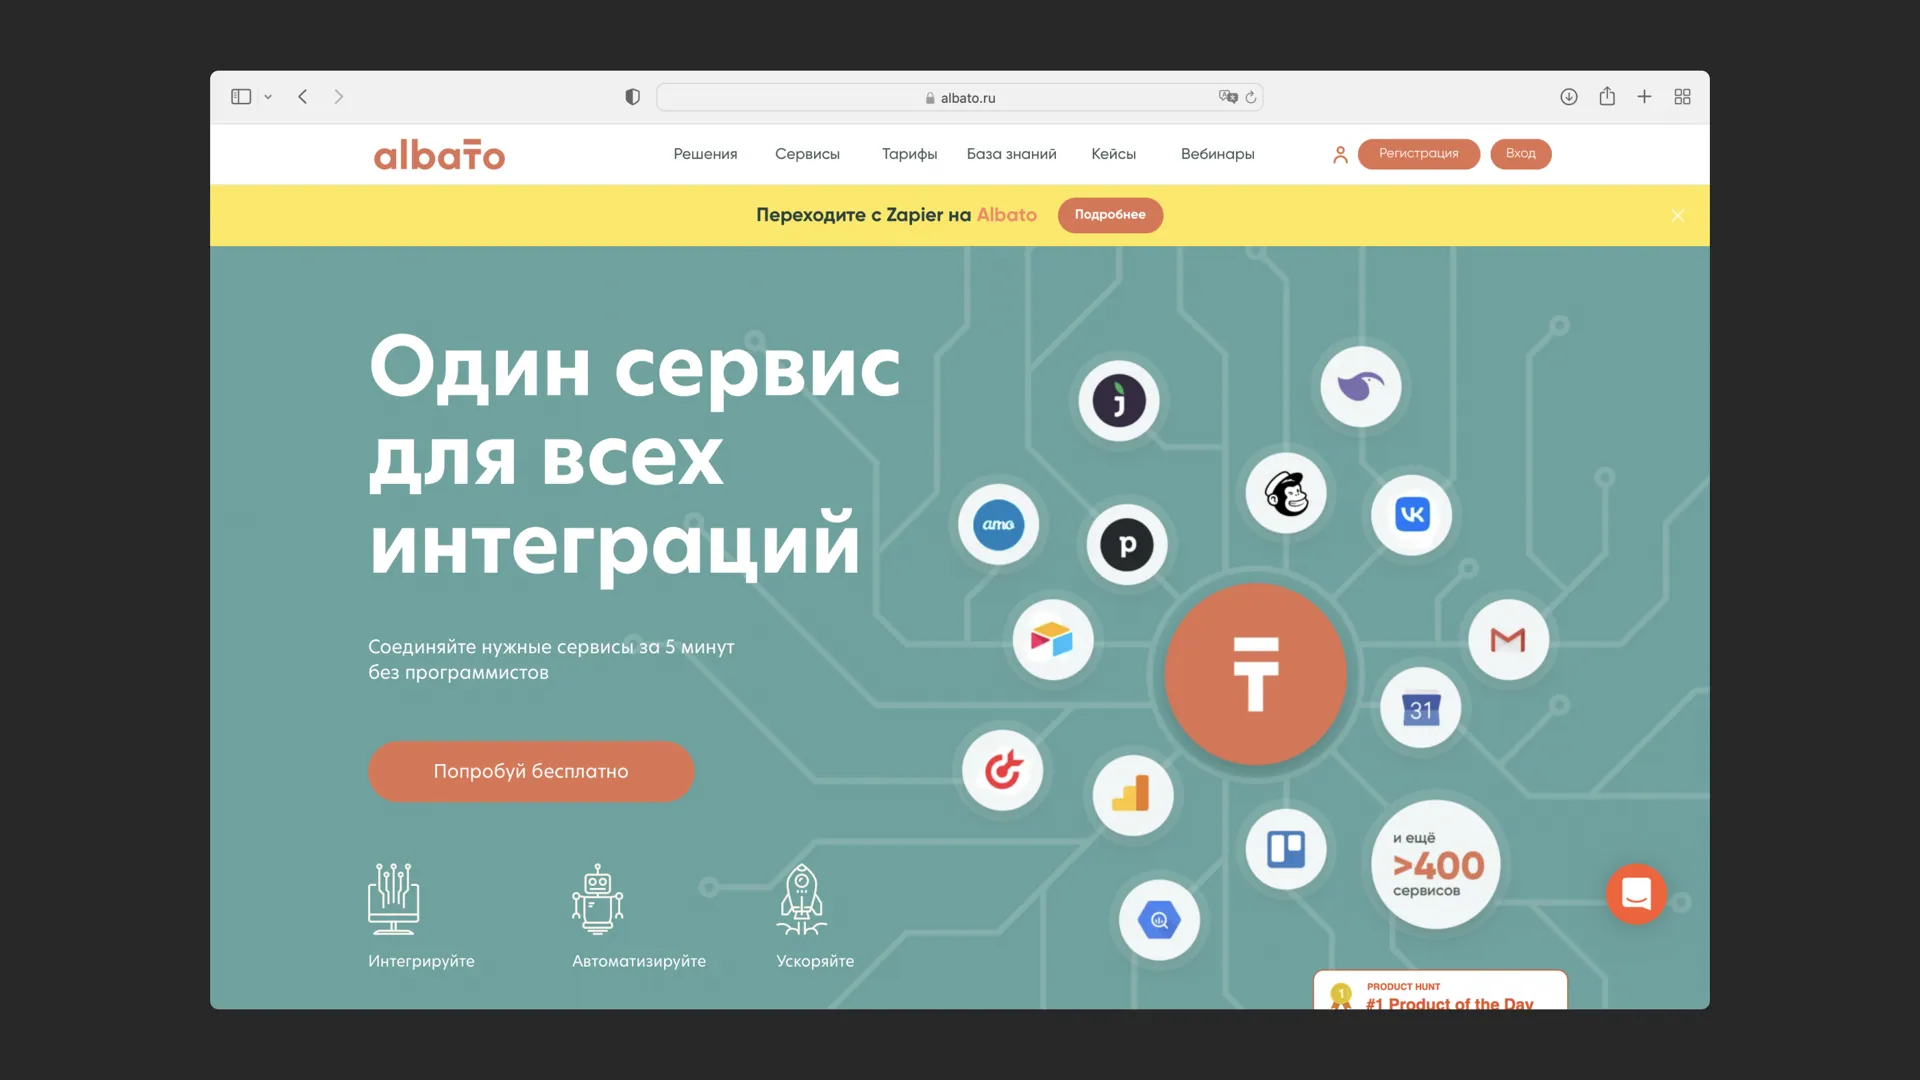
- Go to the Albato website and click Sign up in the top-right corner
- Enter your details and click Sign up
- Check your email for a confirmation code
- Enter the code
2. Connect Pachca to Albato
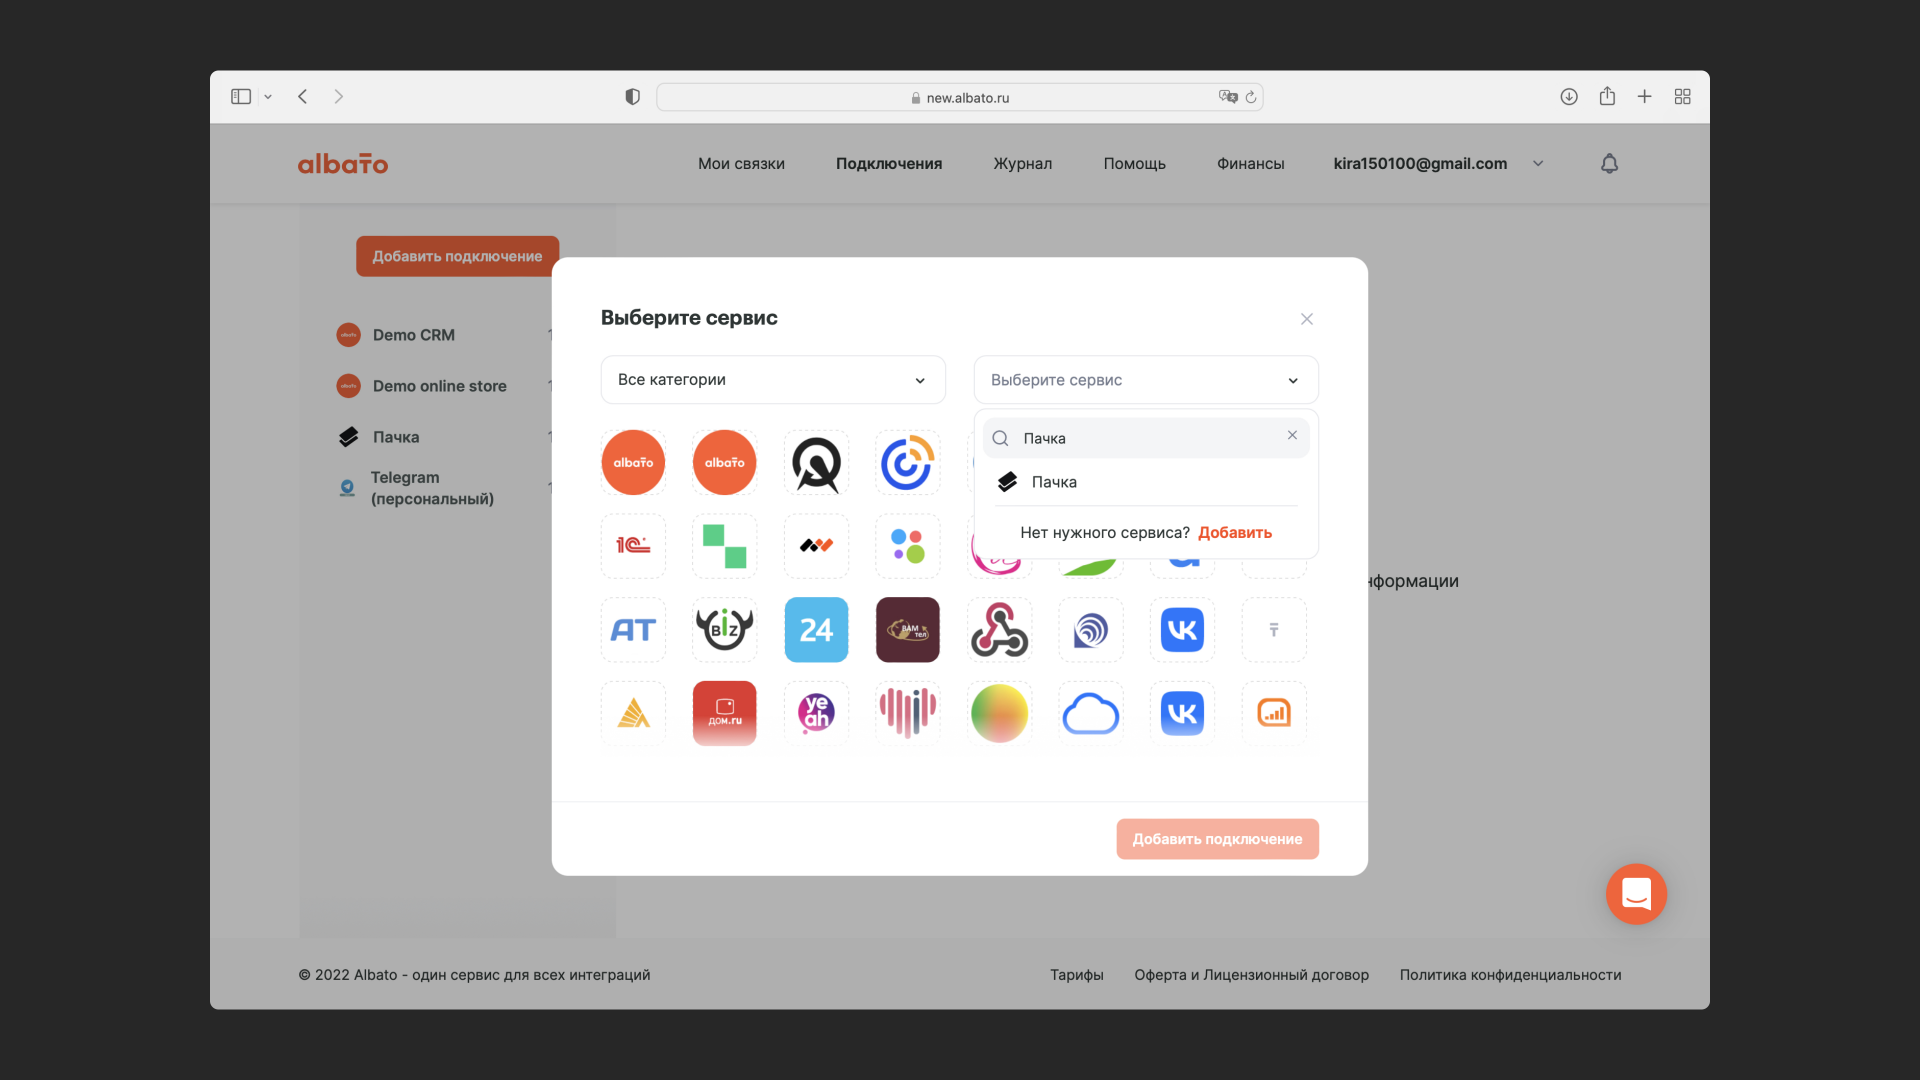
- Log in to your Pachca account in the browser you'll use to set up the integration
- Go back to the Albato website and open Connections in your account
- Click Add connection in the top-left corner
- Select Pachca from the list of services
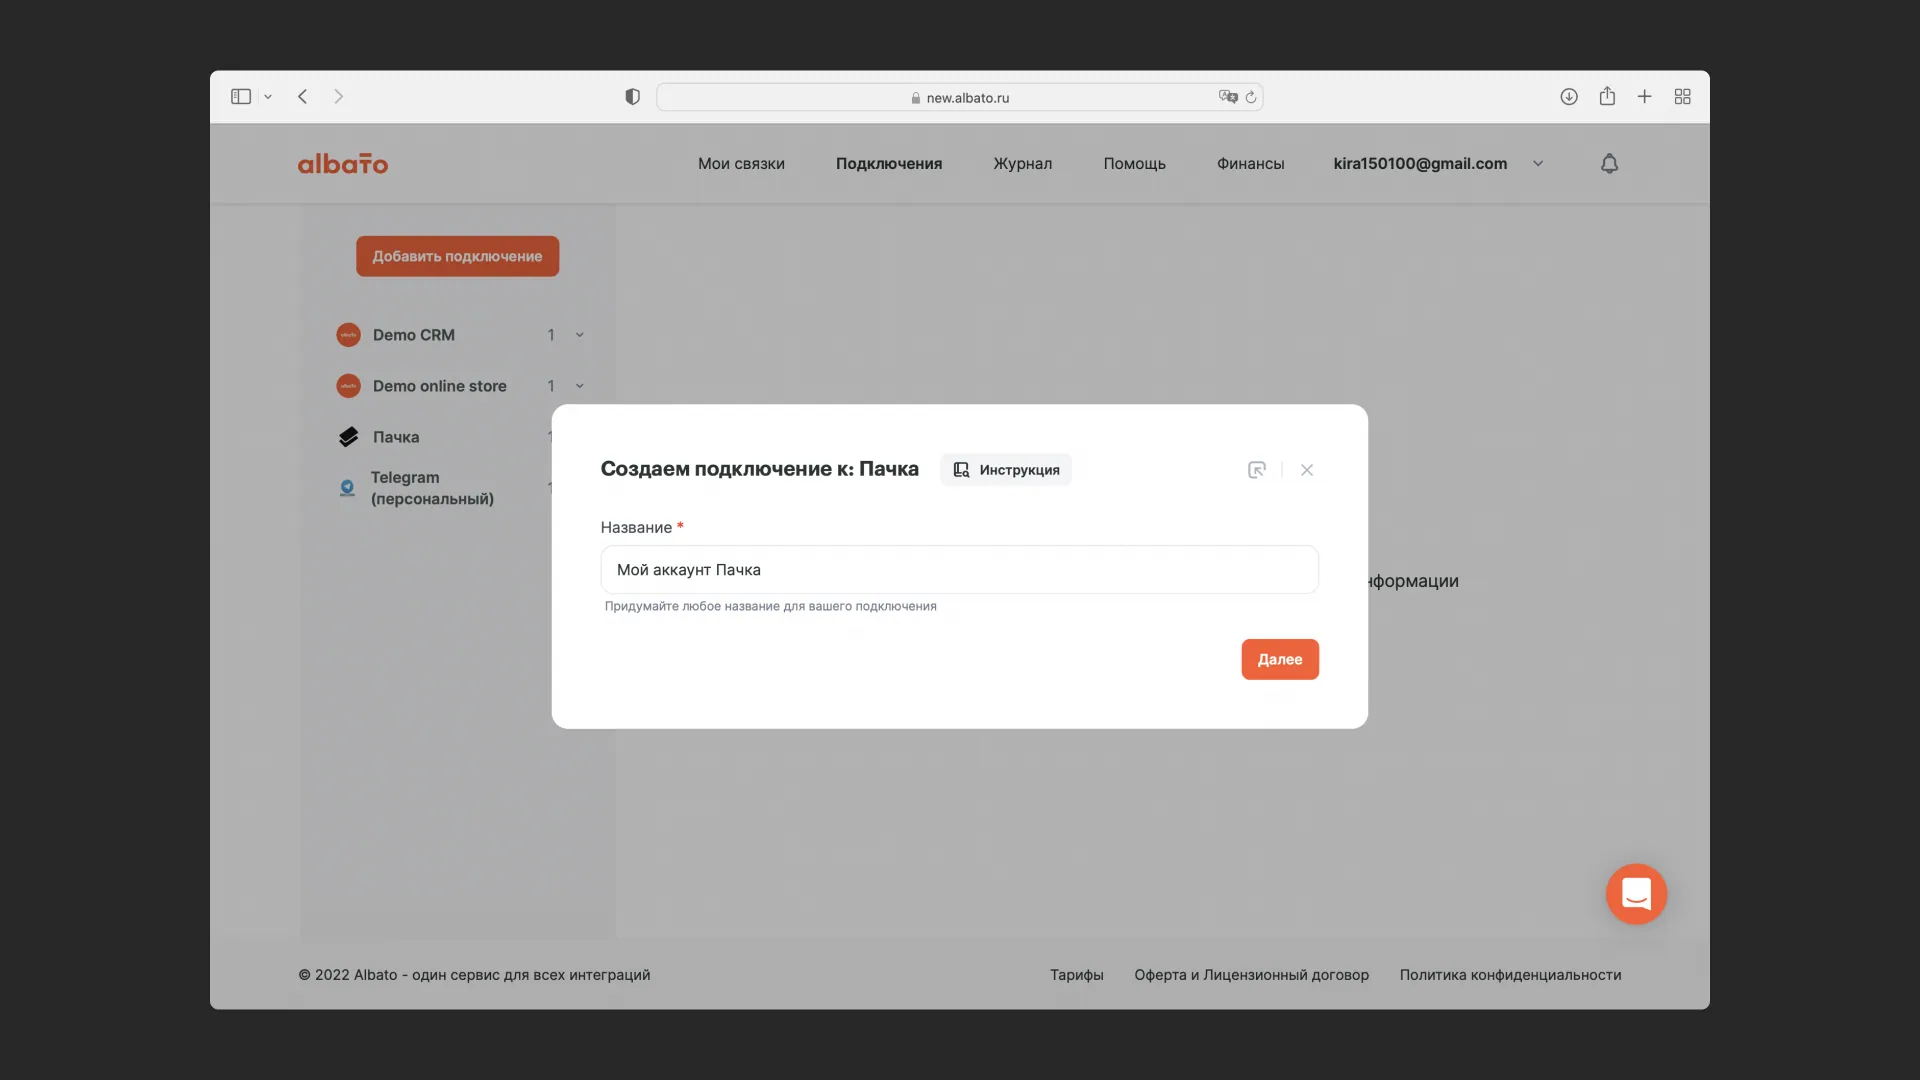
- Name the connection or keep the default name, then click Next
- Click Grant Albato access
- In the window that opens, click Continue
3. Connect the service you want to send data from
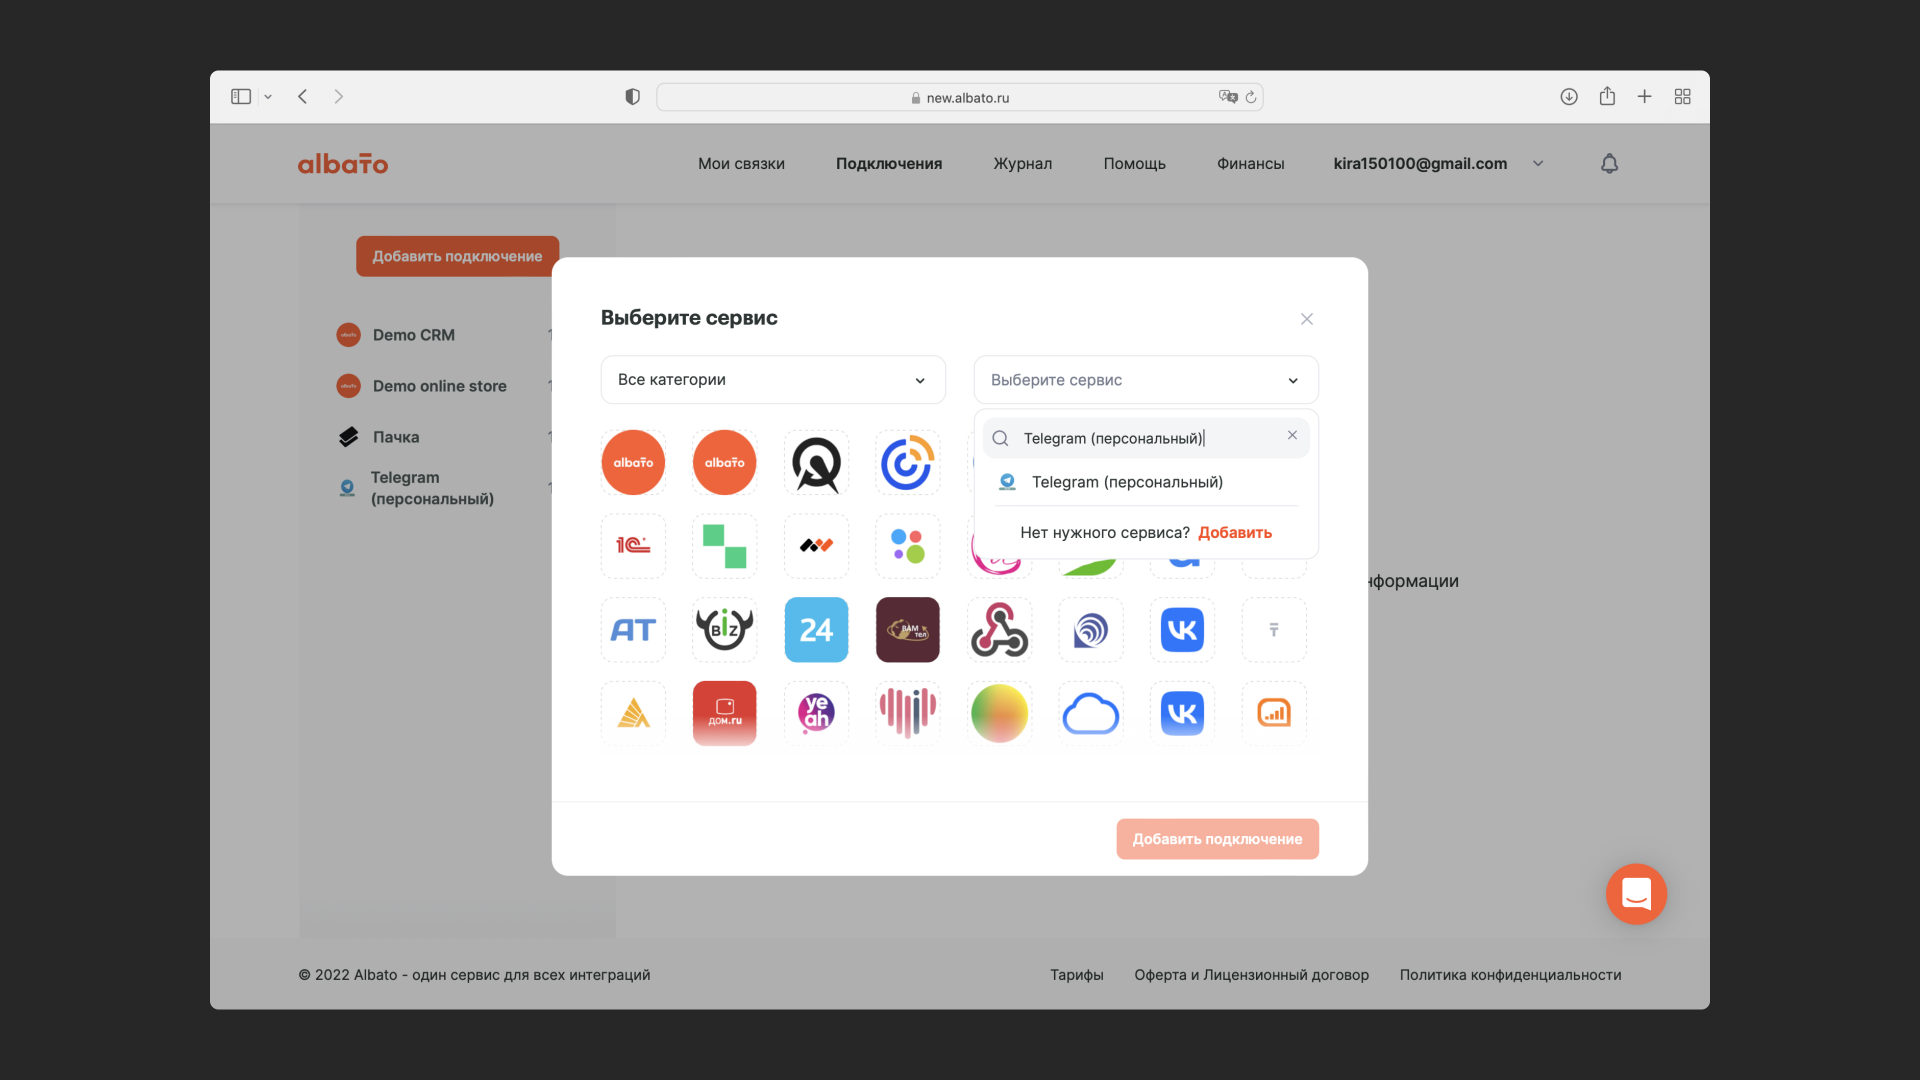
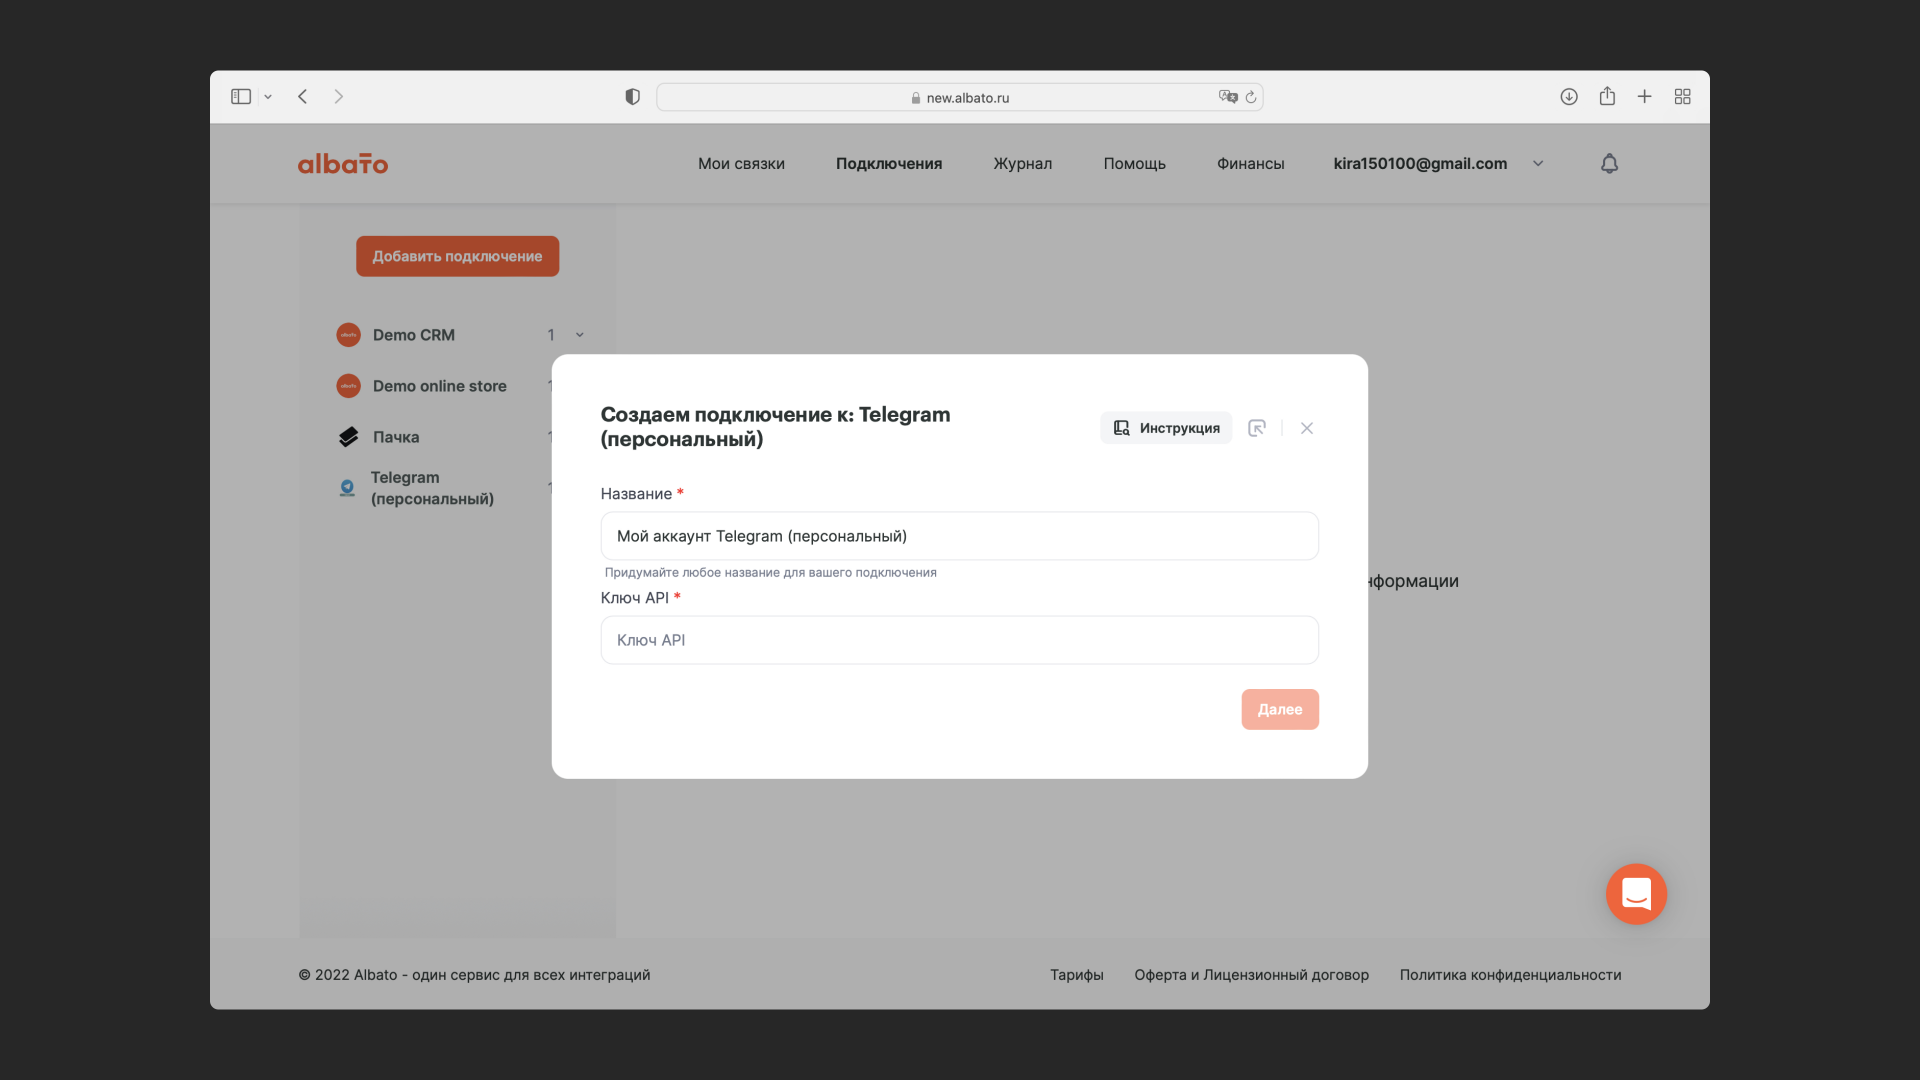
- In your account, open Connections and click Add connection
- Select the service you want to integrate with Pachca and click Grant access
- Name the connection or keep the default name, enter the required details and click Next
Each service needs different details to connect. Albato's knowledge base has guides for connecting the most popular services.
4. Add a trigger to create a workflow
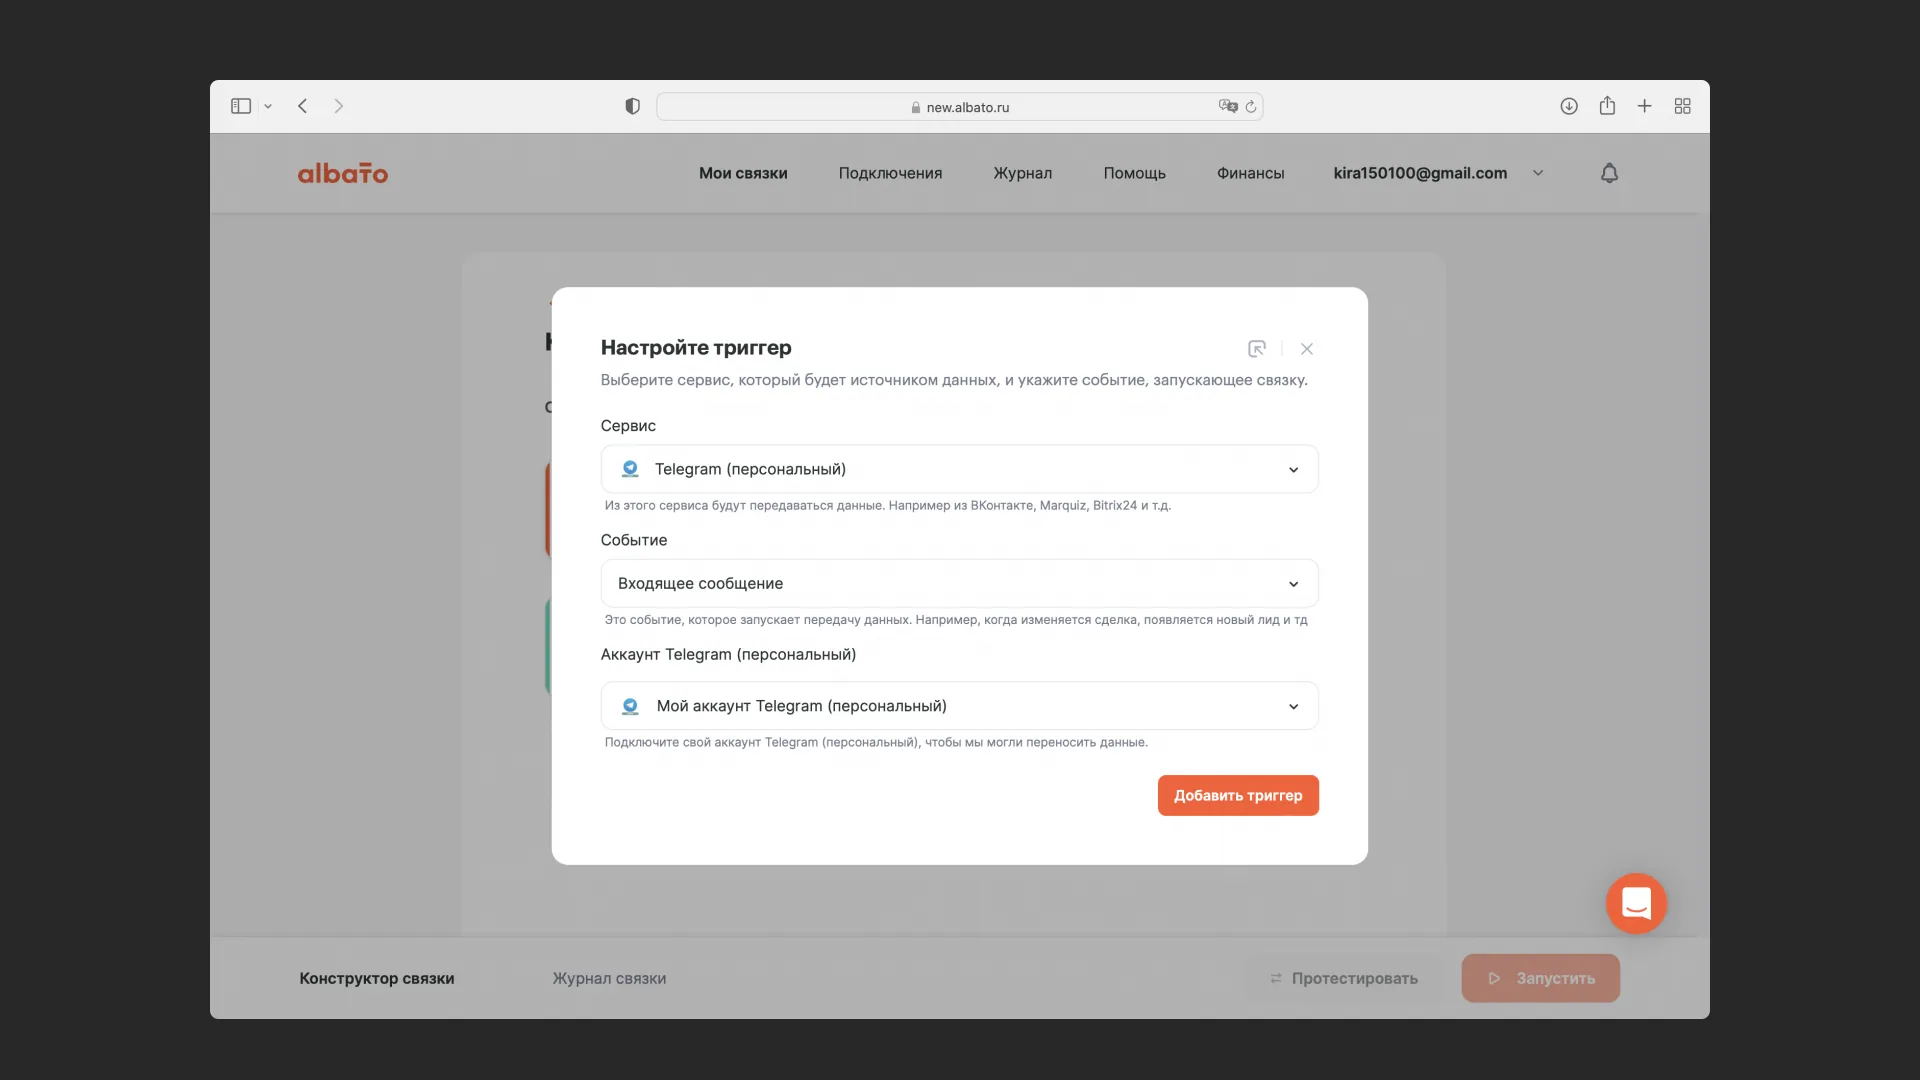
- In your account, go to My workflows and click Create new workflow in the top-left corner
- Click Add a trigger that will start the workflow
- Select the service that will send data to Pachca
- Select the event that will trigger the data transfer
- Select the connected account
- Click Add trigger
- If needed, adjust additional settings (they differ for each service)
Note: In Albato, you can add conditions that stop or continue the workflow (that is, when data should be sent and when it shouldn't). You can do this with the incoming data filter, which you'll find inside the trigger button. Learn more in Albato's article.
5. Add an action that runs after the workflow starts
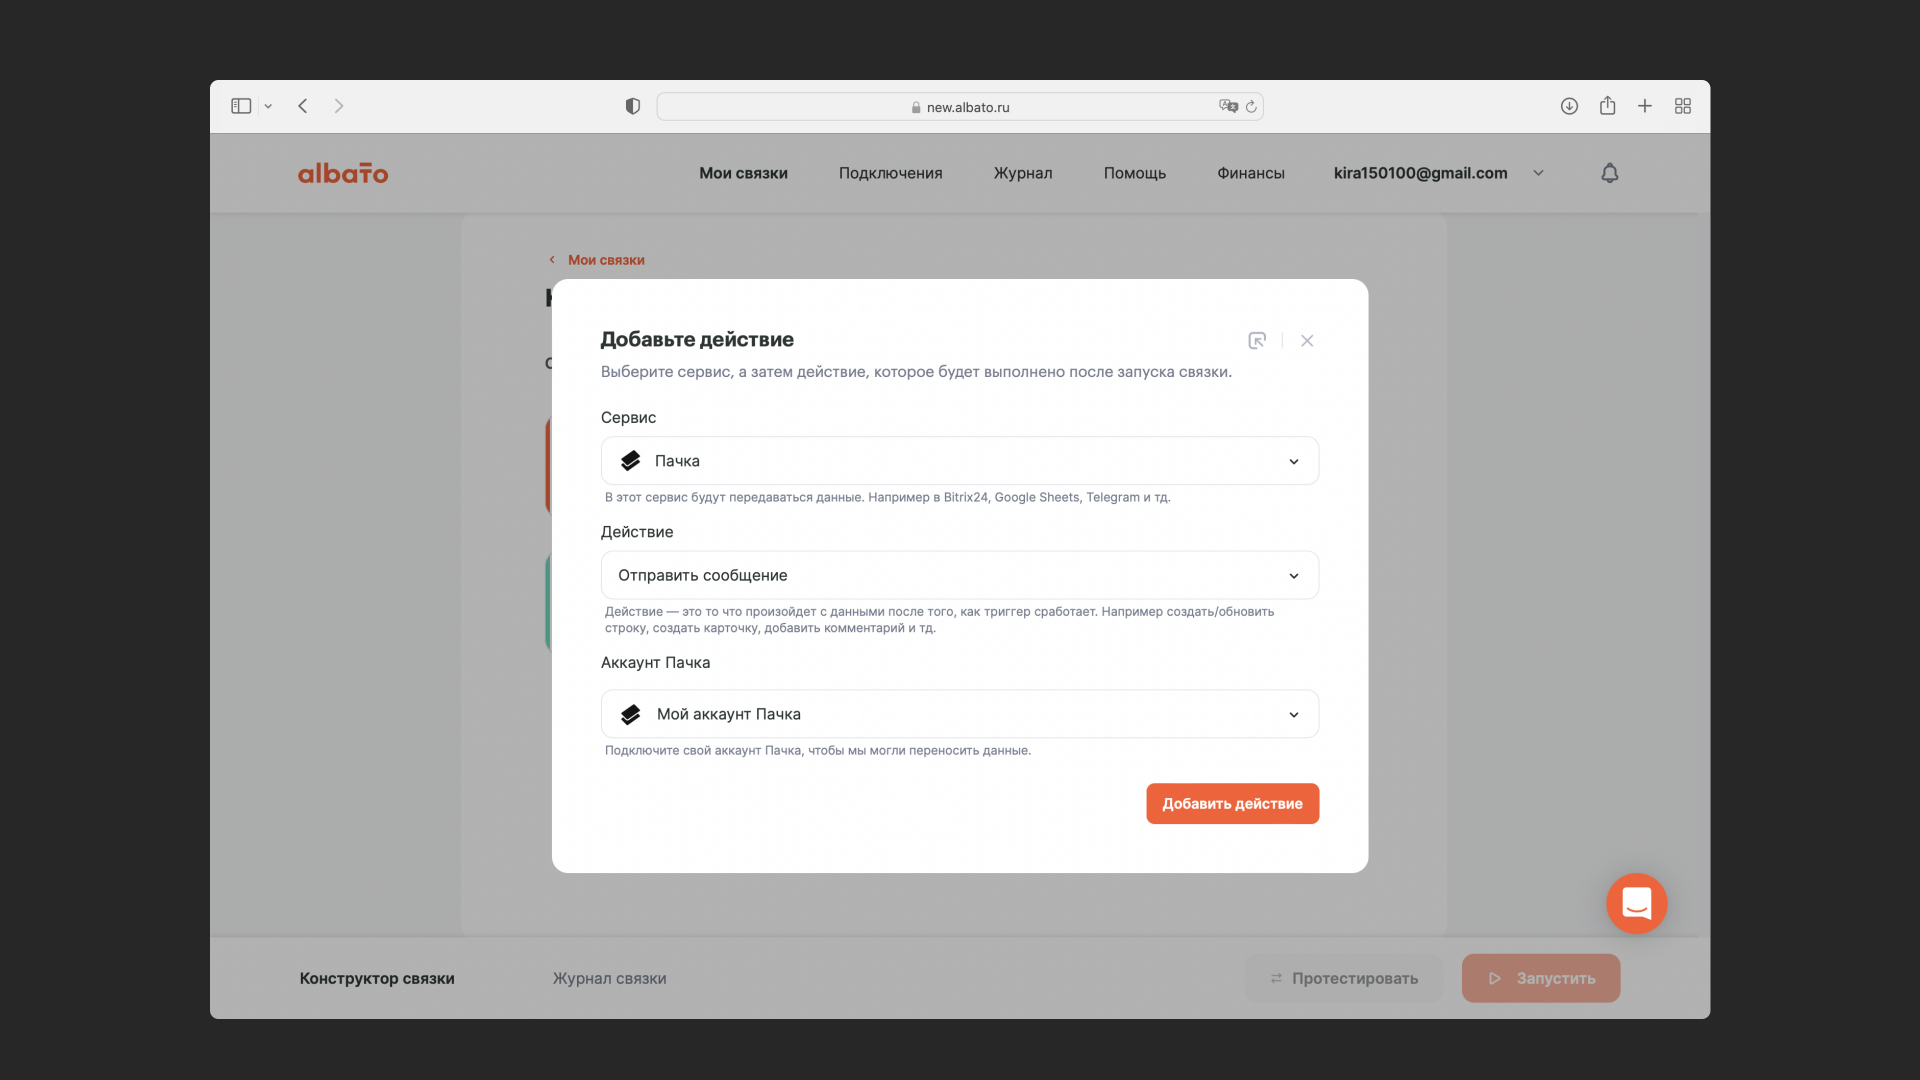
- Click Add an action that will run after the workflow starts
- Select Pachca under Service
- Select Send message under Action
- Select the connected account
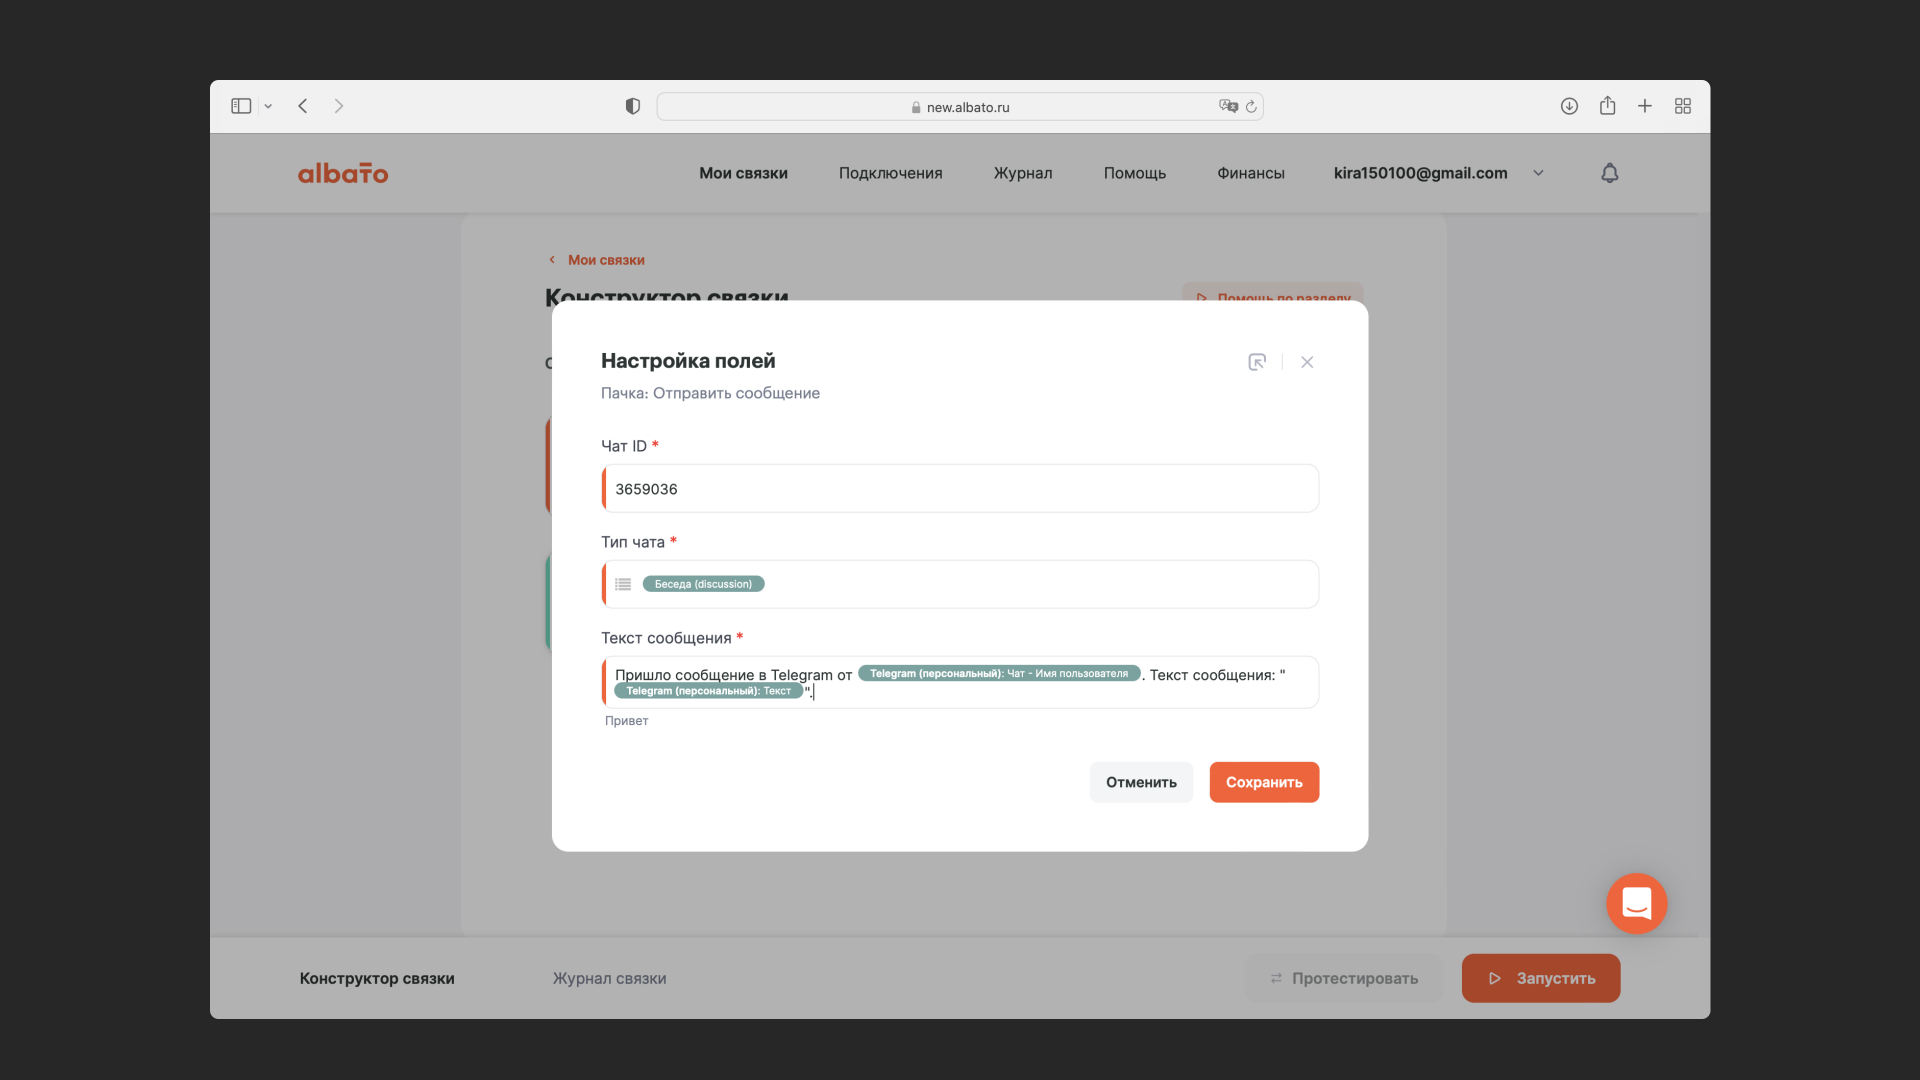
- In the window that opens, enter the ID of the chat or channel where you want to send notifications. The easiest way to find the chat or channel ID is in the address bar of Pachca's web version. It's a seven-digit number that comes after "chats/"
- Under Chat type, select Group chat
- Compose the message text from the data you want to send to Pachca, plus any extra text if you like
- Click Save
6. Start the workflow
All that's left is to start the workflow by clicking the button in the bottom-right corner. You can see how your active workflows are running in the workflow log in your account.