Chatbots with webhooks and API
How to set up incoming webhooks in Pachca to get notifications from your work tools in chats
Setup, payload format and examples on the developer portal
This integration lets you connect your work tools to Pachca and get notifications right in your Pachca chats.
Here's how it works: you create a bot in Pachca that receives information from the service you've connected. The bot can also respond to commands or to any messages in a chat, including in threads, and send a response back to the connected service. You can add the bot to any chat, and it'll post event messages there.
Which services you can connect with webhooks
If the service you use supports outgoing webhooks, you can easily connect it to Pachca. For example, connect your CRM (Bitrix24, 1-С, AmoCRM) to get notifications about sales or subscriptions. Or get notifications from your project management tool (Jira, Confluence) to keep track of what changes there.
There's a lot you can do here, and we don't limit your use cases in any way.
Events the bot shows
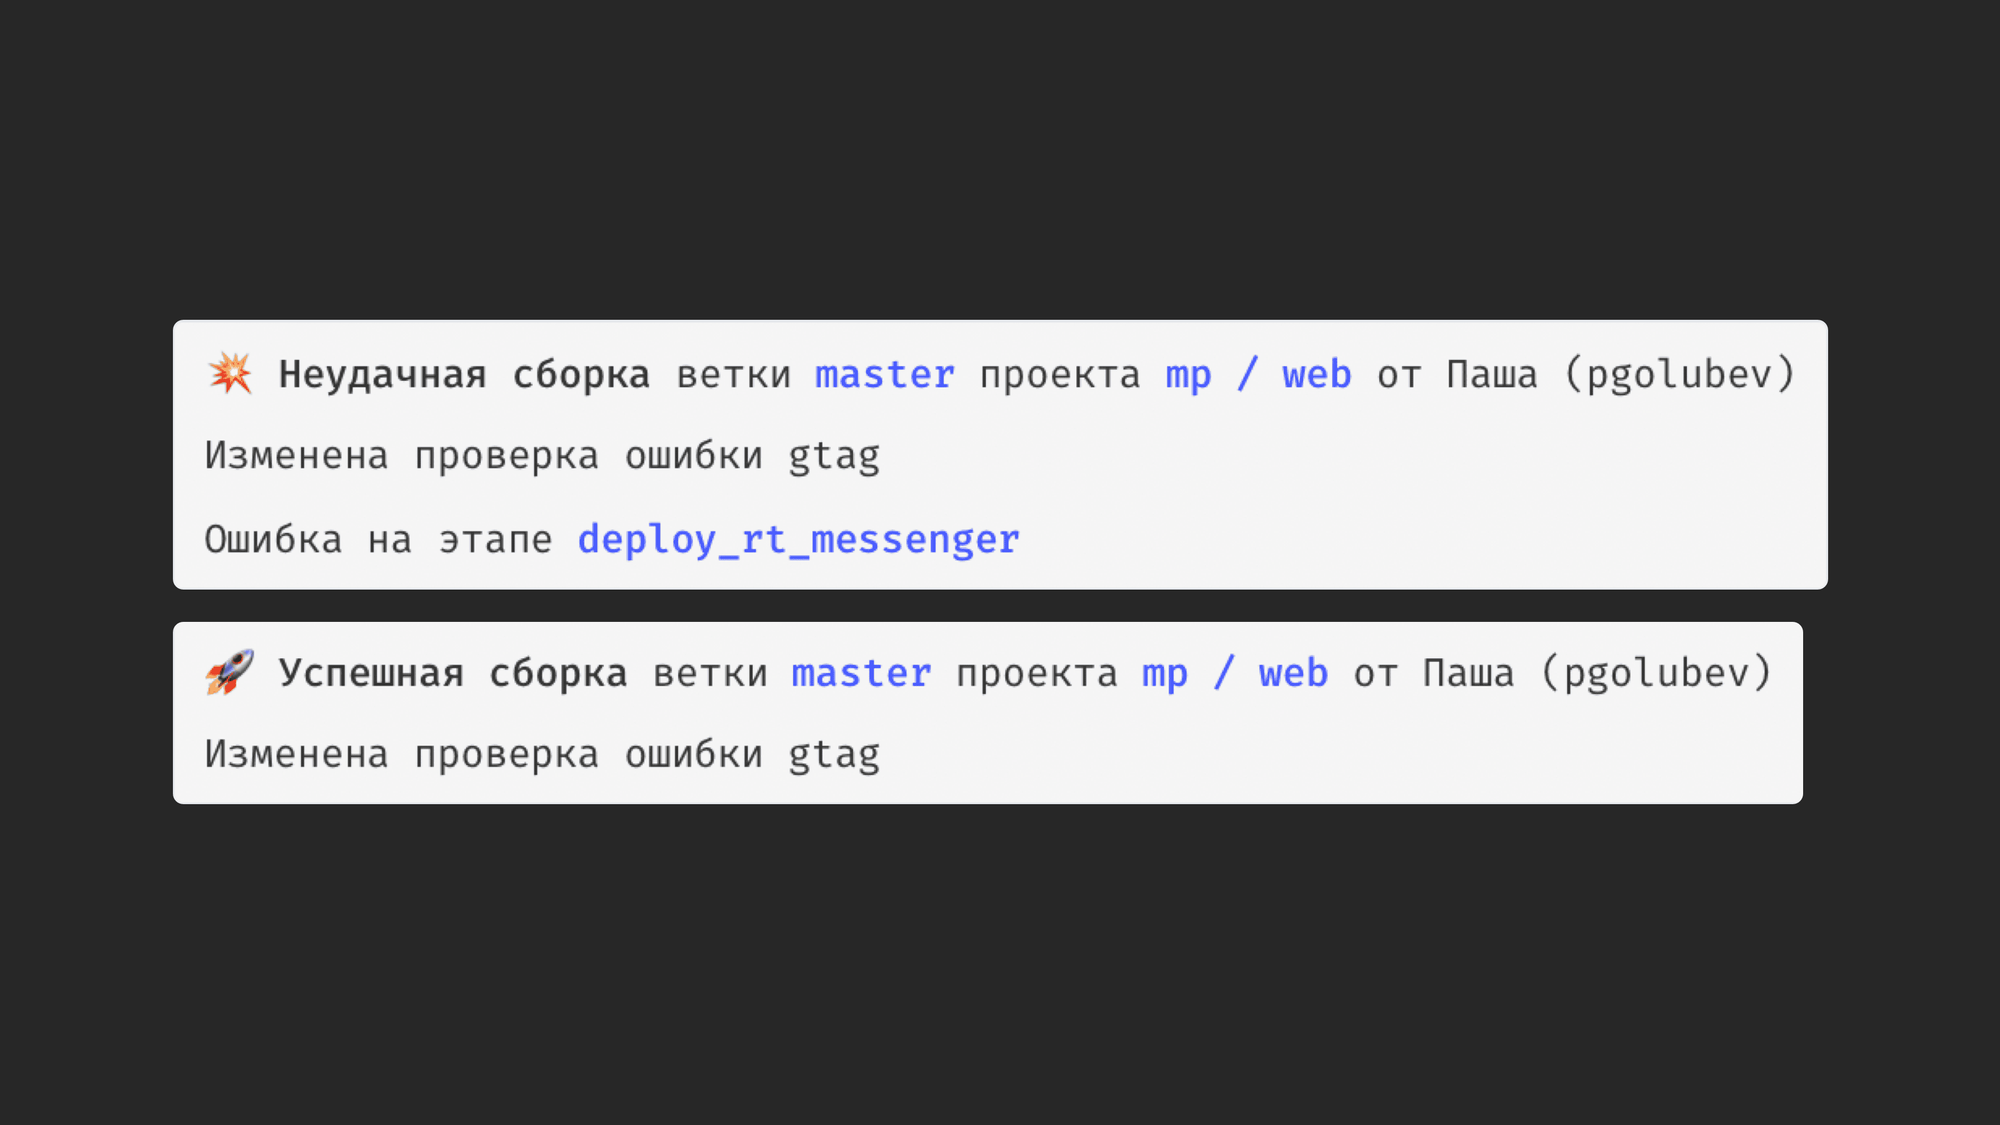
These can be text notifications, images or messages about events. For example, with the Gitlab integration, users get notified when someone changes project settings.
Who can create webhook integrations
Any employee can create an integration. They can keep it private or let their teammates use it. You do this in the settings, which we cover below.
Only a chat admin or the chat creator can add a bot to a chat or remove it. So if you want to create an integration just for yourself, create a new chat and add the integration there.
How to set up a chatbot with webhooks and API
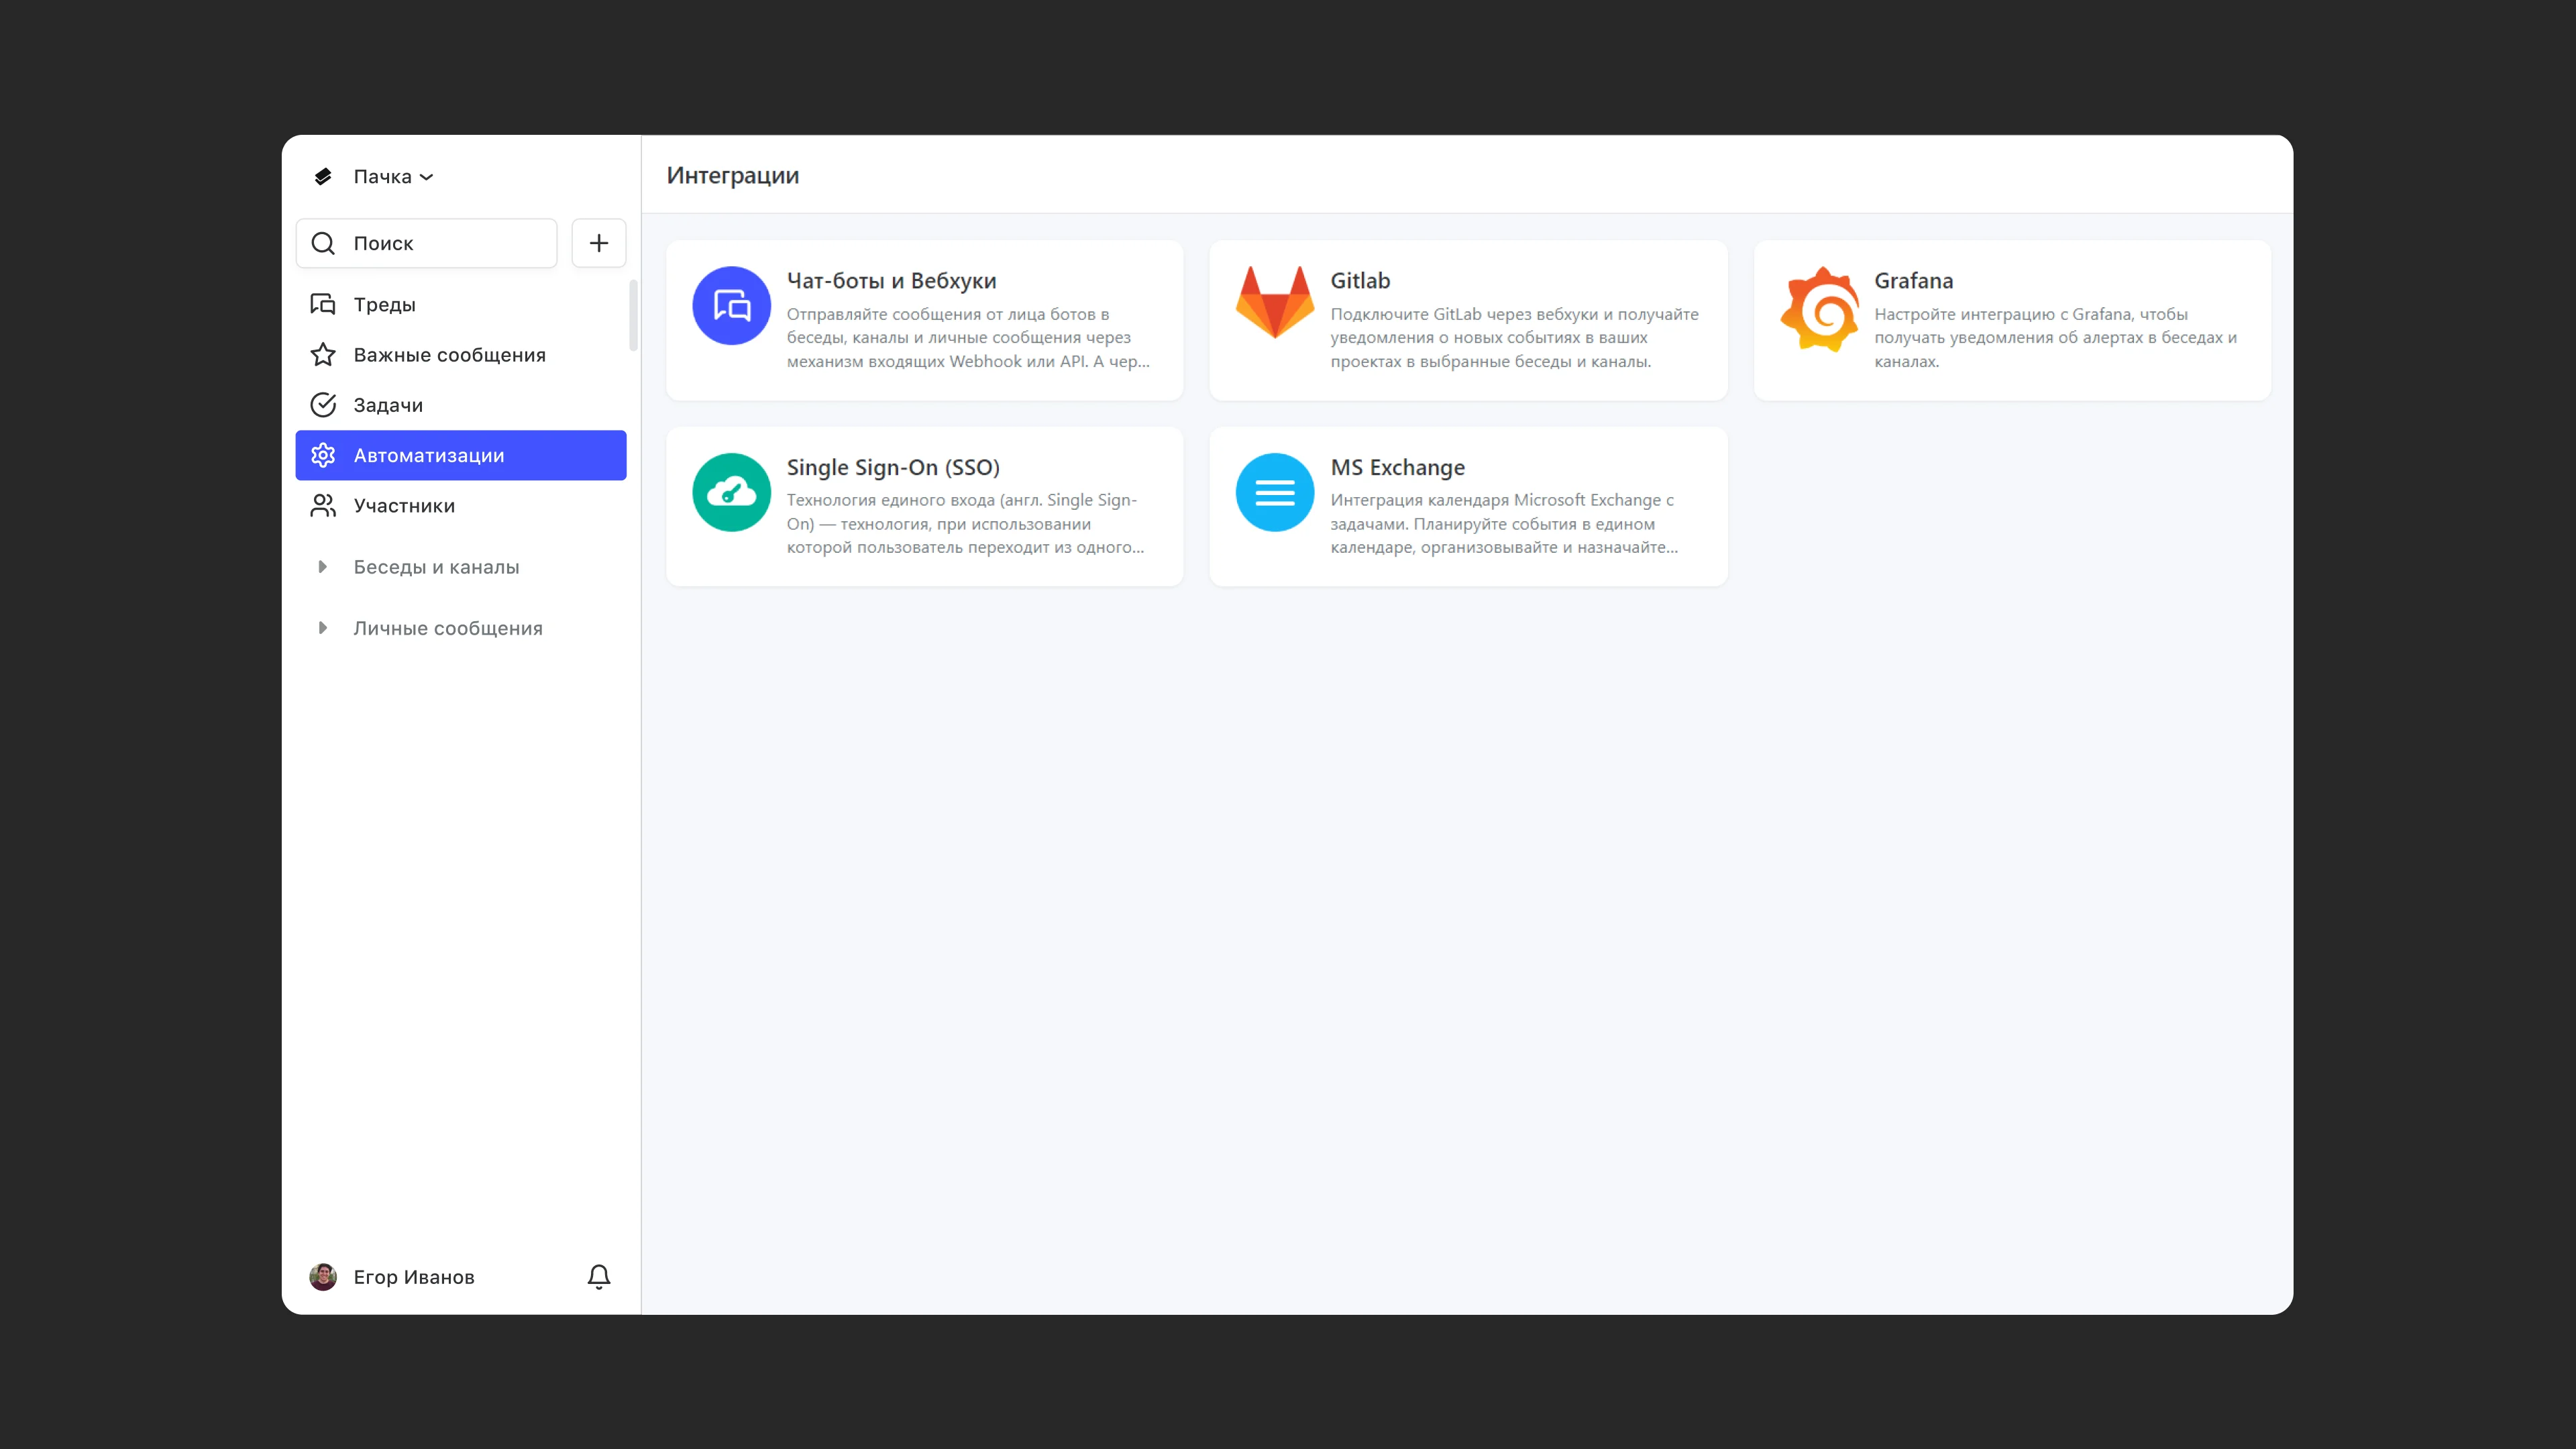
1. Create a new webhook integration:
- Open Automations in the left sidebar
- Go to Integrations
- Find Webhook in the integrations gallery and click its card
- Click + to add a new integration
2. Set up the chatbot's main settings
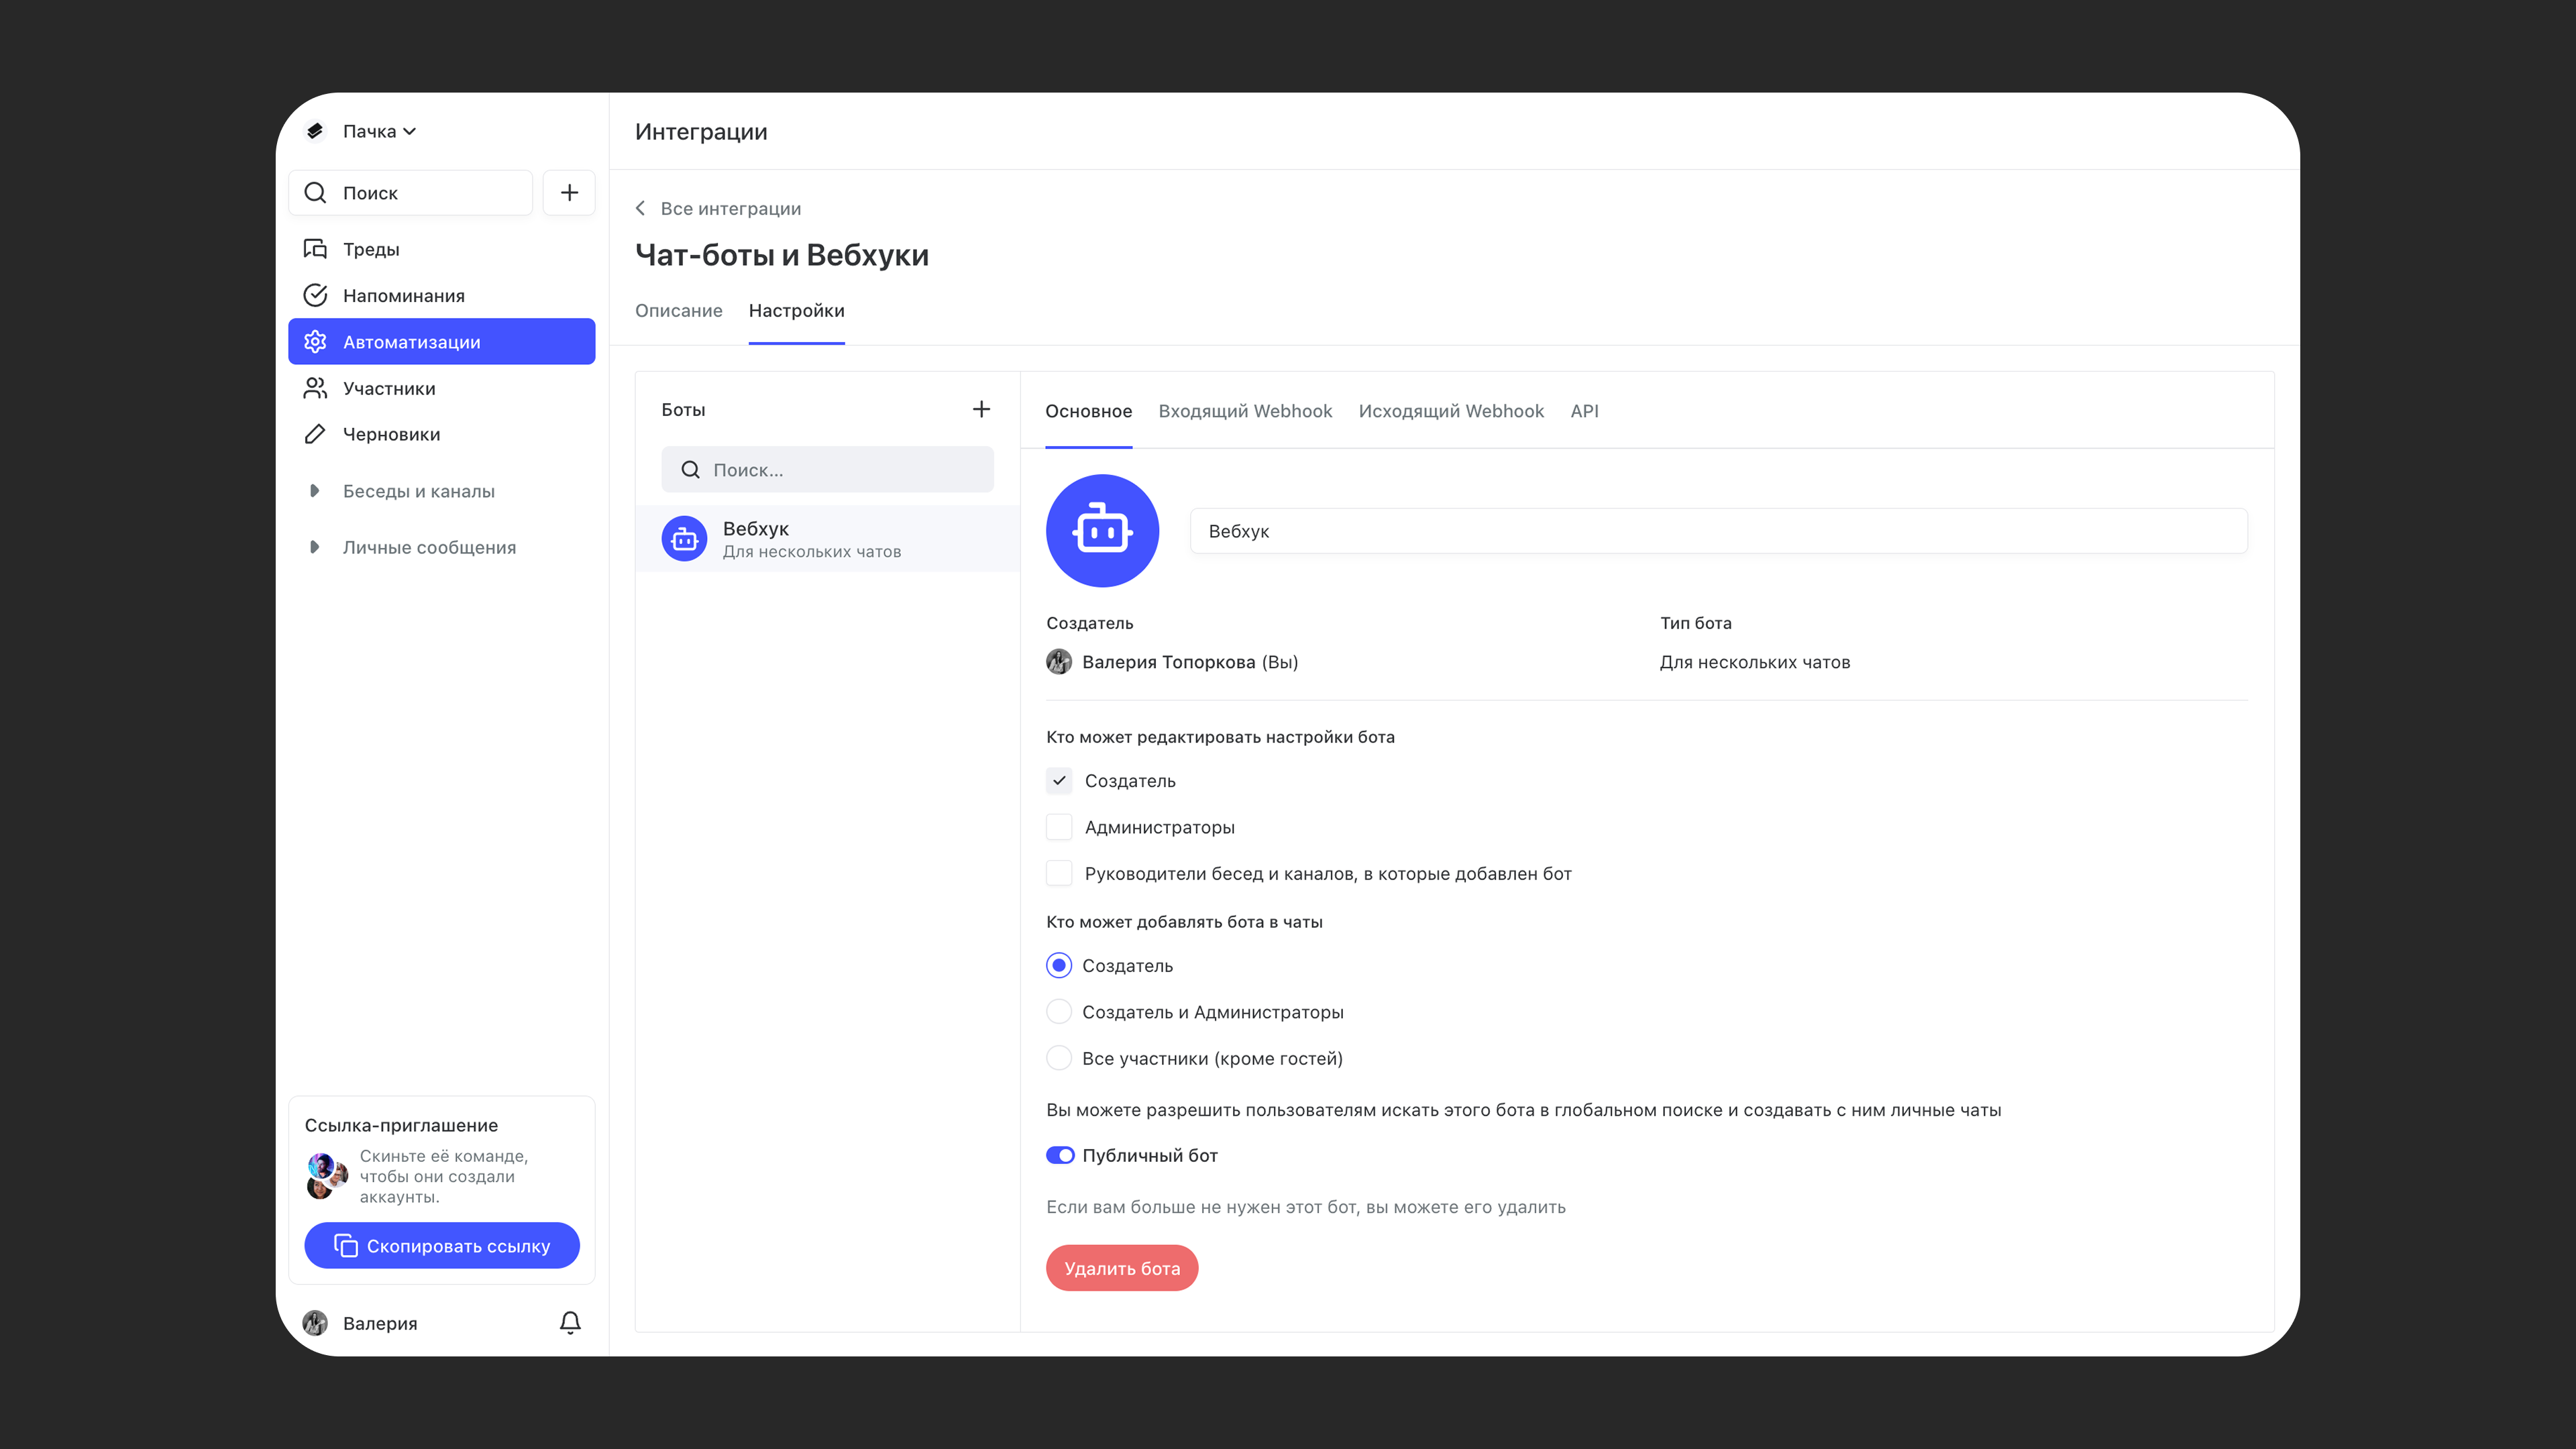
- Choose where the bot will be used: in one chat or in several.
- Name the bot and add the logo of the service you're connecting. They work like a username and profile picture: they make the bot easy to add to a chat and to recognize when it posts messages.
- Choose who can configure the bot. They'll see it in their integrations and can change its settings.
- Choose who can add your bot to chats. These people can add the bot to chats and get messages from it
- Choose whether the bot is public. Any workspace member can find a public bot in global search and message it directly. You can message a non-public bot if you're both in the same chat or channel: open its profile and click Message. If you have no chats in common, the conversation starts only when the bot messages you first.
3. Set up the Incoming webhook section if you want to get notifications from the service
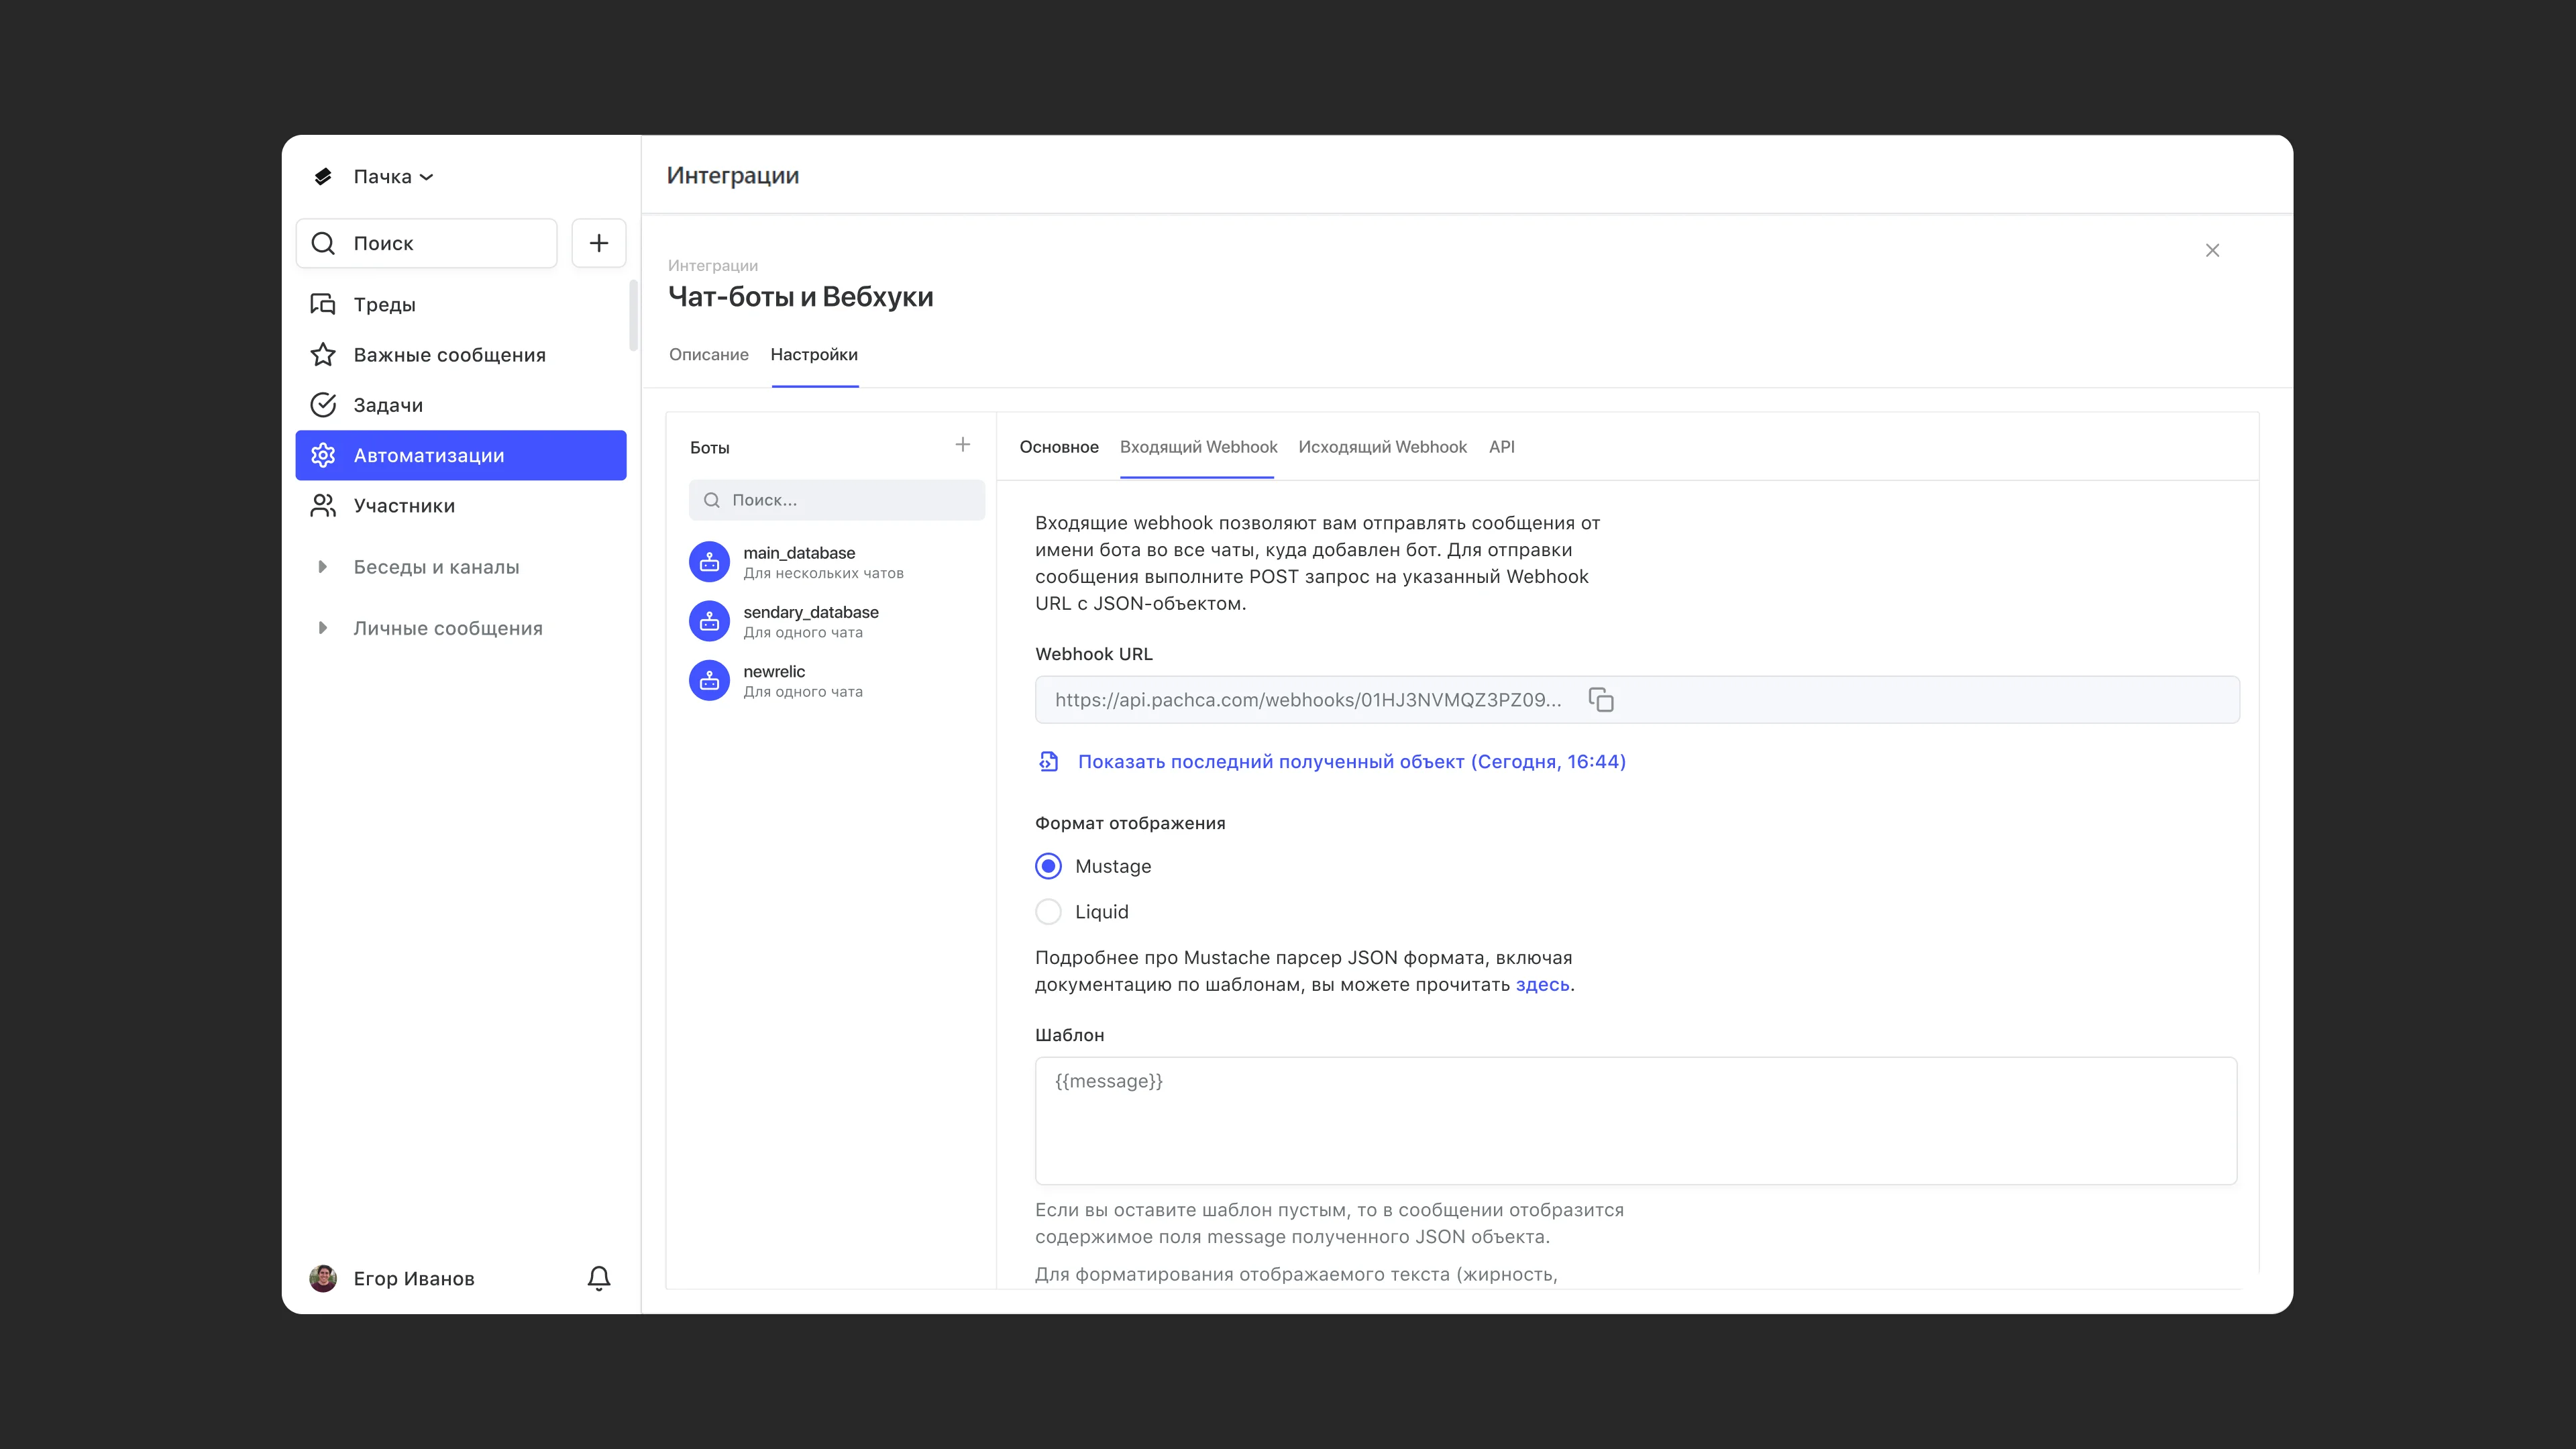
- Copy the Webhook URL. This is the Pachca address the external service sends information to.
- Set up requests to the Webhook URL or fill in the bot's message template. The request format is described in the incoming webhooks guide.
- Choose and fill in the display format. This is where you write the phrases the bot will say :) Open the webhook settings of the service you want to connect. They're usually on the service's website in a "for developers" section and describe the events you can send to Pachca.
- Choose the events you want to get in your Pachca chats. For example, an order amount in your CRM or a task deadline in your task tracker.
- Add these fields to the template along with the text the bot will send. See the image above for an example of a filled-in field. 💡 Learn more about display formats here.
4. Set up the Outgoing webhook section if you want the bot to respond to messages
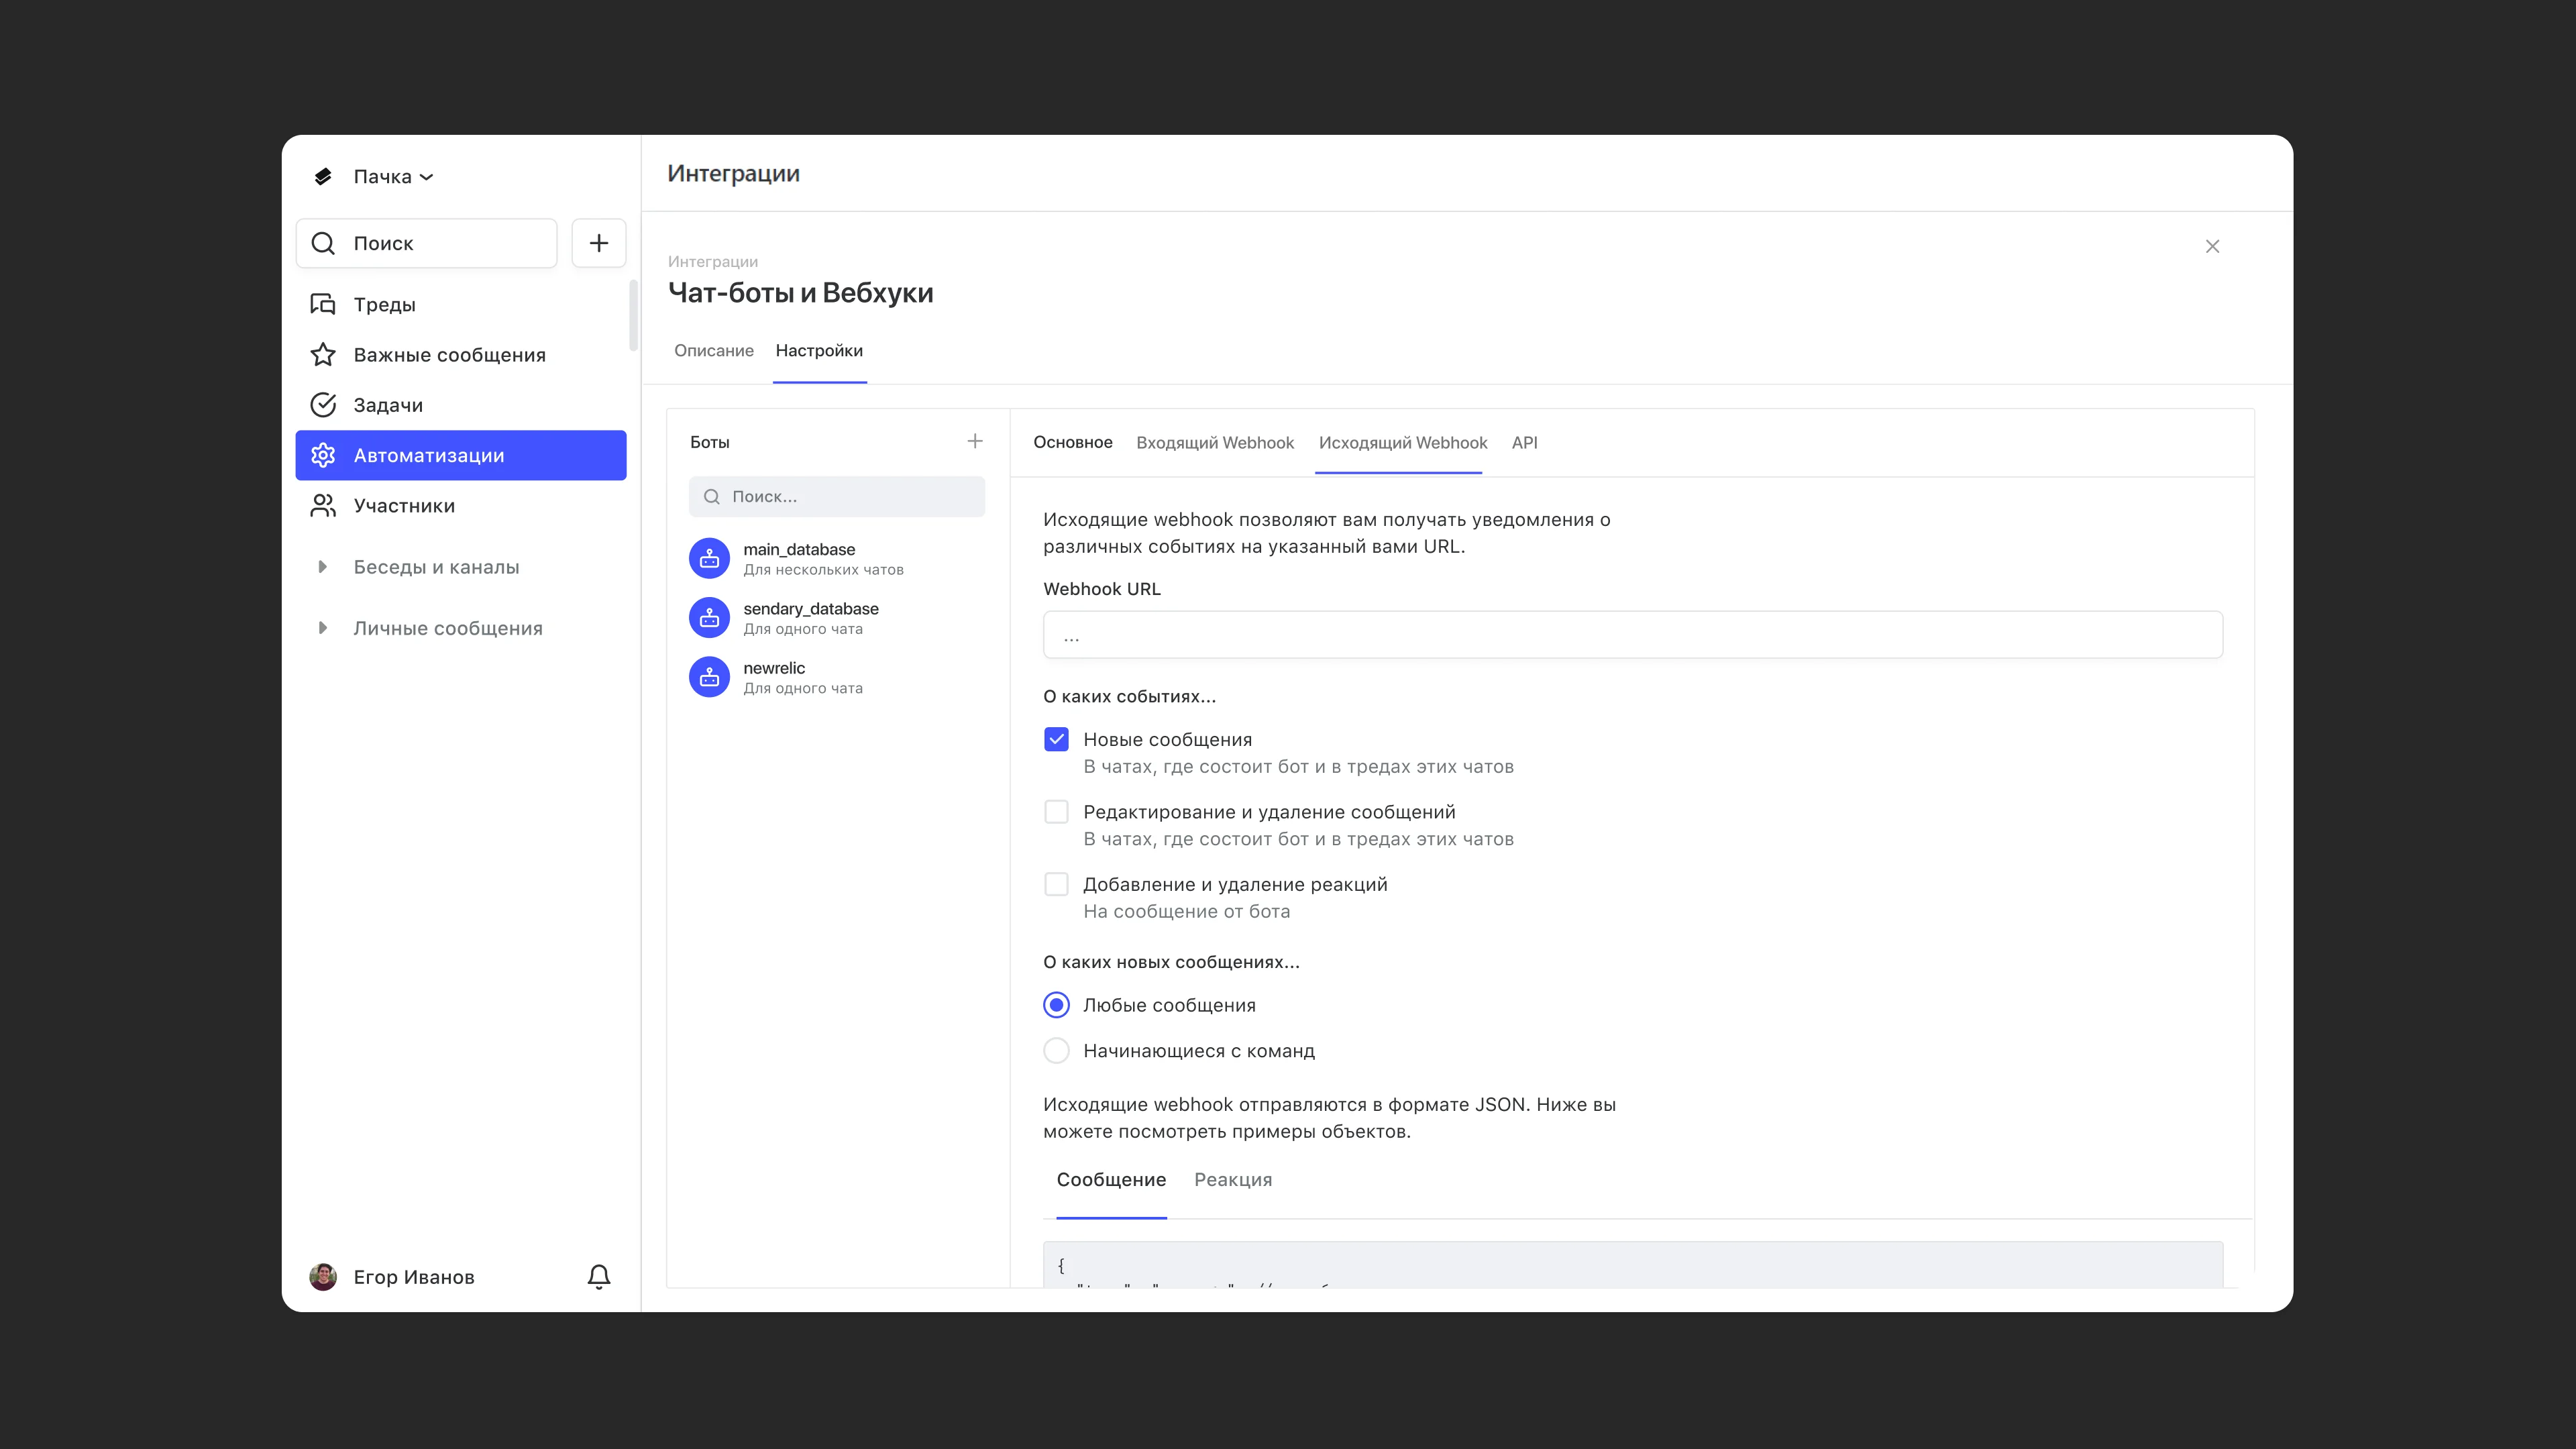
- Paste the service's URL (webhook) that Pachca will send messages to.
- Choose which messages you want to be notified about: any messages, including those in threads, or only messages that start with commands.
- Add commands if you chose messages that start with commands. They tell the bot that a message needs to be sent. Commands must start with / and be in English.
💡 If you want to extend what the bot can do, use the API section. It contains a token you can use to connect your program to the bot and send any messages on its behalf, add reactions, reply in threads and much more.
Learn more about what the API can do in our public API. Or use the description of our public API in OpenAPI format
5. Set up the integration in the service you want to connect
Copy the Webhook URL from the Incoming webhooks section in the bot settings.
Read the instructions for the service you want to connect. The setup may look different in each one, but there's usually a separate window where you paste the webhook from Pachca and set up the events or notifications that will be sent to Pachca.
💡 These instructions are usually on the service's website in a "for developers" section or something similar.
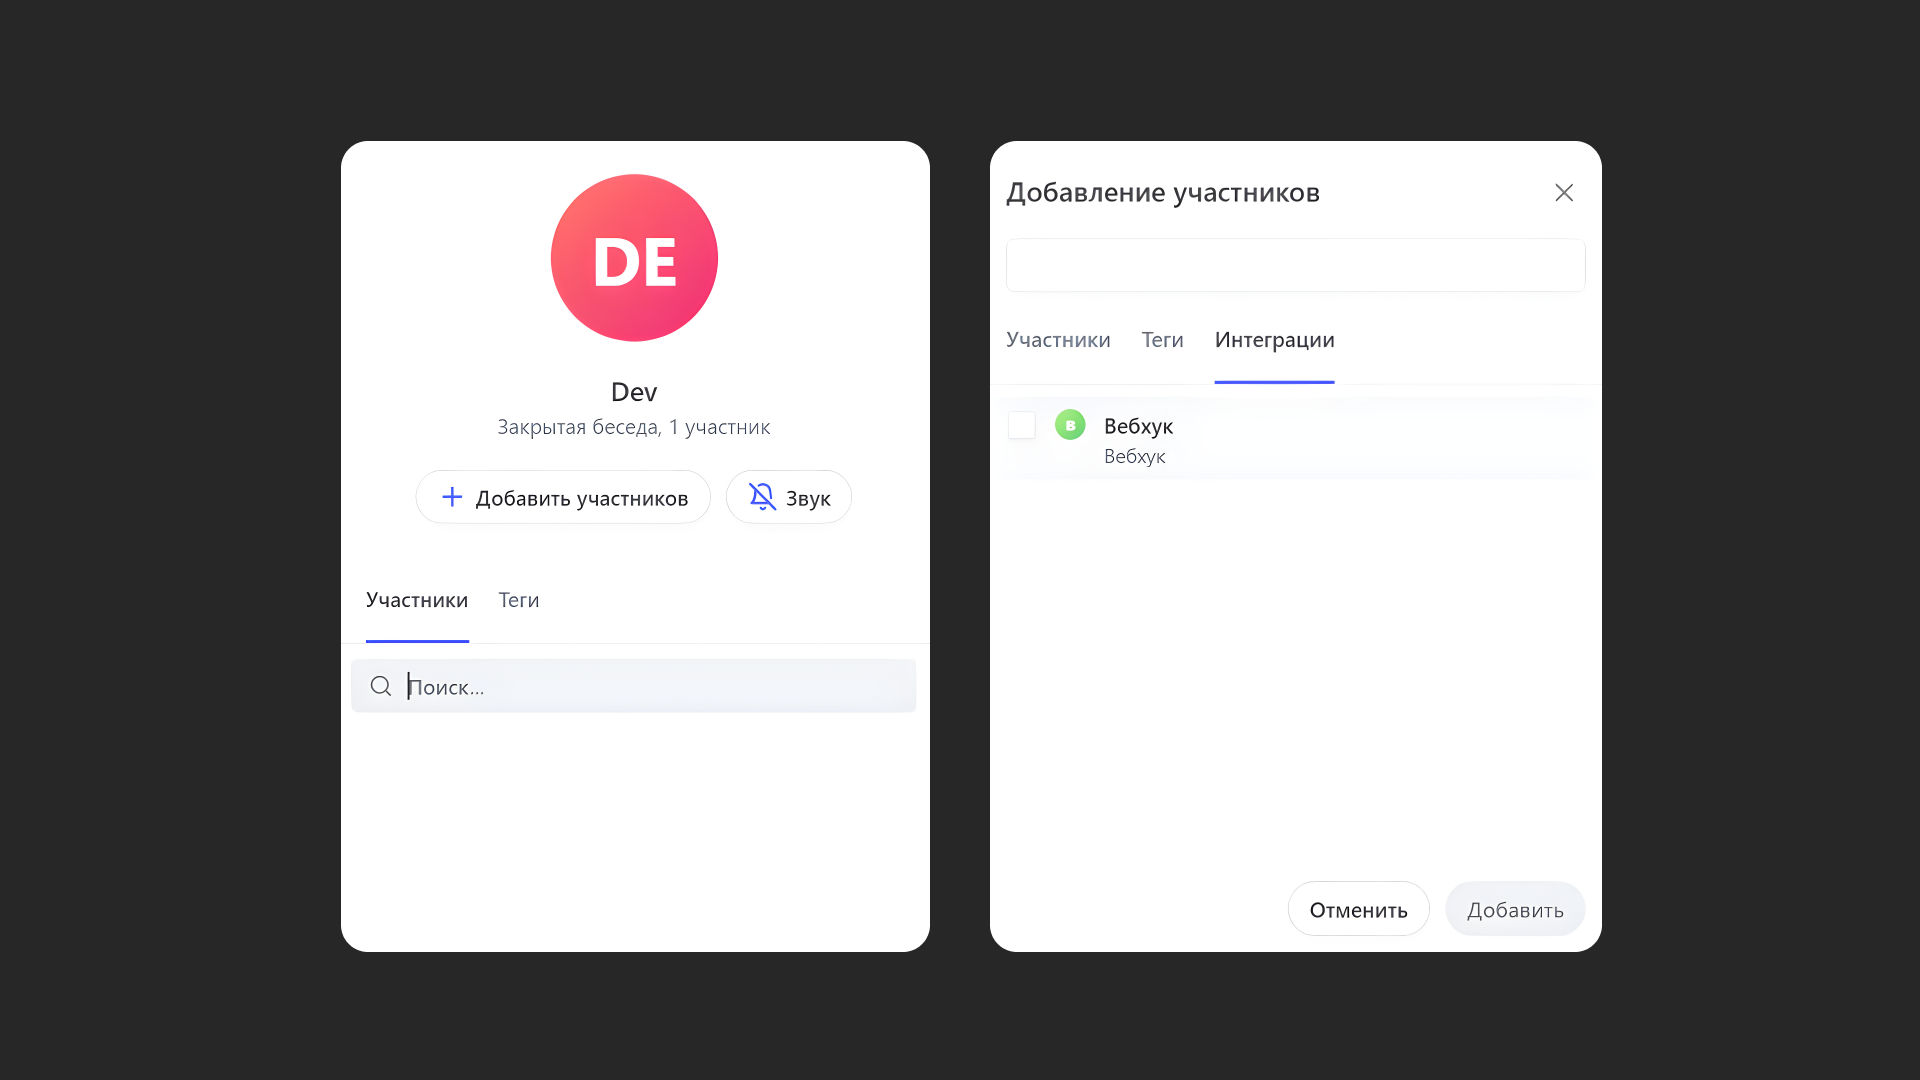
6. Add the integration to a chat
- Open the chat settings (the gray icon in the top-right corner of the chat)
- Select Add members
- Go to the Integrations tab
- Add the integration you created