Managing members in Pachca
Managing members in Pachca: how to add, edit and remove people from your team
This article explains how administrators can use the Members section: how to add and remove people and how to update employee profiles. You can find more about the Members section itself here.
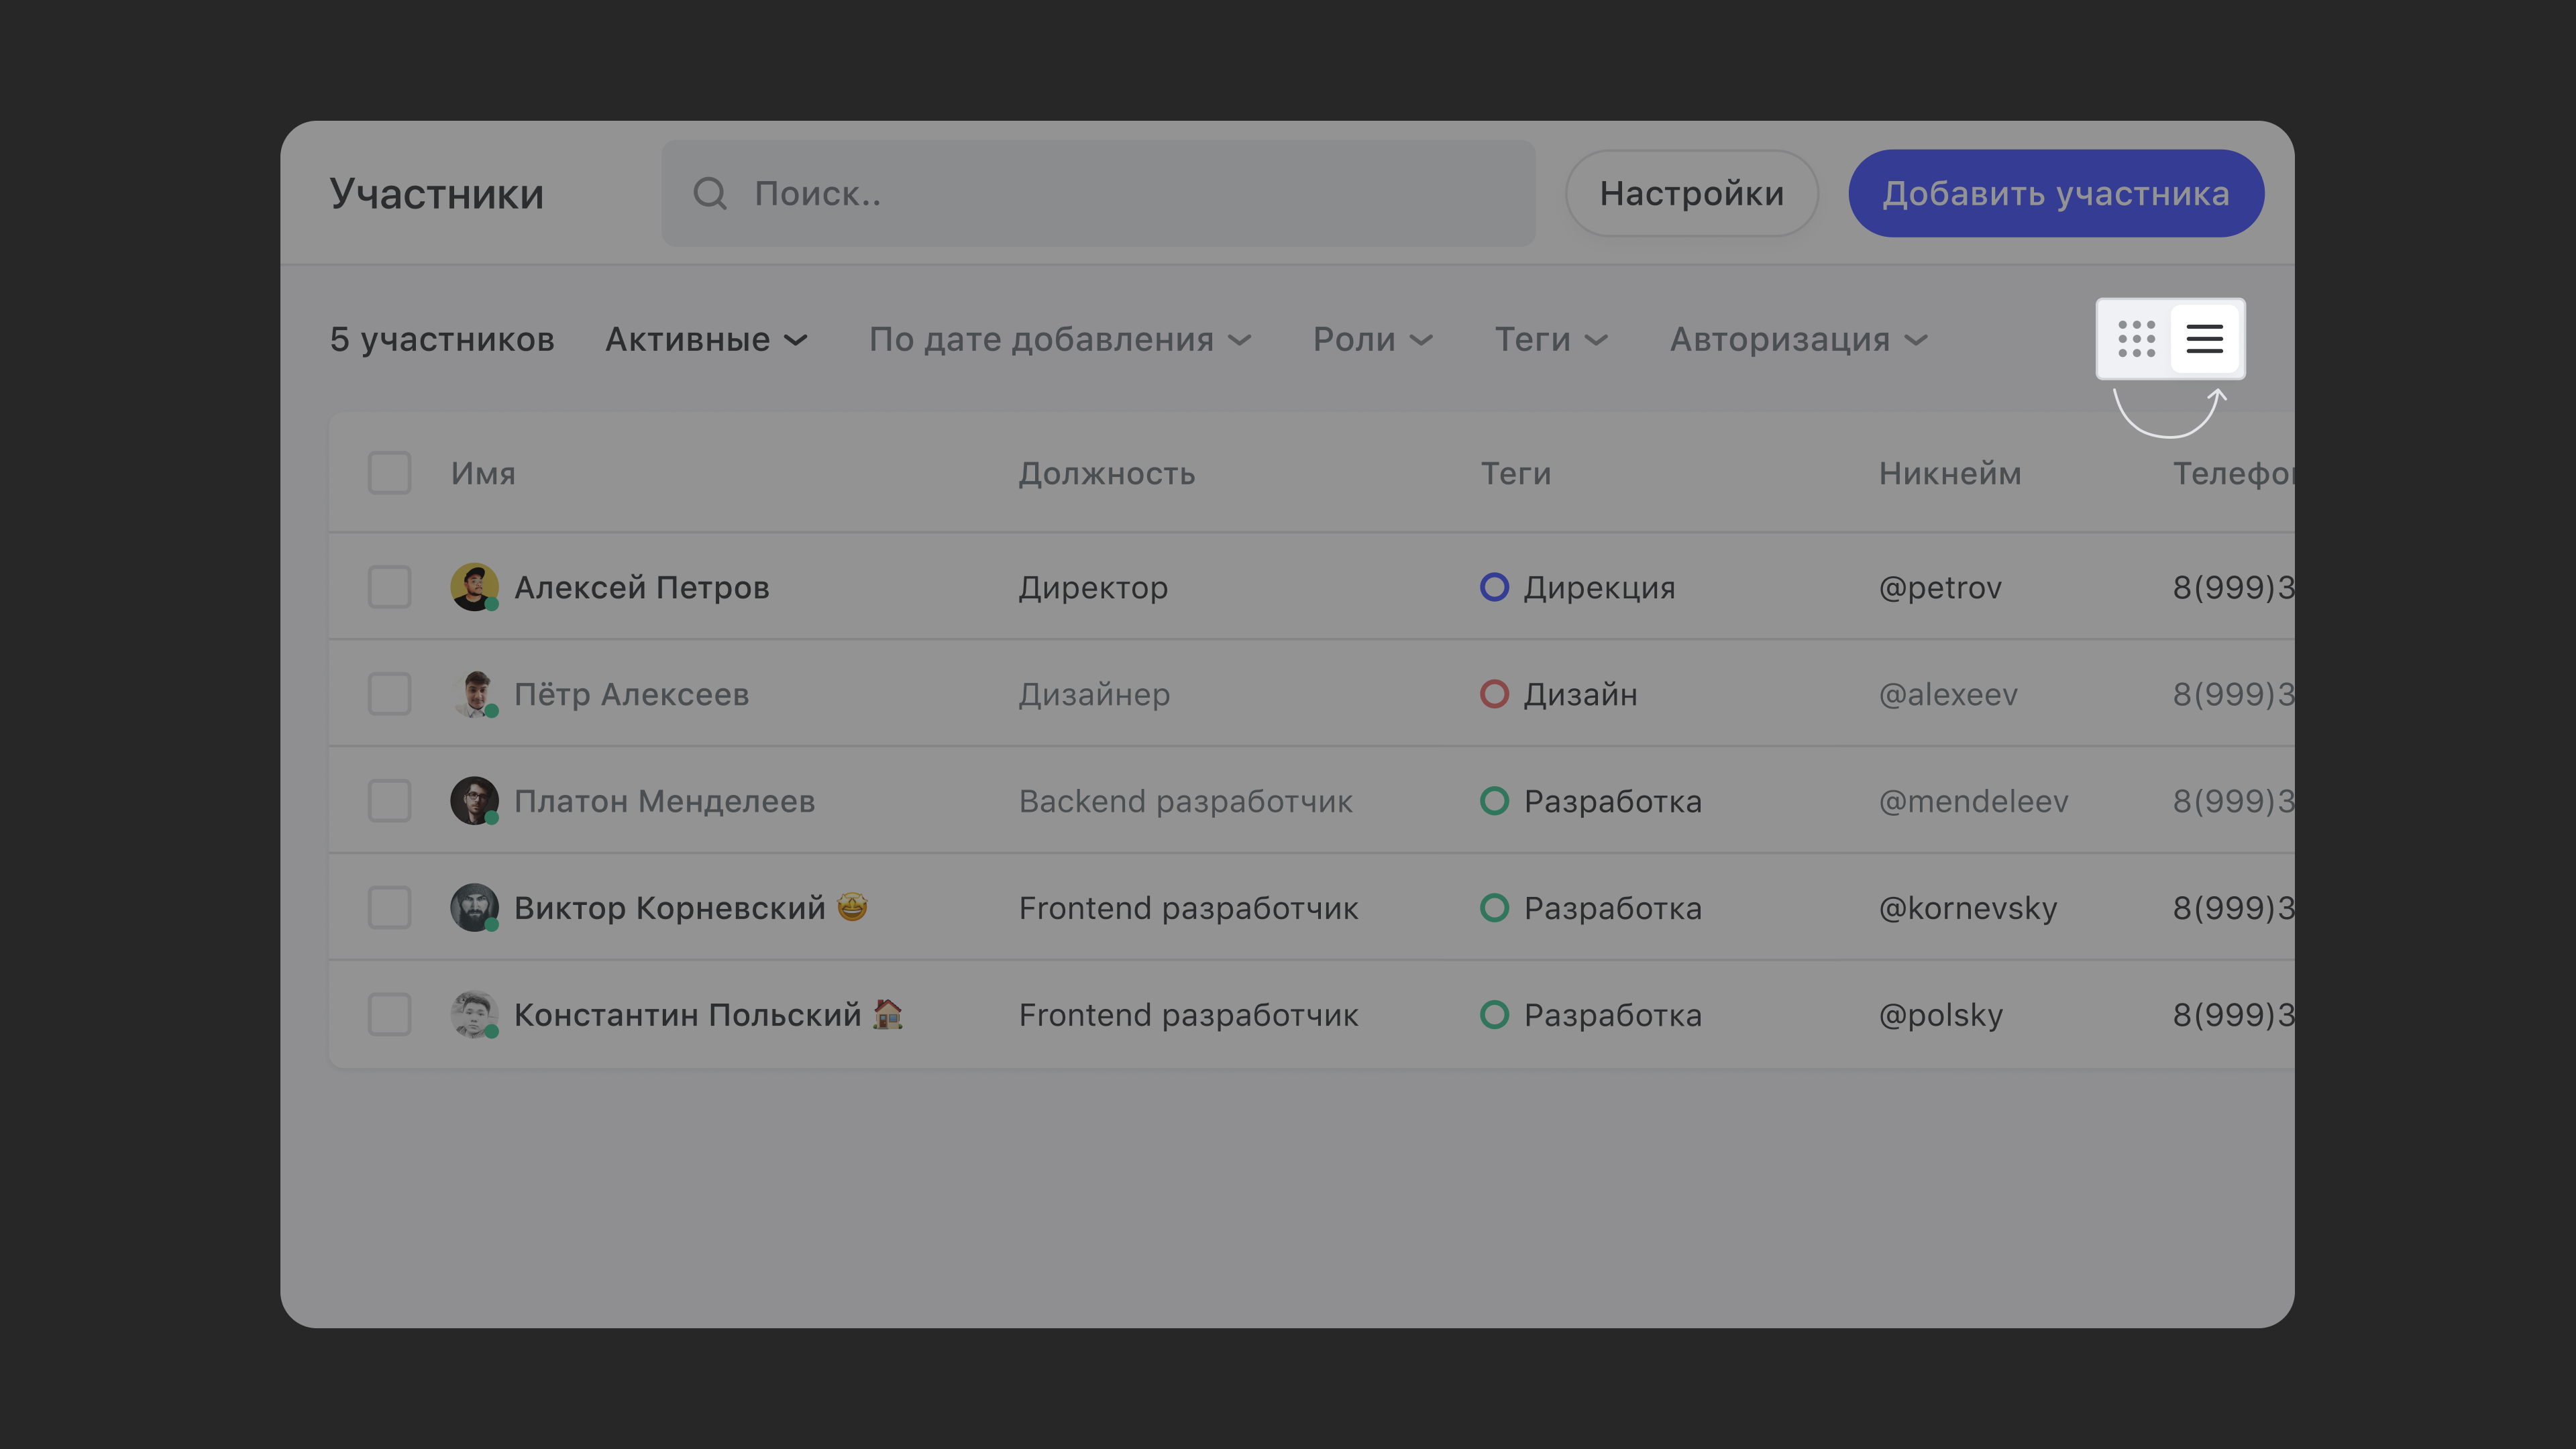
Switch views
In the Members section, you can switch between two views: cards and a table. Cards work well when you want to get to know your colleagues better and see a large photo, job title and so on. The table view is handier for admin tasks: you can filter and sort employees and jump straight to editing a member's profile.
Add people
You can invite your team from the Members section, by email or with an invite link. You can also add guests right from a chat by entering their email in the add members window. Learn more about inviting people in this article.
Deactivate or delete users
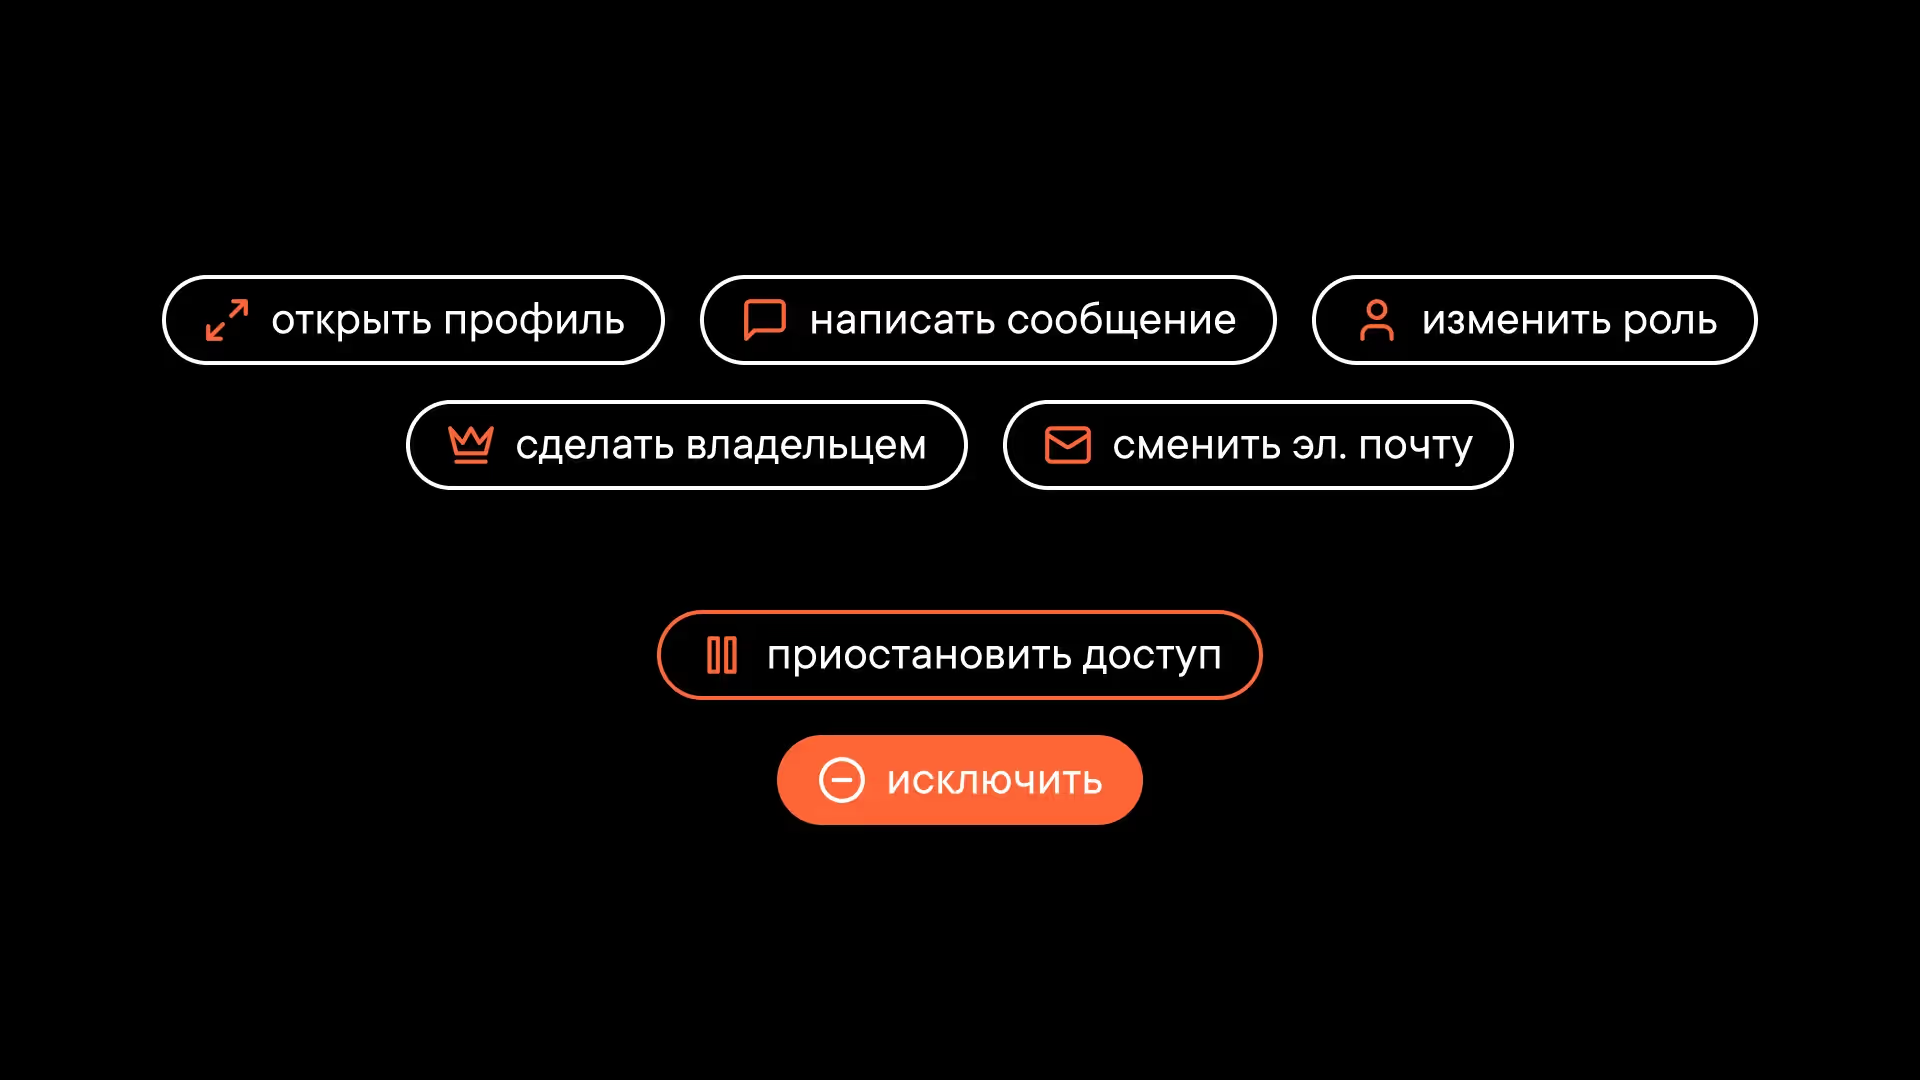
Pachca has two ways to restrict someone's access. Choose one from the drop-down menu: hover over a member's name and click the three dots, or right-click their name. Messages from deactivated and deleted users stay in the workspace.
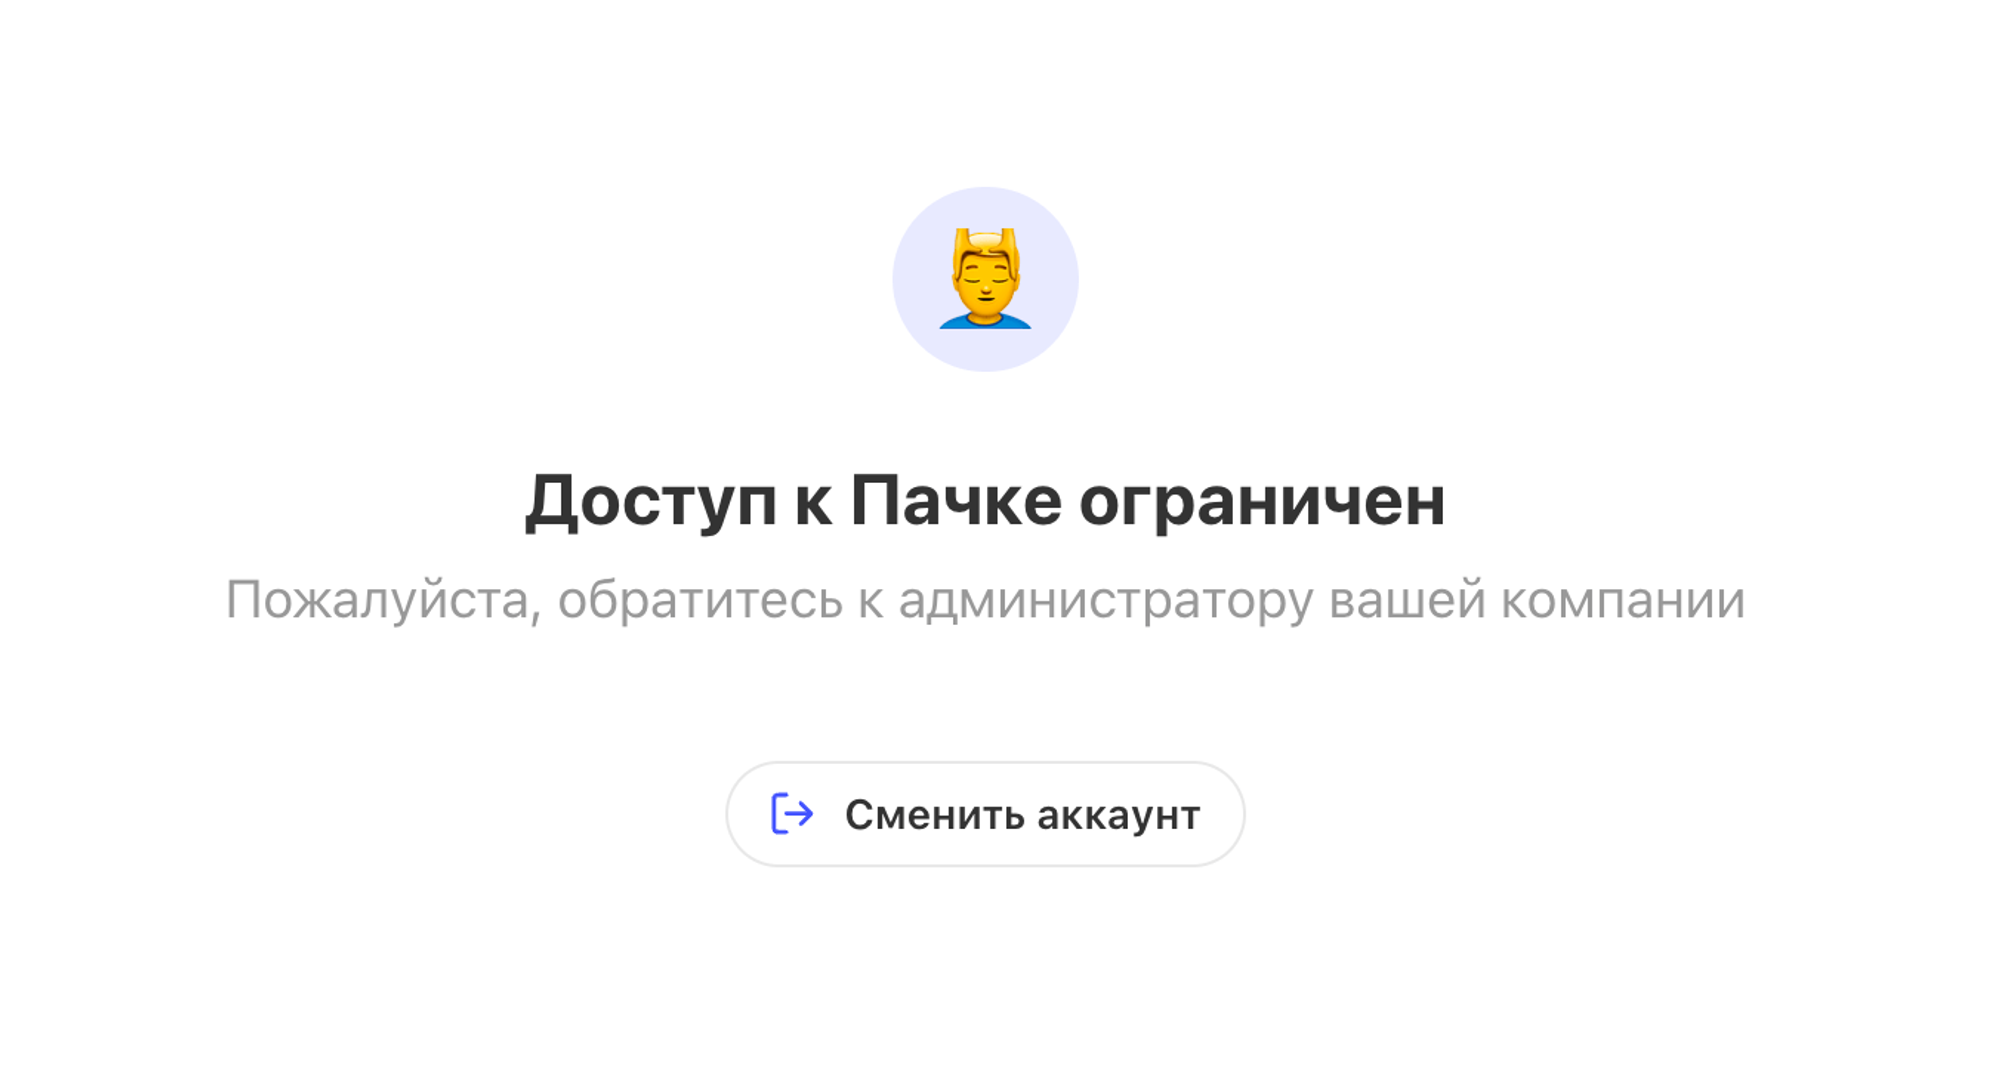
Deactivate a user. If you plan to bring someone back to the workspace later, you can deactivate them. All their information stays in the system: personal details and profile settings, reminders and so on. You don't pay for deactivated users. When the person logs in to their account, they'll see this lock screen:
Delete a user. Once deleted, the person no longer appears in the member list. If someone with the same email was added to several workspaces, they're removed only from the workspace you choose. That workspace disappears from their lobby. The workspace owner and administrators can delete members.
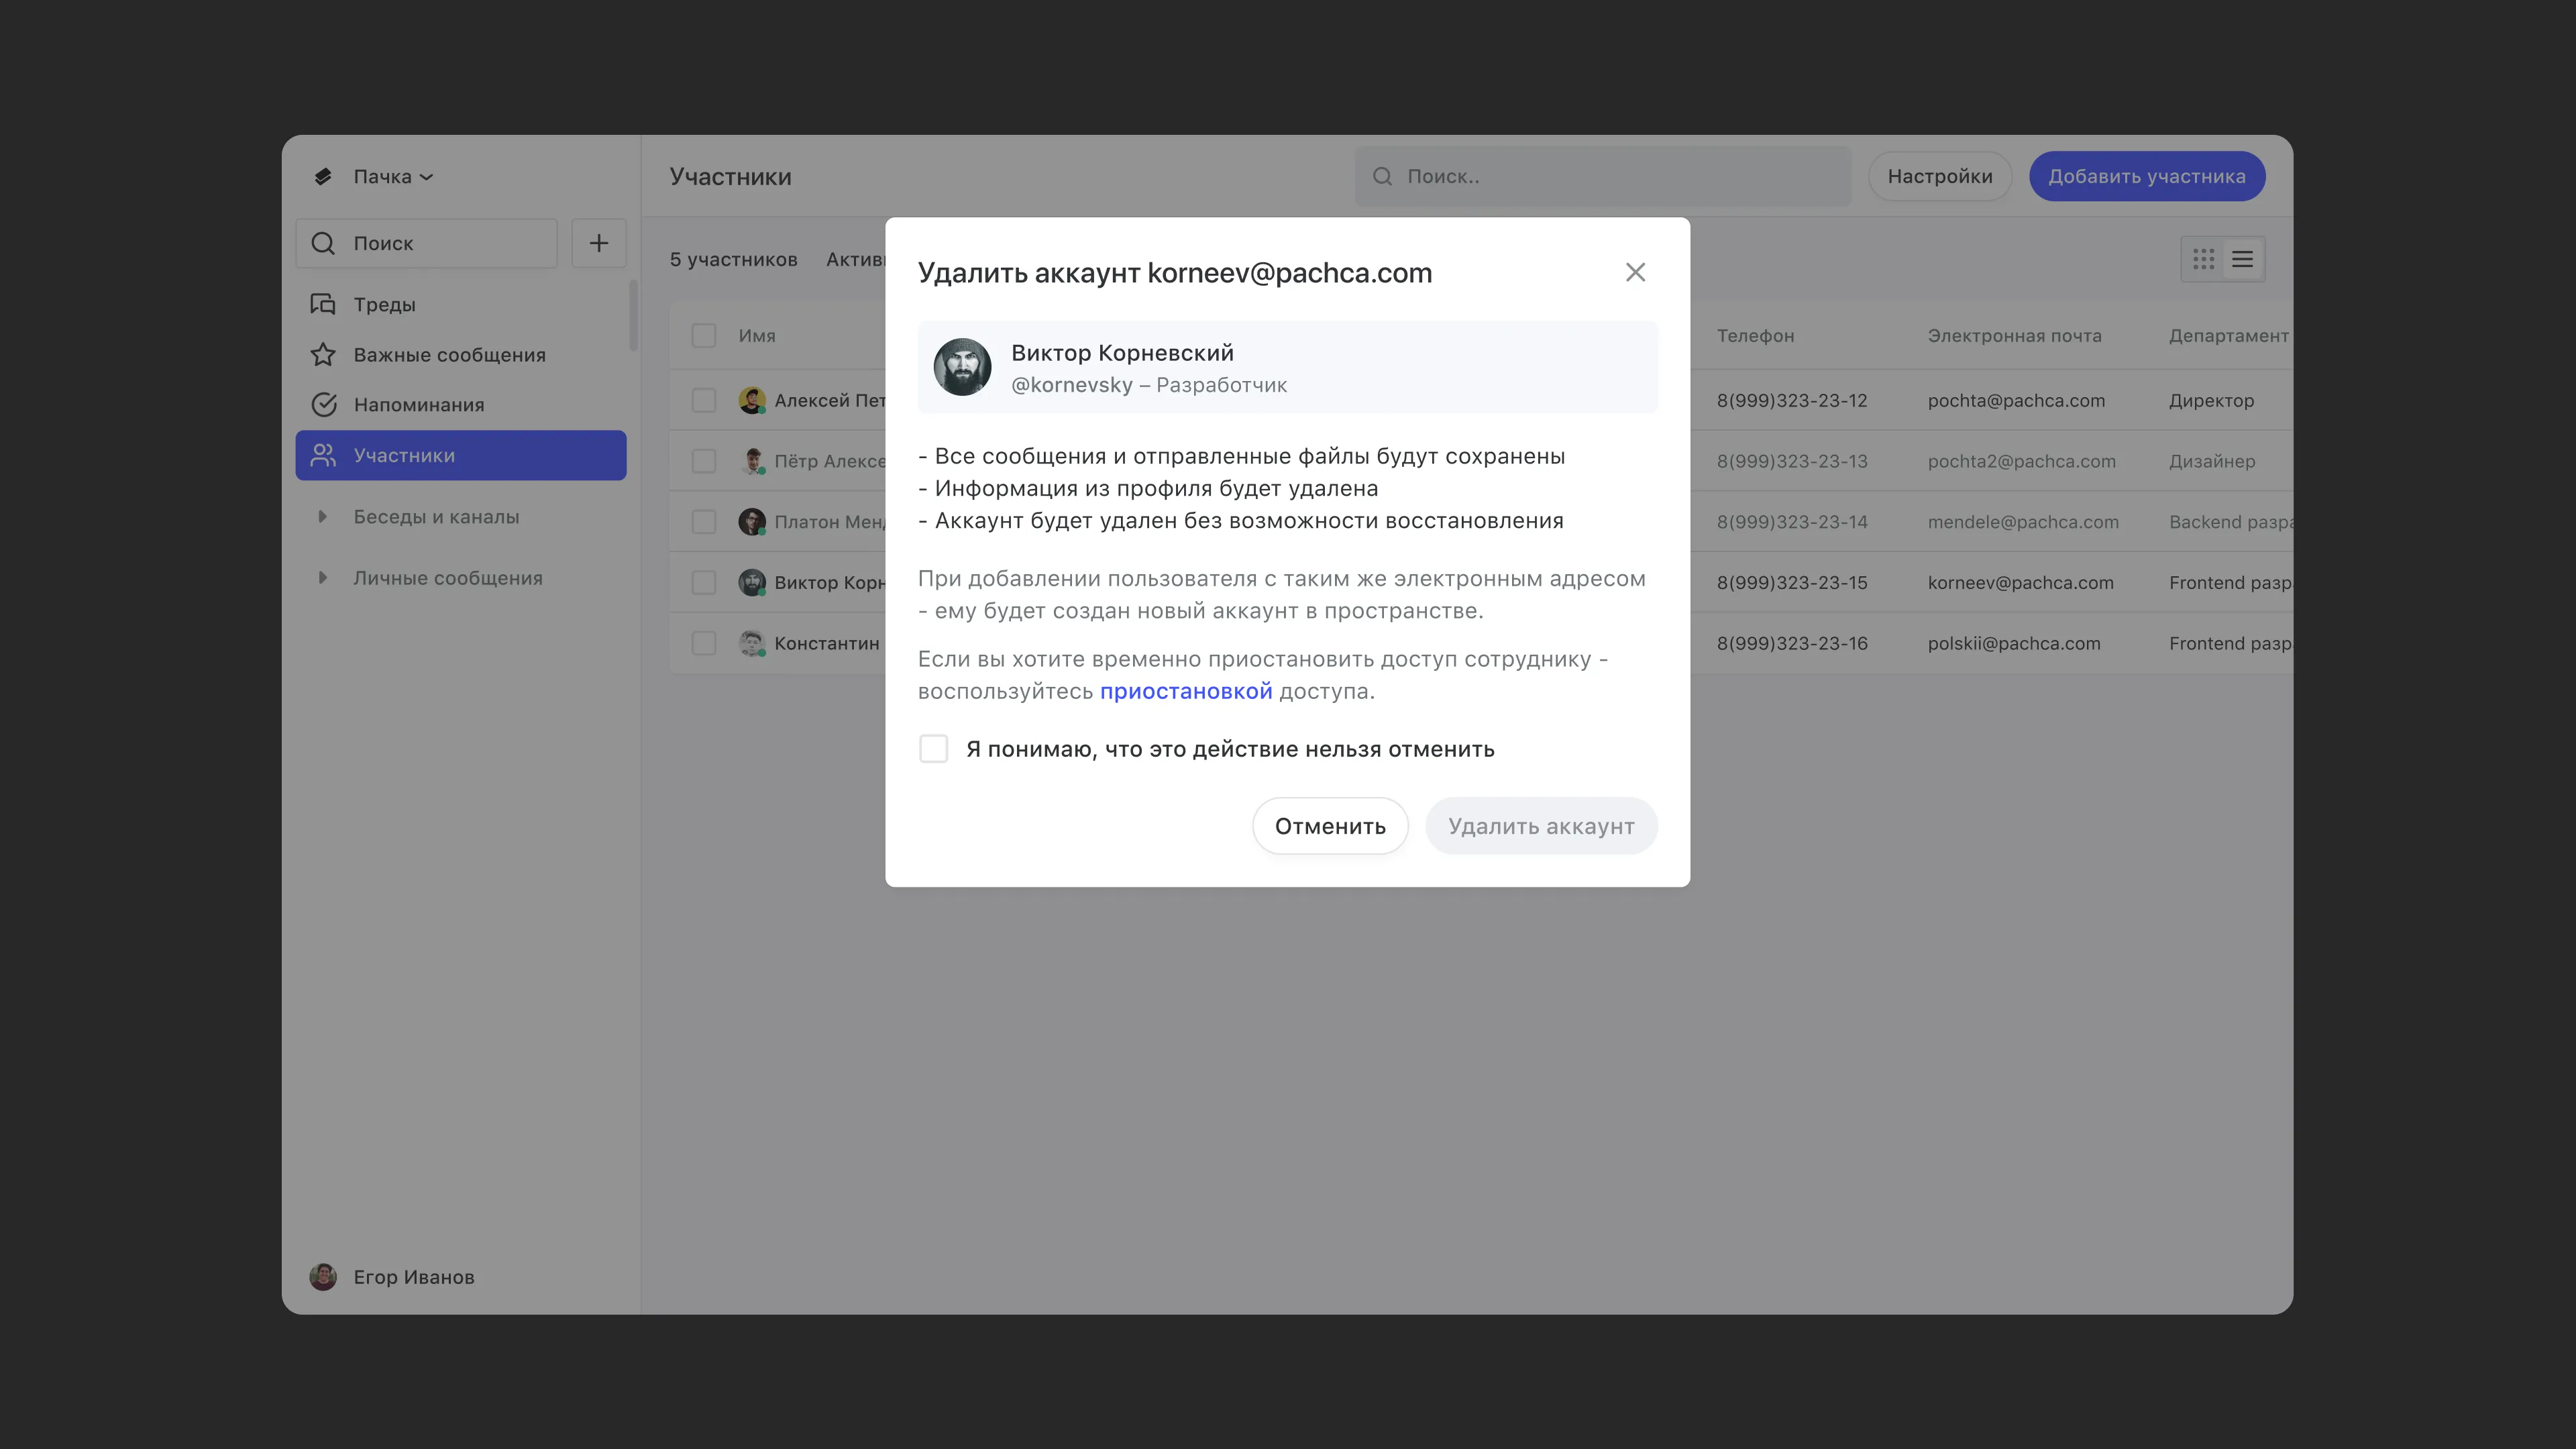
What happens to a deleted employee's data?
- Their messages stay in the workspace with their name and profile picture. They're no longer listed as a member in the members table or in chats. Direct messages with them are kept.
- Their reminders are deleted, both personal ones and those linked to chats. The exception is reminders with another assignee who's still at the company.
- Their profile data is deleted. Even if you add the person again later with the same email, their profile will need to be filled in from scratch. There's currently no way to transfer all data from one employee to another at once.
Other actions
Change role
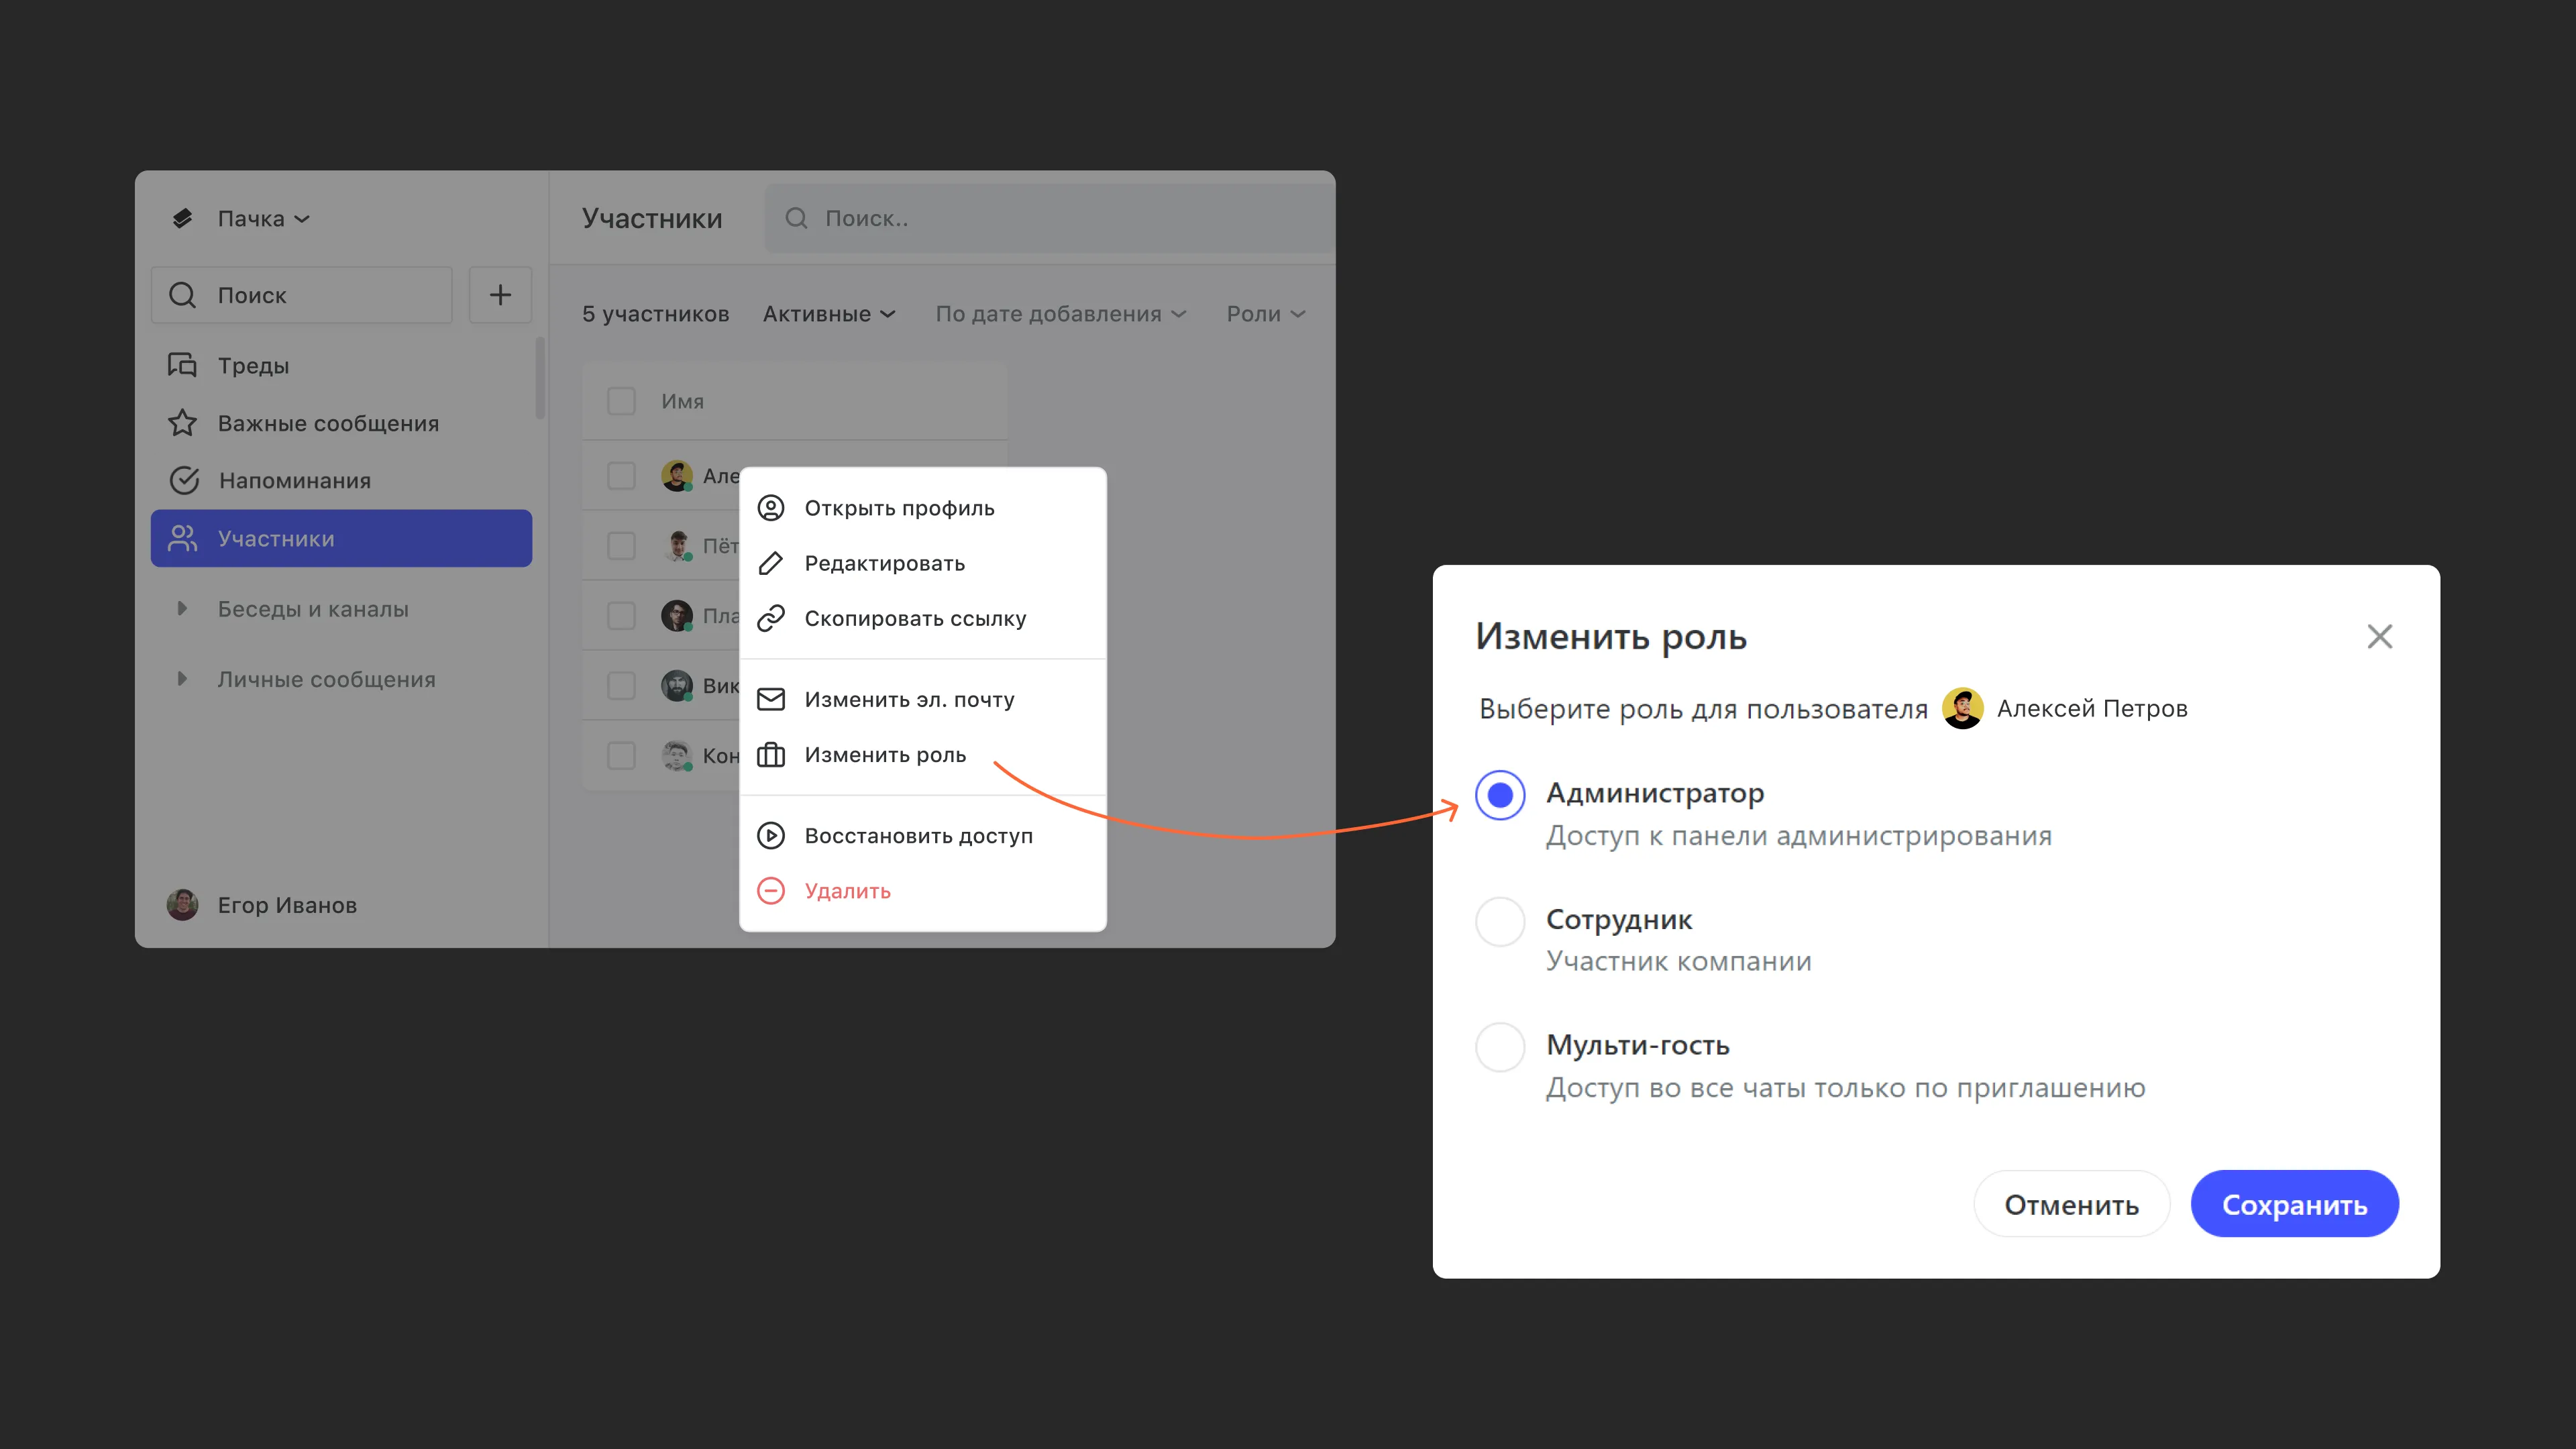
Administrators and the workspace owner can change the role of employees and multi-guests. Here's how:
- In the Members section, switch to table view using the toggle in the top-right corner
- In the table, hover over the user and click the more actions icon
- Click Change role, choose a role and confirm
You can't change a paid role (Administrator, Employee or Multi-guest) to the free Guest role.
Make owner.
You can transfer workspace ownership in Pachca, but only to an administrator.
To transfer ownership:
- Go to the Members section
- Hover over the administrator you want to make the owner and click the three dots
- Click Make owner, then Transfer company ownership
Change email
In Pachca, an account is tied to an email address, and one account can have several workspaces. If you change the email of a member who has only one workspace on their account, that workspace disappears from their lobby and moves to another account tied to the new email. The member gets an email at both the old and new addresses saying that an administrator changed their email address.
If the member has several workspaces on their account, only the workspace where you changed their email disappears from their lobby. The others stay. Once they log in with the new email, the workspace shows up in their lobby again.
Bulk actions
Delete and deactivate users
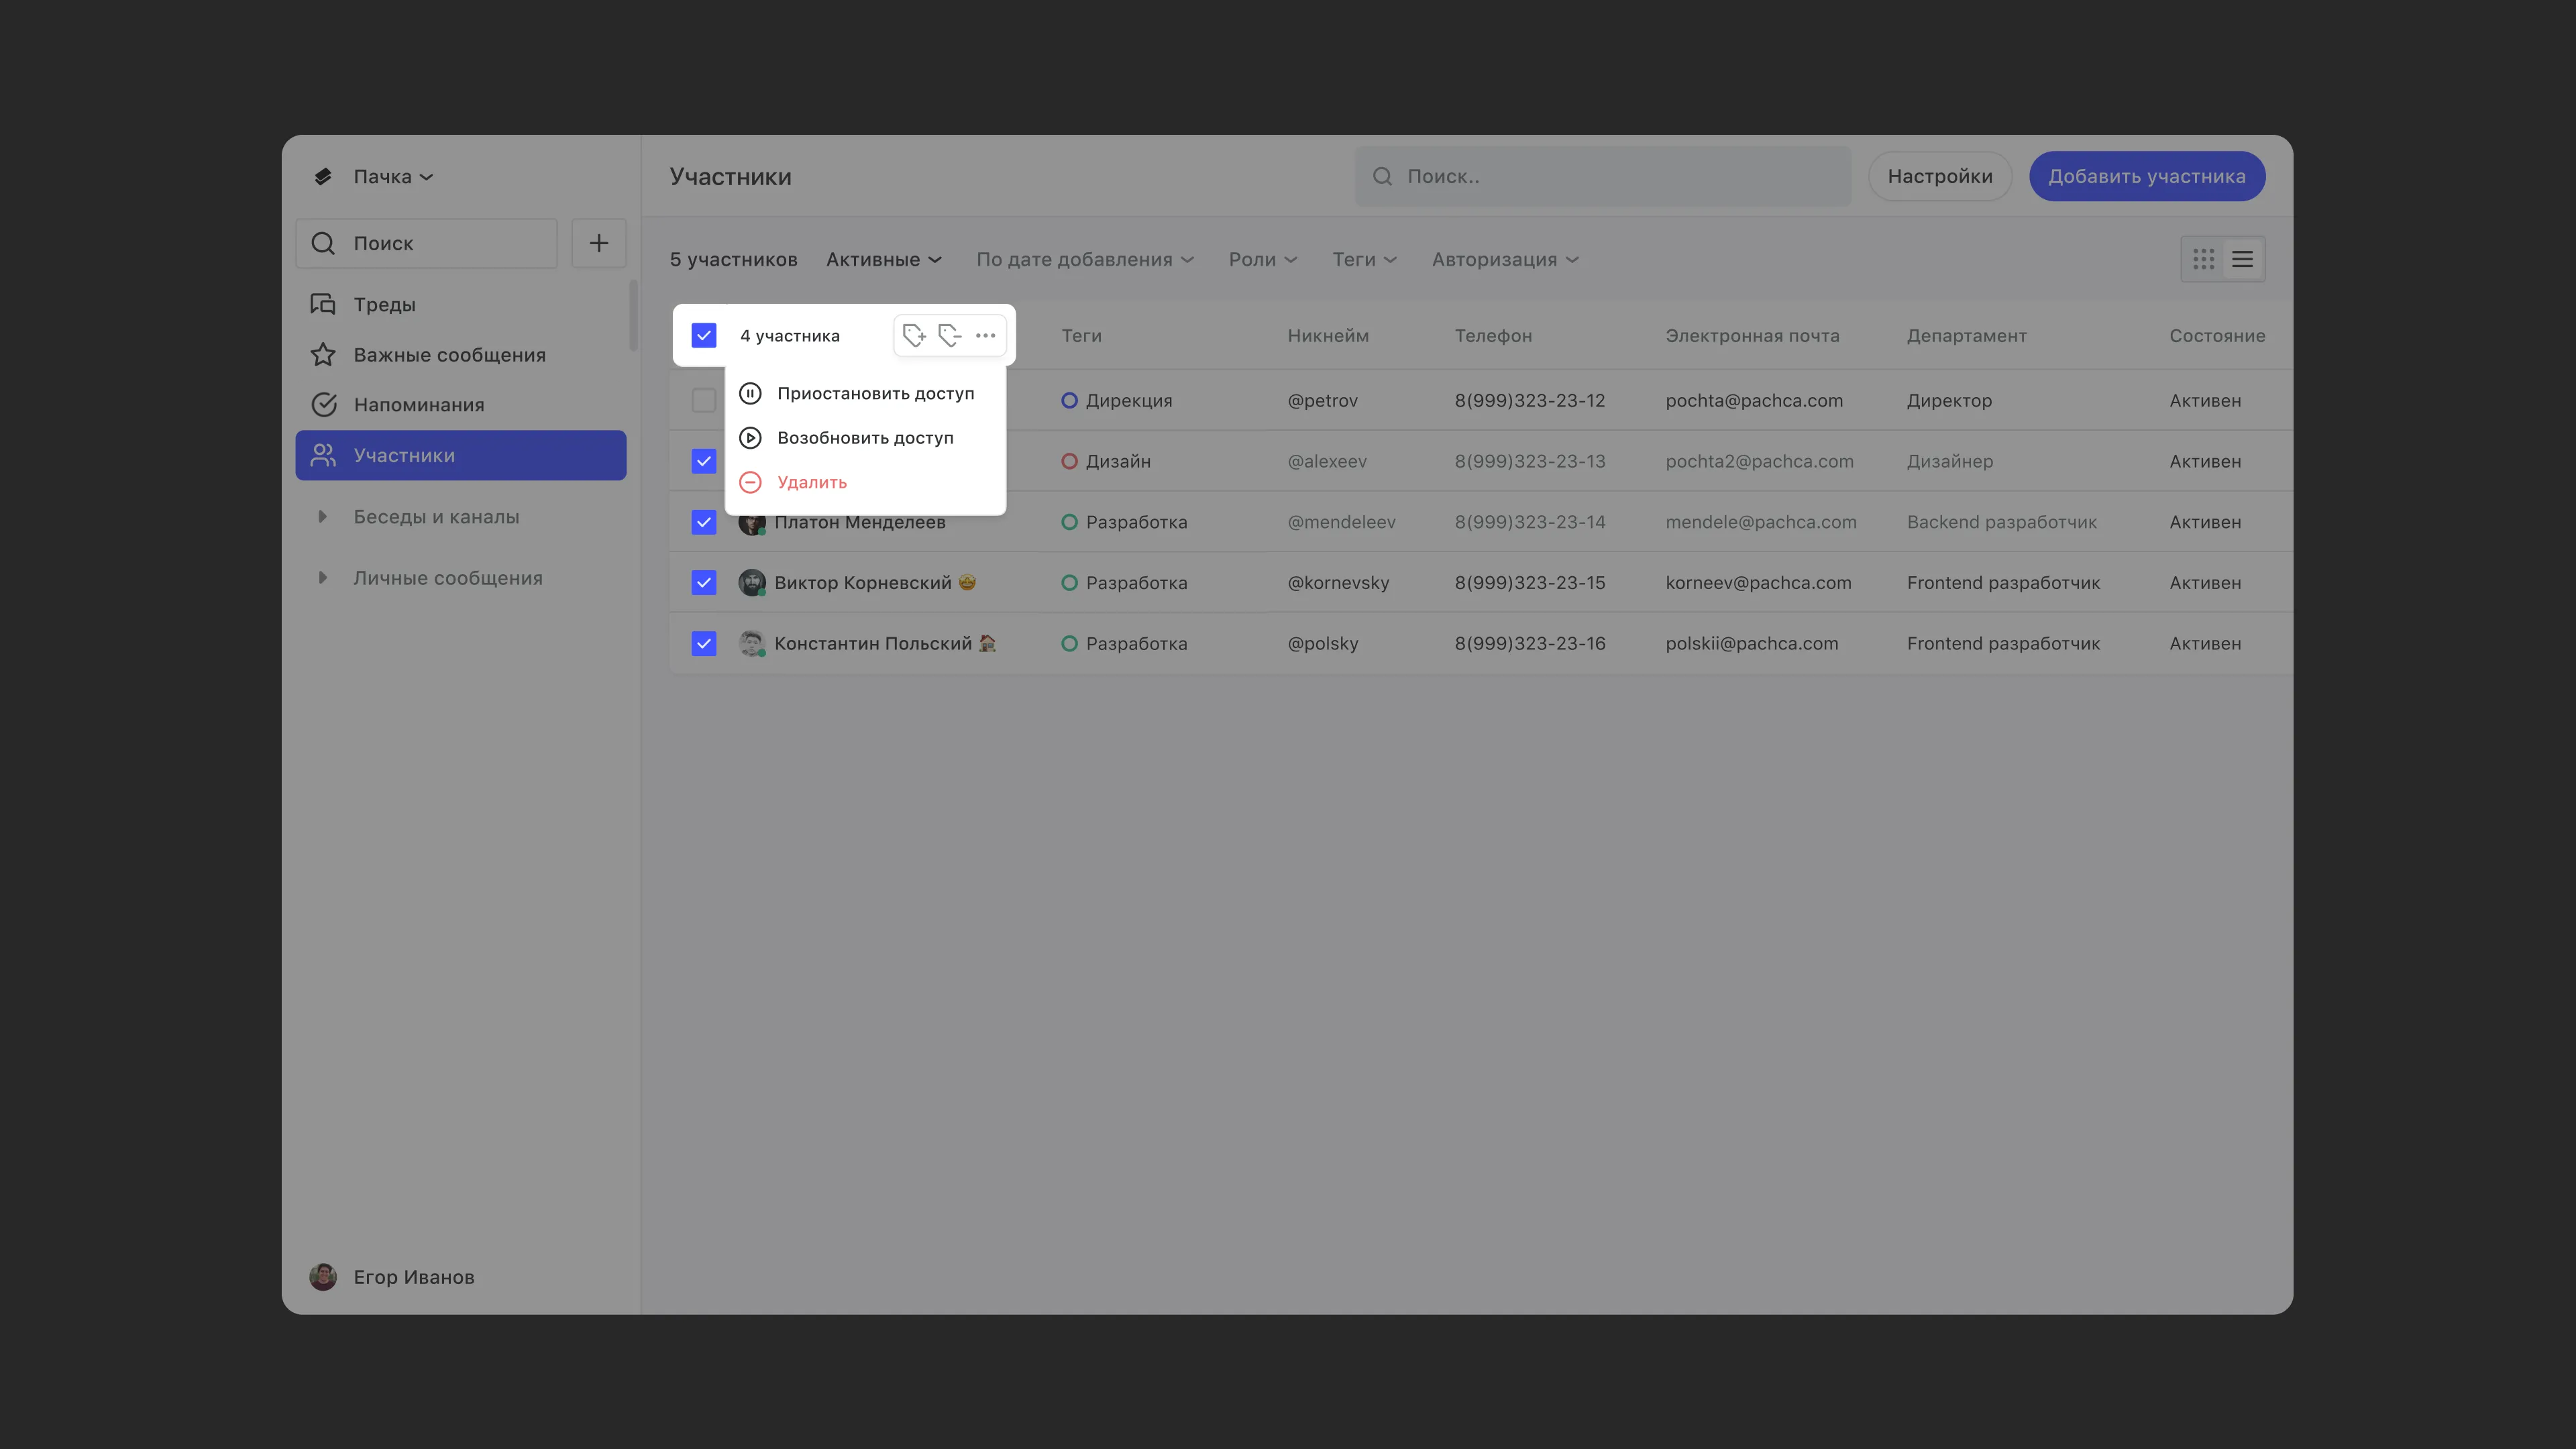
You can delete or deactivate several users at once. To do this:
- Go to Members in the sidebar
- Switch to table view in the top-right corner
- Select the members you want to delete or deactivate
- Click the more actions icon
- Choose Deactivate or Delete. The workspace owner and administrators can delete members.
Add and remove tags
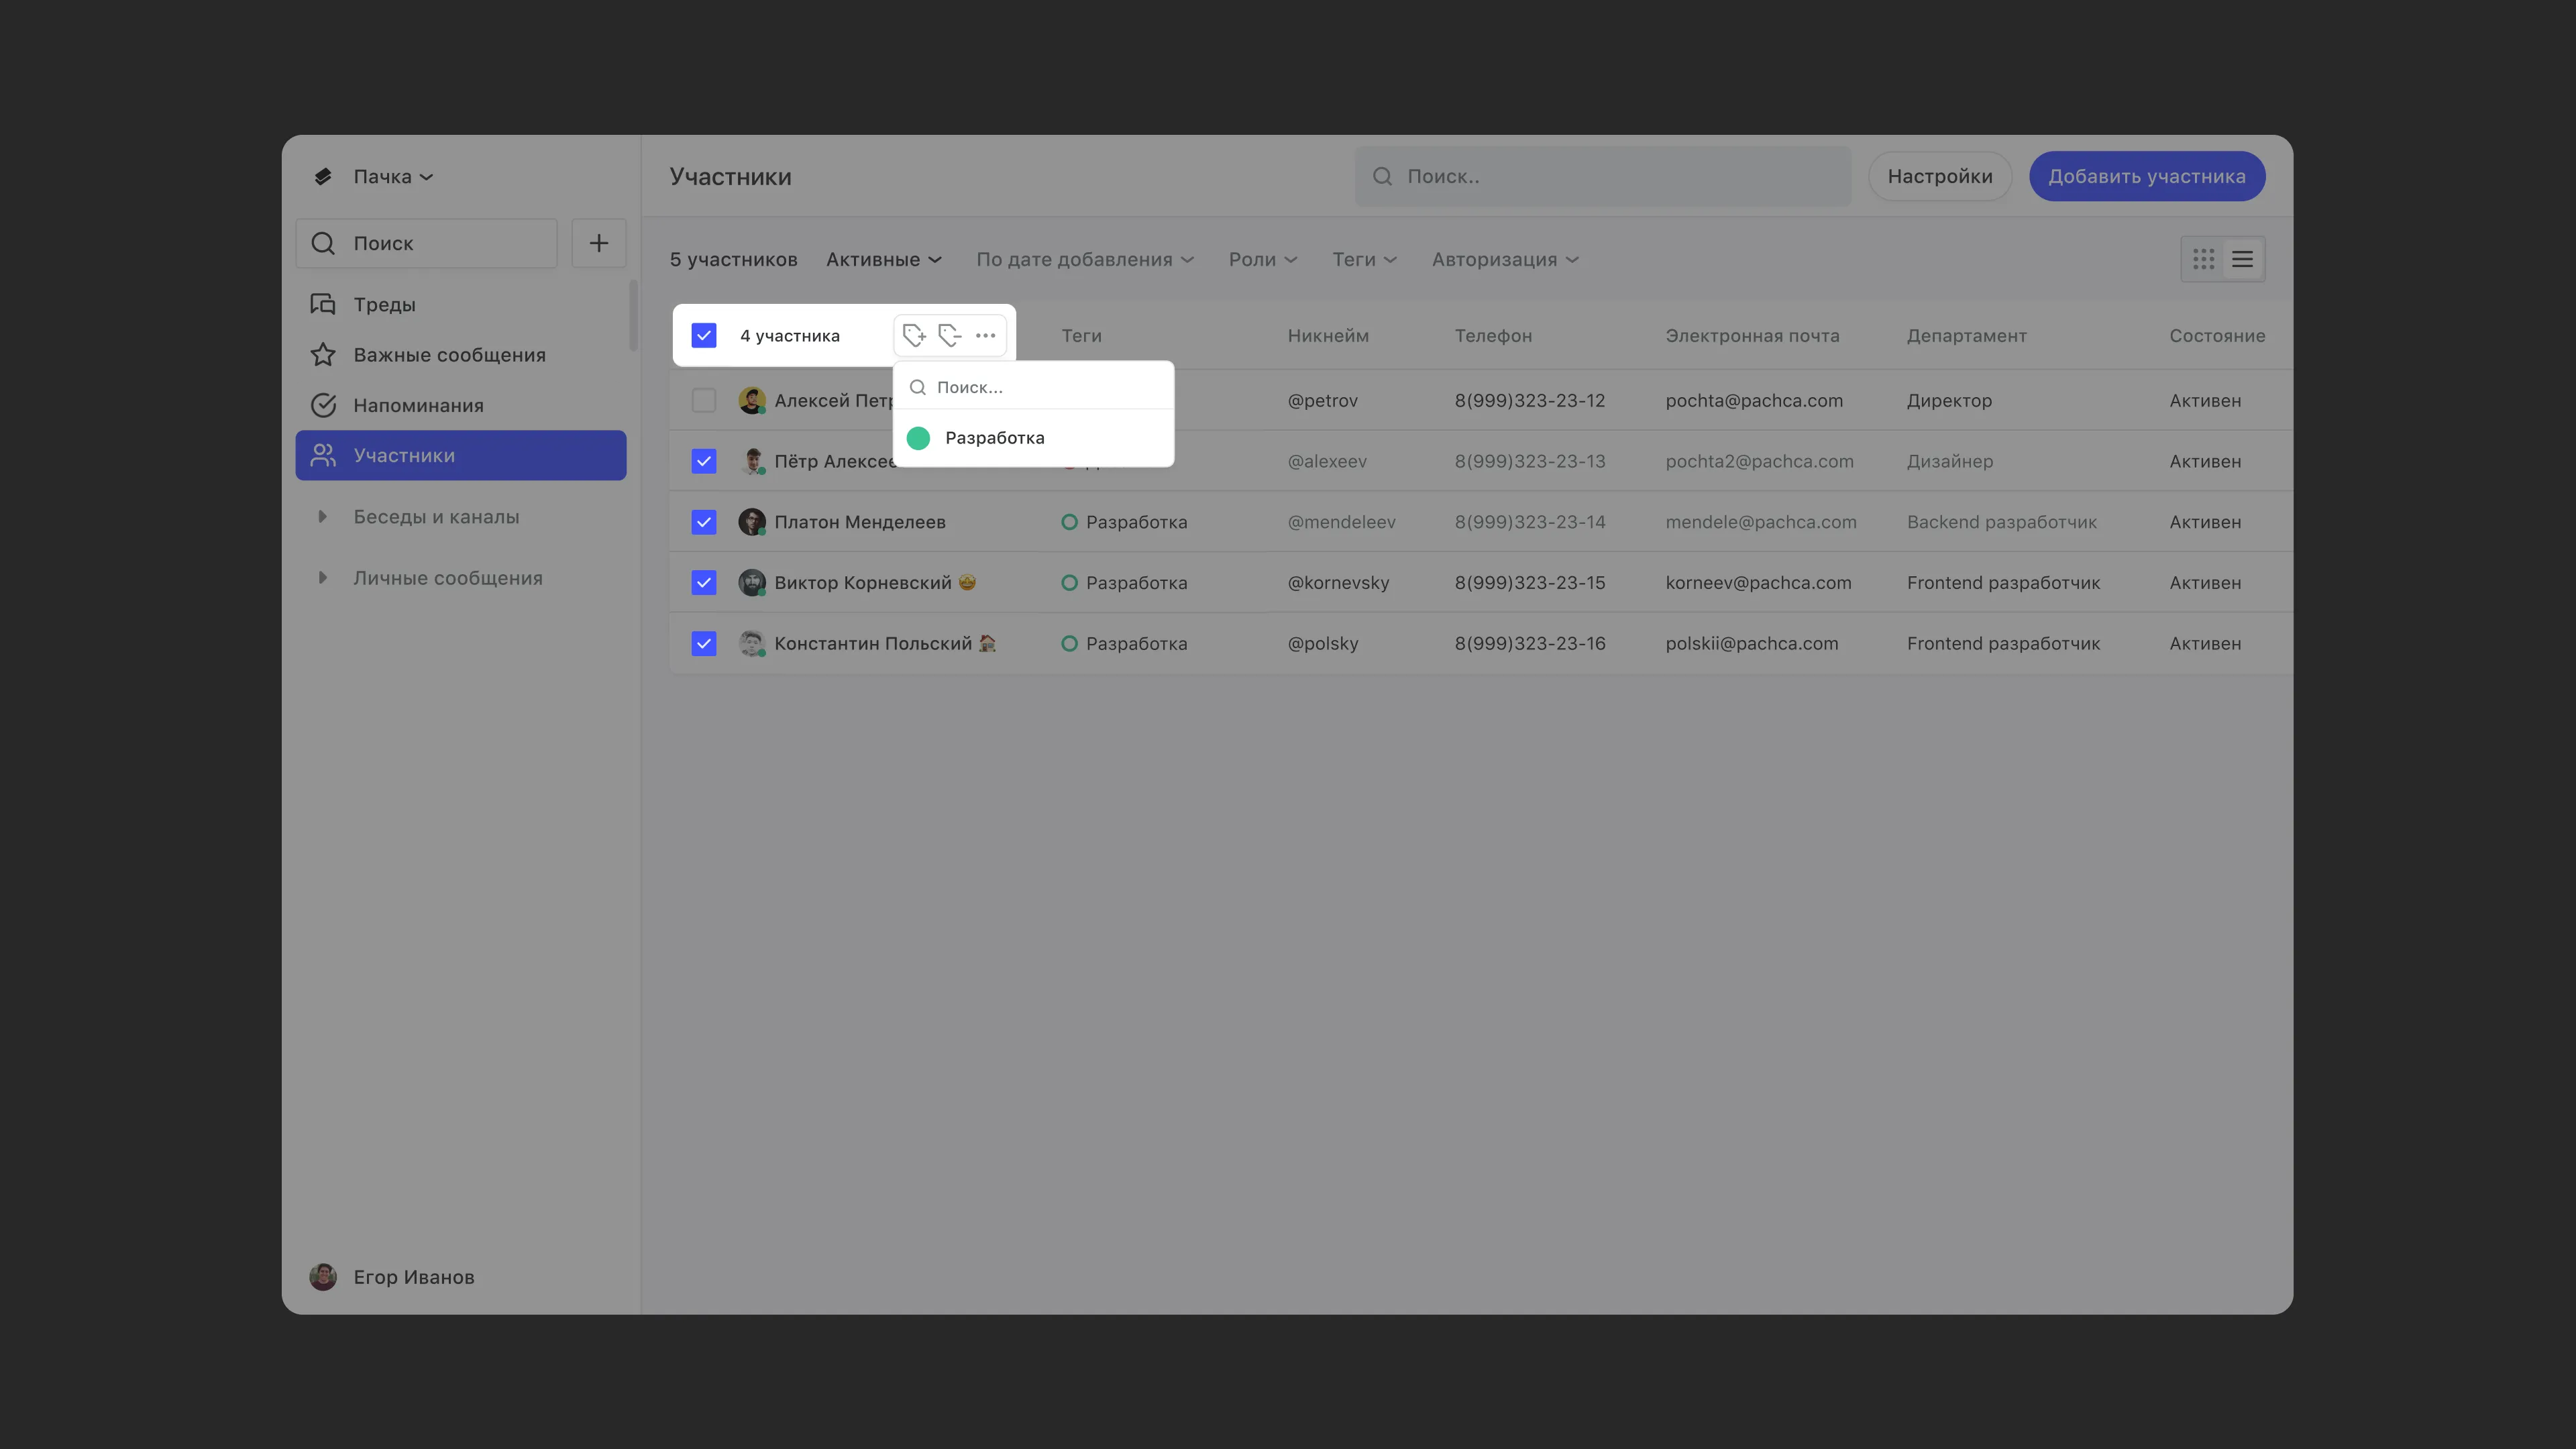
Instead of spending time adding each employee to your team chats one by one, assign them a tag. The employee is automatically added to every chat that has this tag. Learn more about tags and how to assign them here.
To assign tags, select the members with the checkboxes and use the bulk add tag buttons.
Edit profiles
Customize member card fields
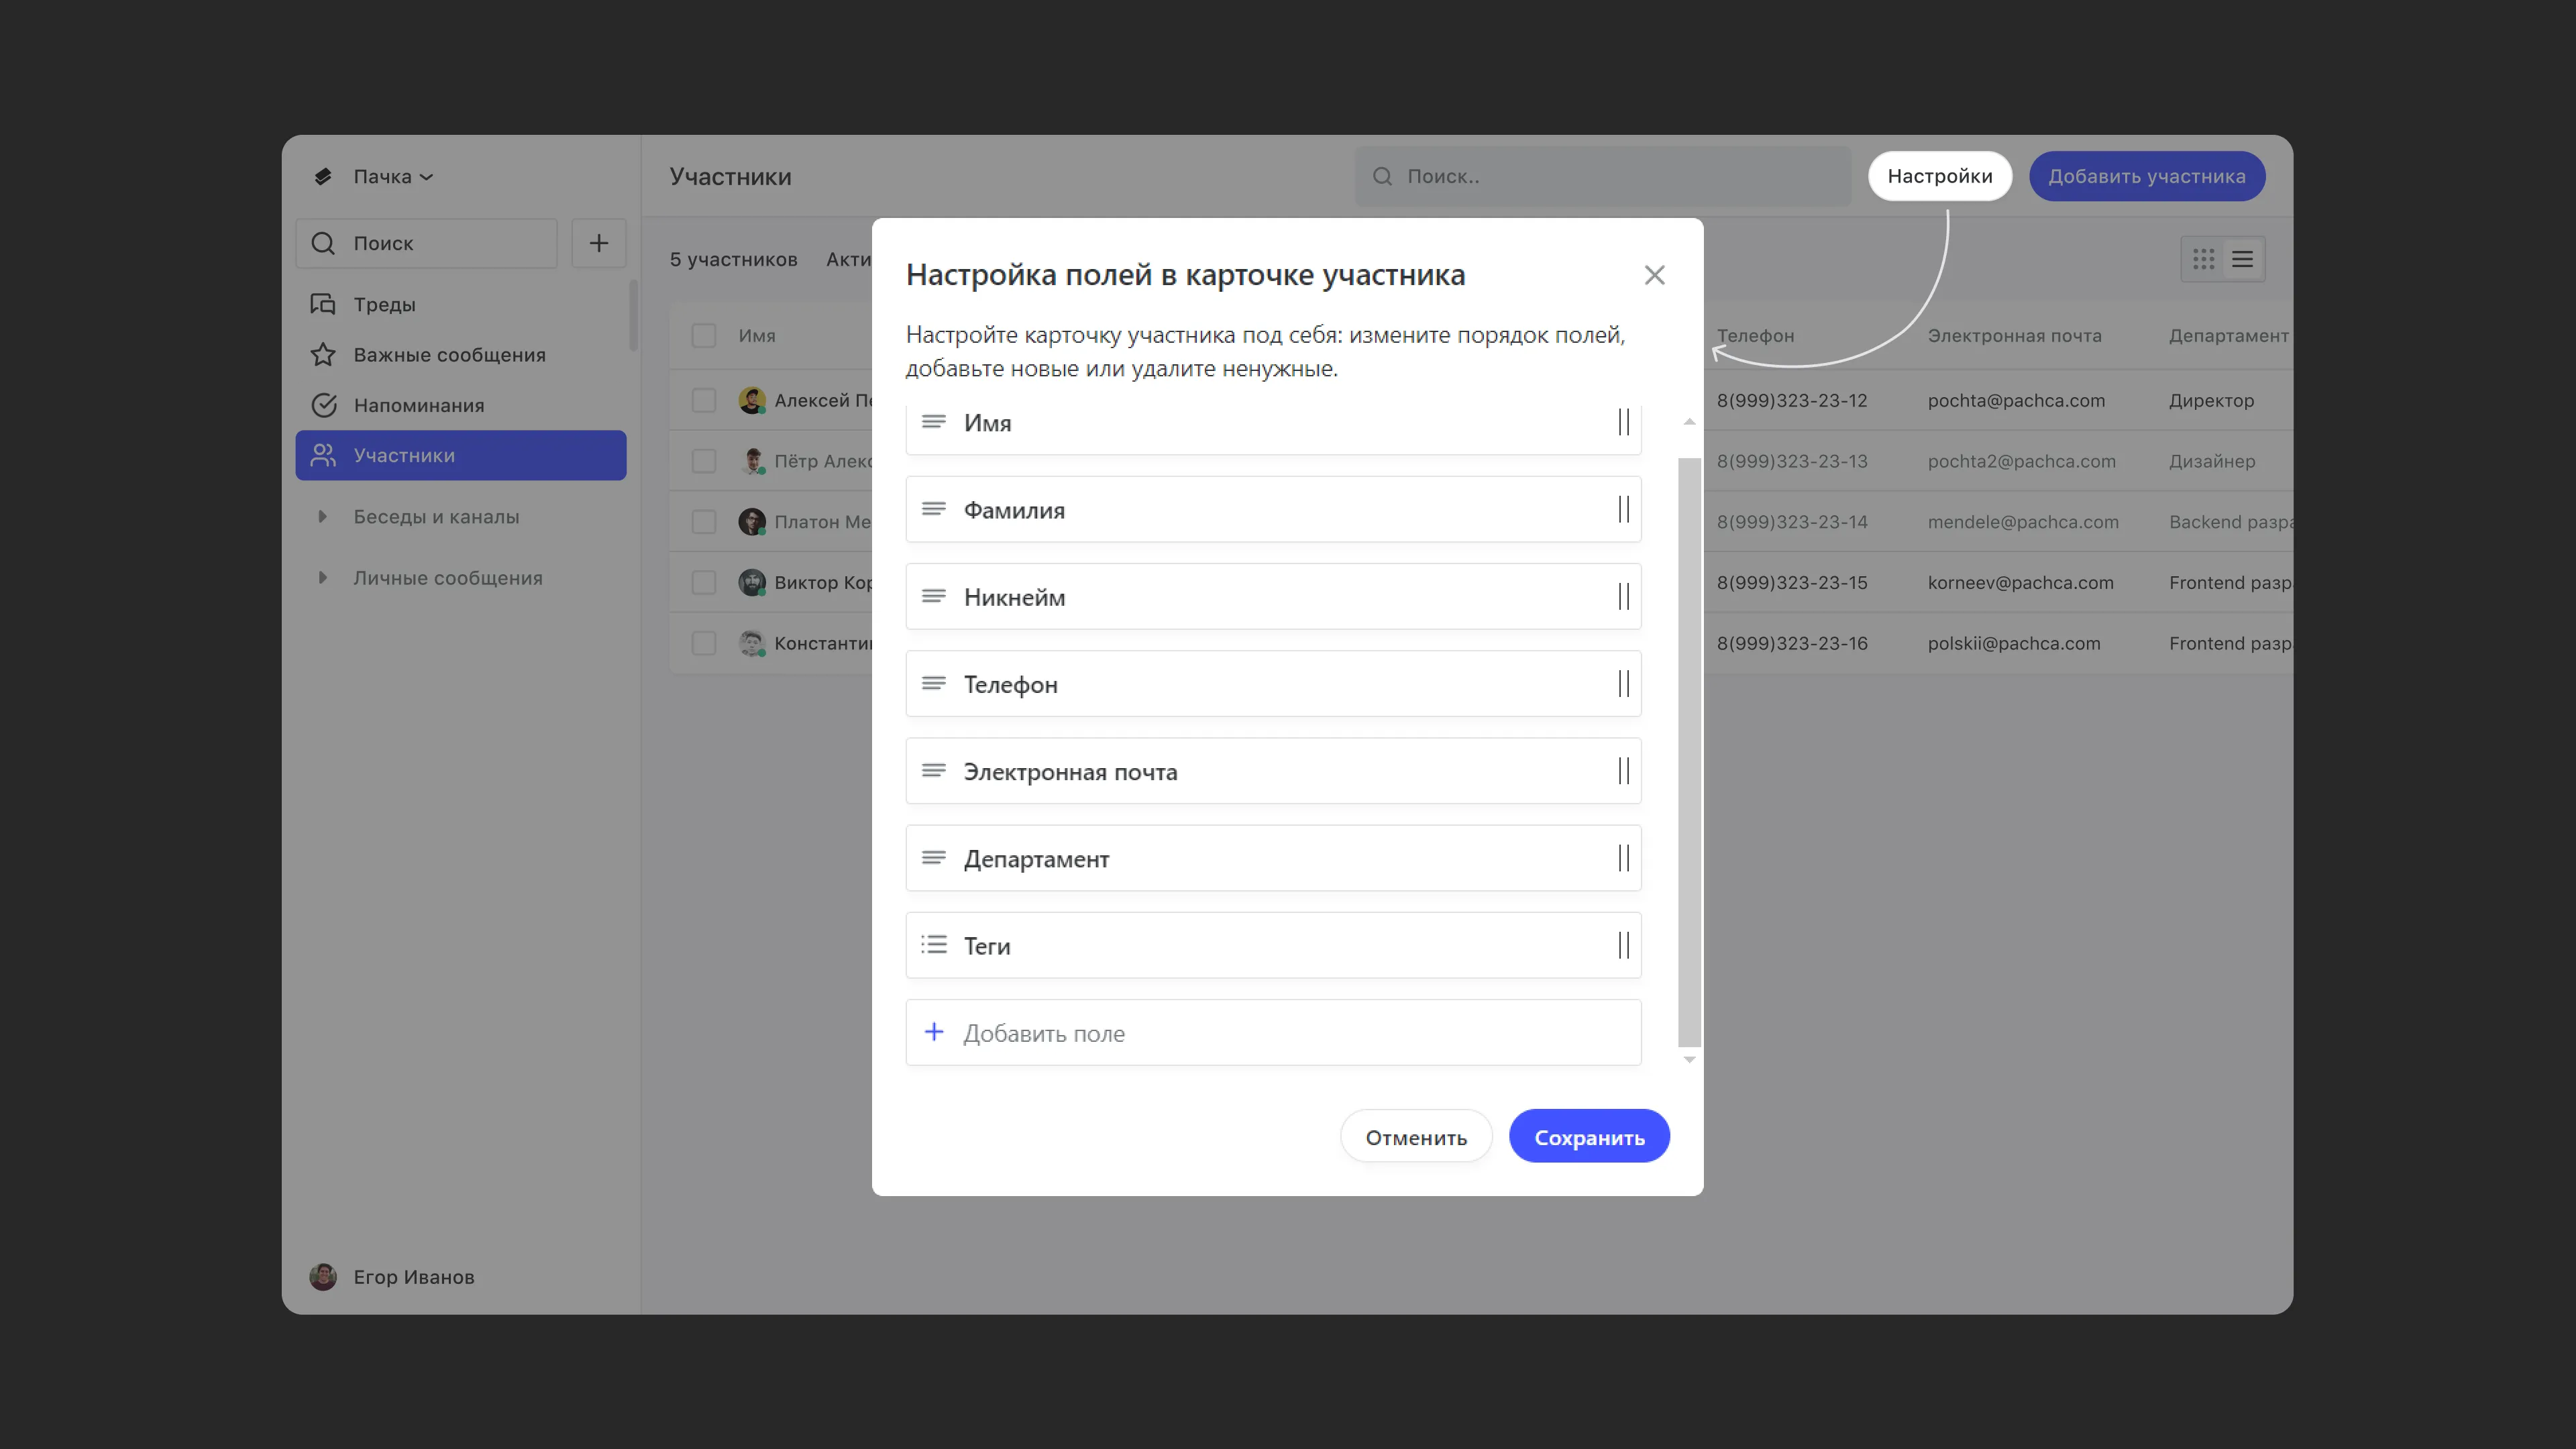
You can customize the fields in member profiles to suit your needs: reorder them, add new fields or hide the ones you don't need.
To do this:
- Go to Members in the sidebar
- Click Settings
- Drag the fields into the order you want
- To create a new field, click Add field and choose a type
- To delete or hide a field, hover over it and choose an action
Edit a specific employee's profile
There are two ways to open an employee's profile for editing:
- Click the member's name. In their profile, click the more actions icon in the top-right corner.
- Switch to table view, hover over the employee's name and click the Edit icon next to it.
Filters in the Members section
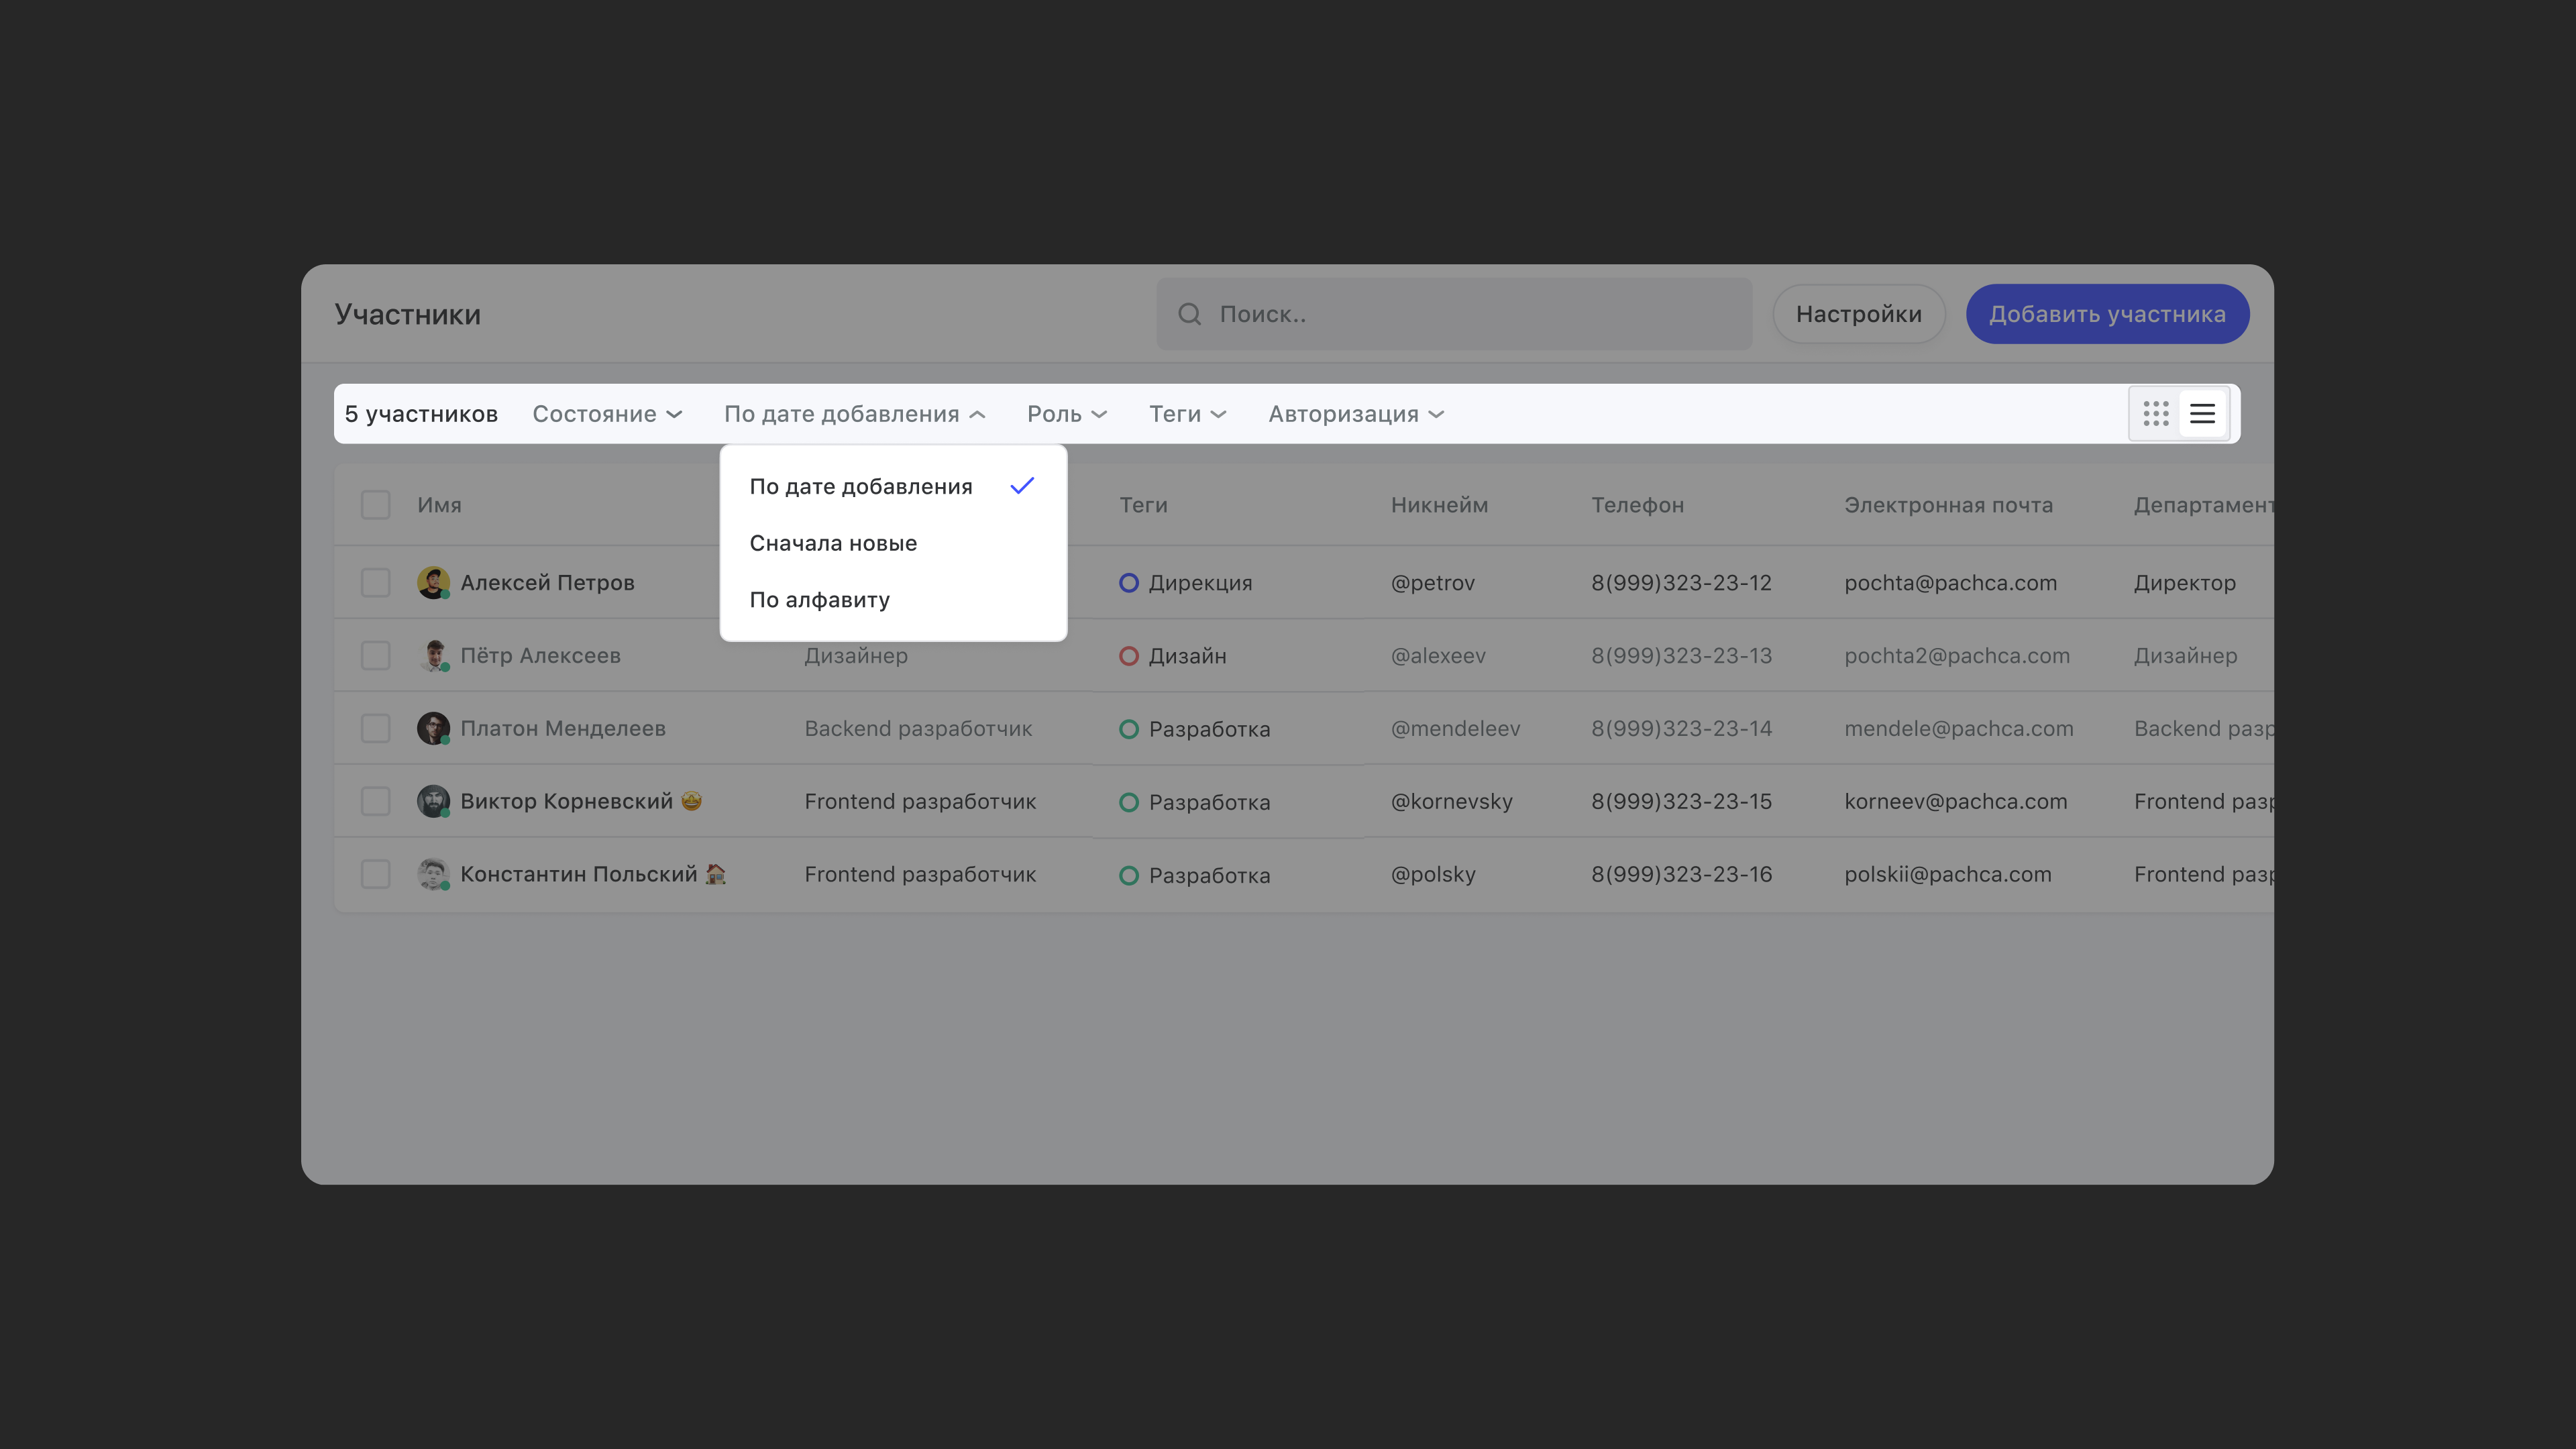
Filters make it easier to manage members and find colleagues. In the Members section, you can filter by individual criteria or combine them all.
You can filter by:
- Status. Handy for checking active or deactivated users.
- Authentication. See who uses two-factor authentication and who uses a regular login.
- Tags. Filter members by tag to see who belongs to which group.
- Role. Helps you find all multi-guests and group them under a separate tag.
- Date added. Makes it easier to manage new users, since they appear at the top.