Import chats from Telegram
If your team is moving to Pachca from Telegram, you can bring your chat history over to your team chat app.
If your team is moving to Pachca from Telegram, you can bring your chat history over to your team chat app. All you need to do is export your data from Telegram and map your users to Pachca accounts.
Before you start:
- The import is only available on paid plans.
- For now, only the workspace Owner can run an import. To start, go to Workspace settings
- The compressed file you upload can be up to 2 GB.
- You can only import chats (group chats). Importing channels isn't supported.
- When you import a chat with topics, only the content of the #general topic is uploaded. To bring over messages from other topics, export their history separately. Each topic becomes a separate chat in Pachca.
- You can run several imports in a row, for example, if you're moving data in batches or importing multiple chats.
- If something goes wrong during the import, you'll see an error message in the app.
Step 1. Export your history from Telegram Desktop
You can only export chats from Telegram Desktop, so download the app from the official Telegram Desktop website. The App Store version of the app doesn't support exports.
- Open Telegram Desktop.
- Go to the chat you want to move.
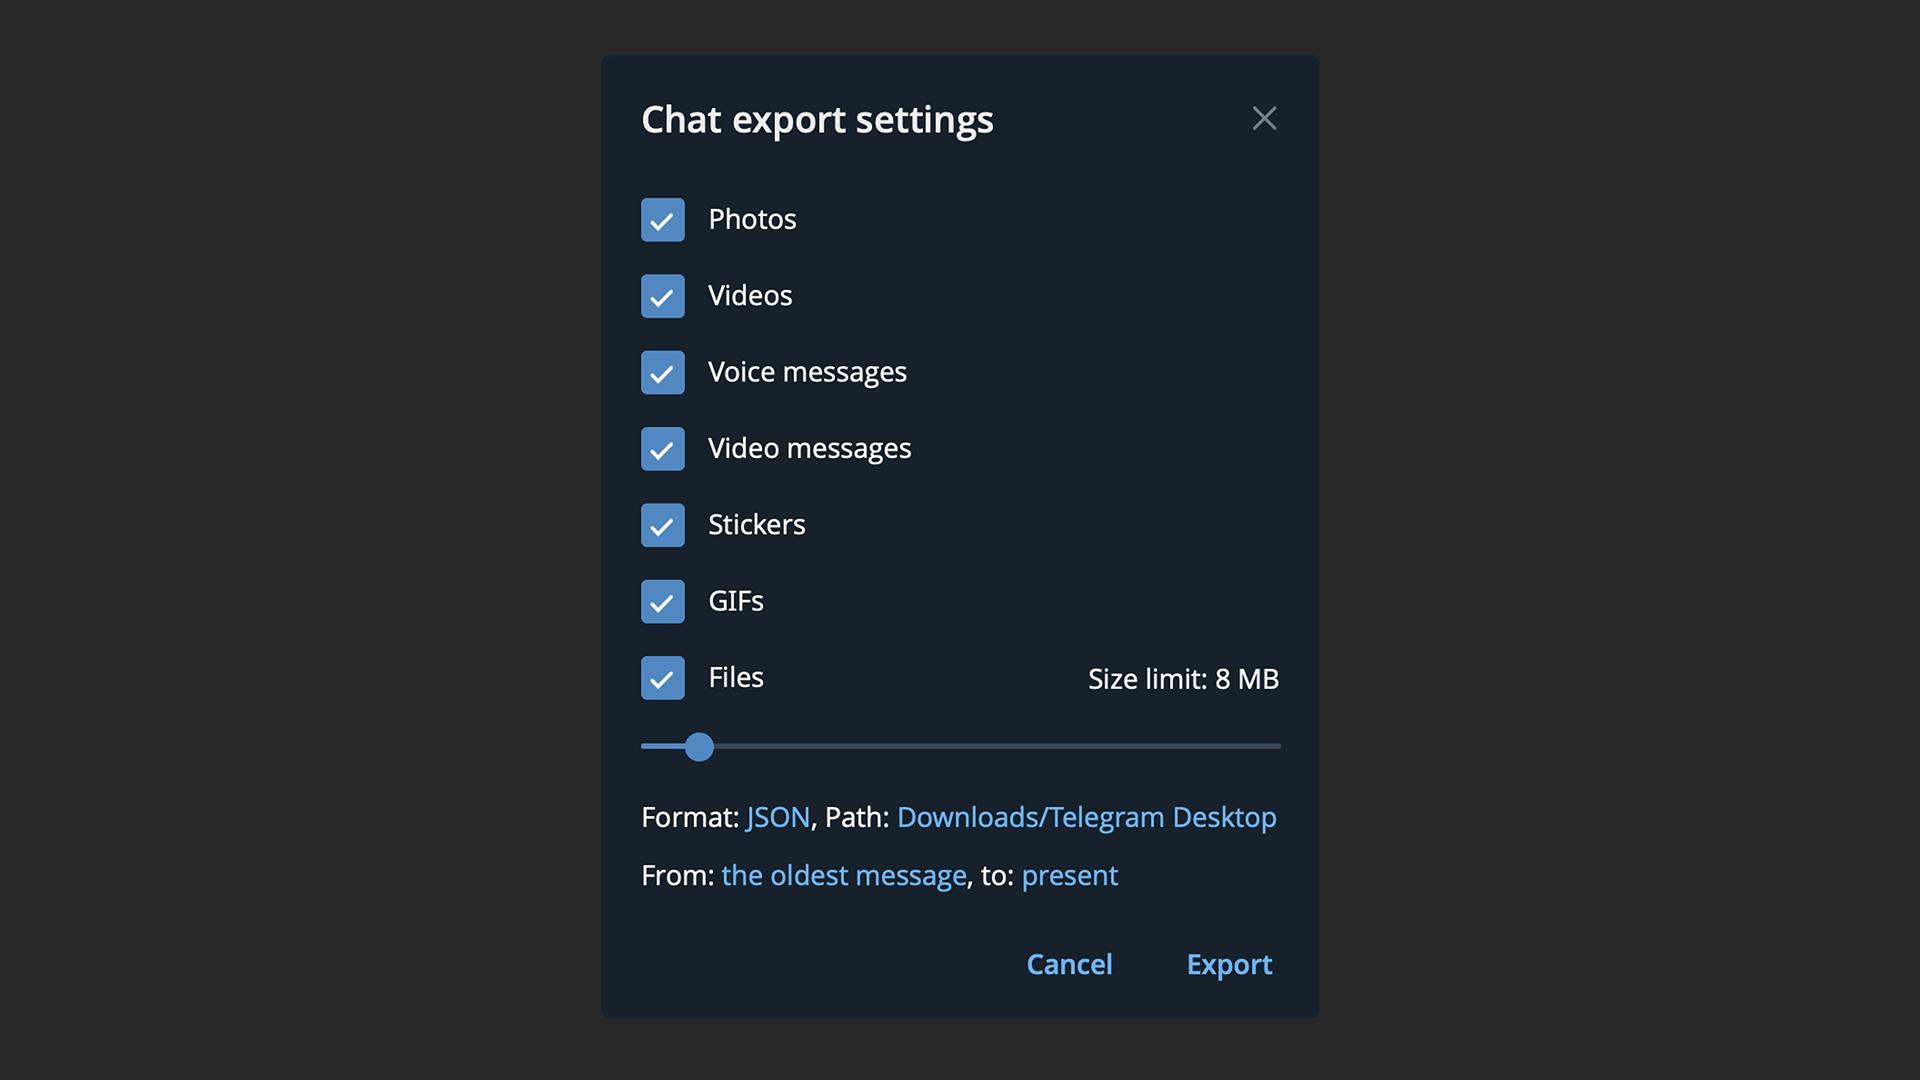
- Click the three dots in the top right corner → Export chat history.
- Select the JSON format, set the file size limit (up to 4 GB, which affects export speed) and click Export.
- Repeat for each chat whose history you want to move.
You'll get a chat export folder. Compress it into a .zip file.
Make sure the name hasn't changed. It should look like this: ChatExport_YYYY-MM-DD.zip
Step 2. Match users in the mapping tool
Telegram doesn't store users' email addresses, so you'll need to manually link Telegram accounts to Pachca accounts or to the emails you plan to add to Pachca. There's a dedicated mapping tool for this.
-
In Pachca, open Workspace settings. In the Telegram import section, click Start import and open the mapping tool. You can also open it using the link above.
-
On the Upload page, drag and drop your Telegram Desktop archives or click Choose files. You can upload several
.ziparchives at once. When the upload is done, click Next. -
On the Mapping page, the tool shows how many members it matched automatically:
- Matched: users found in your workspace by their Telegram usernames.
- New: Telegram users who aren't in Pachca.
- Skipped: members the tool couldn't match.
To match them, click Download .xlsx template, fill in an email for each skipped user and upload the file back using Upload completed file.
-
Click Next. The tool will generate a bundle file in
.zipformat. Don't rename it. -
Download the bundle to your computer.
⚠️ The bundle file is created entirely on your device. No data is uploaded to Pachca at this step!
Step 3. Upload the bundle to Pachca
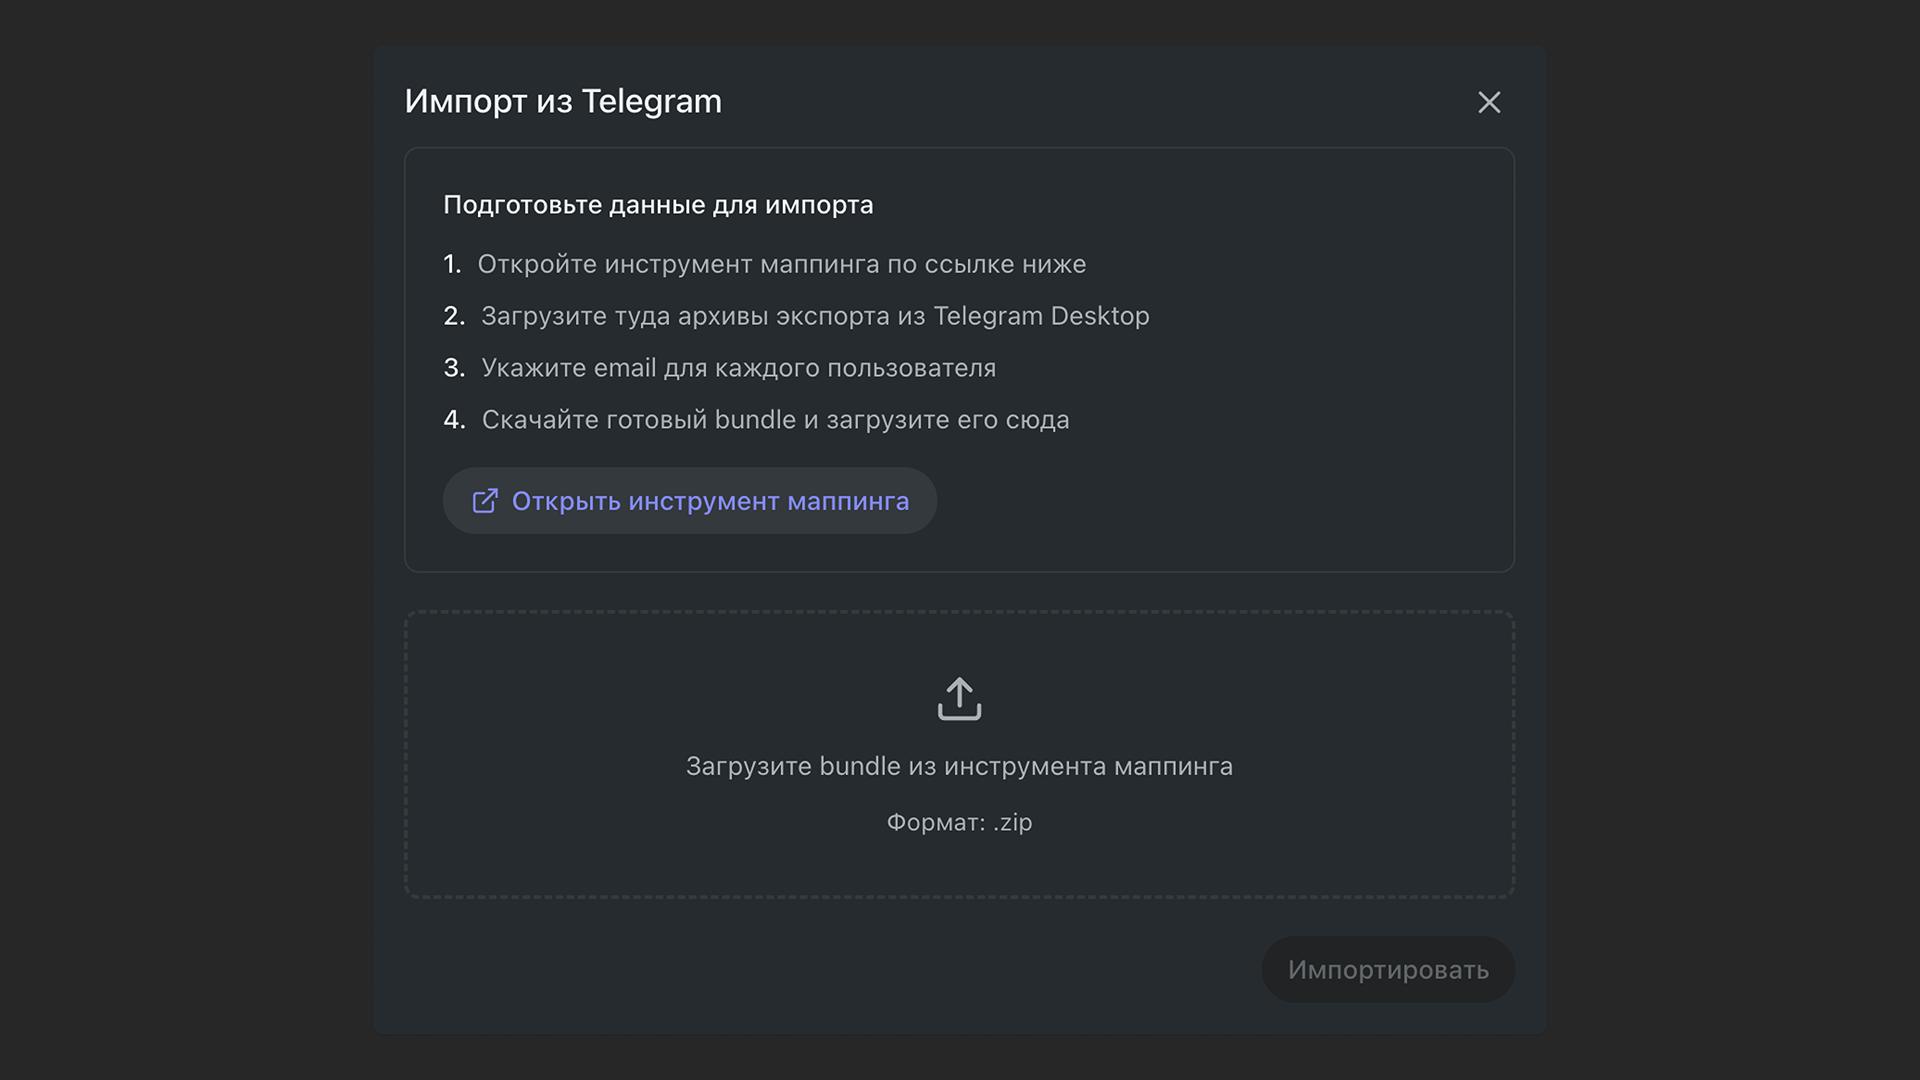
- Go back to the import window in Pachca.
- Drop the downloaded
.zipfile into the upload area. - Click Import.
Once the upload is complete, the message history will appear in the corresponding chats in your workspace.
FAQ
What happens to messages from skipped users?
If a member wasn't matched, their messages are still moved to Pachca. Instead of their real email, a placeholder email is used for that user.
What if my file is larger than 2 GB?
Split the history into parts when you export from Telegram: set a date range or select less data. Then import the parts one by one.
Need help?
If something went wrong or you have questions, contact our support team.